Chapter 5
Embroidery
- BEFORE EMBROIDERING ........ 126
- Embroidery Step by Step ........ 126
- Attaching Embroidery Foot “W” ........ 127
- Attaching the Embroidery Unit ........ 128
- About the Embroidery Unit ........ 128
- Removing the Embroidery Unit ........ 129
- SELECTING PATTERNS ........ 130
- Copyright Information ........ 130
- Pattern Selection Screens ........ 131
- Selecting Embroidery Patterns/Heirloom Patterns/Border Patterns/Cross stitch Patterns/Floral alphabet Patterns .. 132
- Selecting Alphabet Character Patterns ........ 133
- Selecting Frame Patterns ........ 134
- Selecting Patterns from Embroidery Cards ........ 135
- About Embroidery Cards (Sold Separately) ........ 135
- Selecting Patterns from USB media/Computer ........ 135
- VIEWING THE SEWING SCREEN ........ 136
- Key Functions ........ 137
- PREPARING THE FABRIC ........ 138
- Attaching Iron-on Stabilizers (backing) to the Fabric ........ 138
- Hooping the Fabric in the Embroidery Frame ........ 139
- Types of Embroidery Frames ........ 139
- Inserting the Fabric ........ 140
- Using the Embroidery Sheet ........ 141
- Embroidering Small Fabrics or Fabric Edges ........ 141
- Embroidering Small Fabrics ........ 141
- Embroidering Edges or Corners ........ 141
- Embroidering Ribbons or Tape ........ 142
- ATTACHING THE EMBROIDERY FRAME ........ 143
- Removing the Embroidery Frame ........ 143
- CONFIRMING THE PATTERN POSITION ........ 144
- Checking the Pattern Position ........ 144
- Previewing the Completed Pattern ........ 145
- SEWING AN EMBROIDERY PATTERN ........ 146
- Sewing Attractive Finishes ........ 146
- Embroidery Needle Plate Cover ........ 146
- Sewing Embroidery Patterns ........ 147
- When Threading Manually ........ 148
- Sewing Embroidery Patterns Which Use Appliqué ........ 148
- ADJUSTMENTS DURING THE EMBROIDERY PROCESS ........ 150
- If the Bobbin Runs Out of Thread ........ 150
- If the Thread Breaks During Sewing ........ 151
- Restarting from the Beginning ........ 152
- Resuming Embroidery After Turning Off the Power ........ 152
- MAKING EMBROIDERY ADJUSTMENTS ........ 154
- Adjusting Thread Tension ........ 154
- Correct Thread Tension ........ 154
- Upper Thread is Too Tight ........ 154
- Upper Thread is Too Loose ........ 154
- Using the Automatic Thread Cutting Function (END COLOR TRIM) ........ 155
- Using the Thread Trimming Function (JUMP STITCH TRIM) ........ 155
- Selecting the length of JUMP STITCH not to trim ........ 156
- Adjusting the Embroidery Speed ........ 156
- Changing the Thread Color Display ........ 157
- Changing the Embroidery Frame Display ........ 158
- REVISING THE PATTERN ........ 159
- Changing the Pattern Position ........ 159
- Aligning the Pattern and the Needle ........ 159
- Changing the Size ........ 160
- Rotating the Pattern ........ 161
- Creating a Horizontal Mirror Image ........ 162
- Changing the Density (Alphabet Character and Frame Patterns Only) ........ 162
- Changing the Colors of Alphabet Character Patterns ........ 163
- USING THE MEMORY FUNCTION ........ 164
- Embroidery Data Precautions ........ 164
- Types of Embroidery Data that can be Used ........ 164
- Types of USB Devices/Media that can be Used ........ 164
- Computers and Operating Systems with the Following Specifications can be Used ........ 164
- Precautions on Using the Computer to Create and Save Data ........ 165
- Tajima (.dst) Embroidery Data ........ 165
- Trademarks ........ 165
- Saving Embroidery Patterns in the Machine’s Memory ........ 166
- If the Memory is Full ........ 166
- Saving Embroidery Patterns to USB Media (Commercially Available) ........ 168
- Saving Embroidery Patterns in the Computer ........ 169
- Retrieving Patterns from the Machine’s Memory ........ 170
- Recalling from USB Media ........ 170
- Recalling from the Computer ........ 171
- EMBROIDERY APPLICATIONS ........ 173
- Using a Frame Pattern to Make an Appliqué (1) ........ 173
- Using a Frame Pattern to Make an Appliqué (2) ........ 174

BEFORE EMBROIDERING
Embroidery Step by Step
Follow the steps below to prepare the machine for embroidery.

| Step # | Aim | Action | Page |
|---|---|---|---|
| 1 | Presser foot attachment | Attach embroidery foot “W”. | 127 |
| 2 | Checking the needle | Use needle 75/11 for embroidery. * | 36 |
| 3 | Embroidery unit attachment | Attach the embroidery unit. | 128 |
| 4 | Bobbin thread setup | For the bobbin thread, wind embroidery bobbin thread and set it in place. | 19 |
| 5 | Fabric preparation | Attach a stabilizer material to the fabric, and hoop it in the embroidery frame. | 138 |
| 6 | Pattern selection | Turn the main power to ON, and select an embroidery pattern. | 130 |
| 7 | Embroidery frame attachment | Attach the embroidery frame to the embroidery unit. | 143 |
| 8 | Checking the layout | Check and adjust the size and position of the embroidery. | 144 |
| 9 | Embroidery thread setup | Set up embroidery thread according to the pattern. | 25 |
- It is recommended that a 90/14 needle should be used when embroidering on heavy weight fabrics or stabilizing products (for example; denim, puffy foam, etc.).
BEFORE EMBROIDERING
Attaching Embroidery Foot “W”
CAUTION
- When attaching a presser foot, always press [icon] on the screen. You may accidentally press the “Start/Stop” button and possibly cause injury.
- Be sure to use embroidery foot “W” when doing embroidery. Using another presser foot may cause the needle to strike the presser foot, causing the needle to bend or break and possibly cause injury.
-
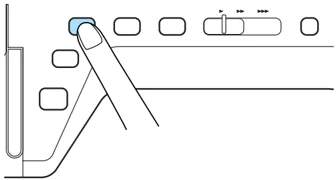
Press the “Needle Position” button to raise the needle.

-
Press [icon]. → The key appears as [icon].
-
Raise the presser foot lever.
-
Push the black button on the presser foot holder and remove the presser foot.
 ① Black button
② Presser foot holder
→ Remove the presser foot from the presser foot holder.
-
Use the included screwdriver to loosen the screw of the presser foot holder, then remove the presser foot holder.
 ① Screwdriver
② Presser foot holder
③ Presser foot holder screw
→ Remove the presser foot holder.
-
Lower the presser foot lever.
-
Position embroidery foot “W” on the presser foot bar so that the arm of embroidery foot “W” is in contact with the back of the needle holder.


 ① Black button
② Presser foot holder
→ Remove the presser foot from the presser foot holder.
 ① Screwdriver
② Presser foot holder
③ Presser foot holder screw
→ Remove the presser foot holder.

5 Embroidery
127


BEFORE EMBROIDERING
8 Use the included screwdriver to firmly tighten the screw of the presser foot holder.

CAUTION
- Use the included screwdriver to firmly tighten the screw of the presser foot holder. If the screw is loose, the needle may strike the presser foot and possibly cause injury.
9 Press [icon] to unlock all keys and buttons.
Attaching the Embroidery Unit
■ About the Embroidery Unit
CAUTION
- Do not move the machine with the embroidery unit attached. The embroidery unit could fall off and cause injury.
- Keep your hands and foreign objects away from the embroidery carriage and frame when the machine is embroidering. Otherwise, injury may result.
- If the embroidery unit could not be initialized correctly, a buzzer will sound. If this happens, go through the initialization process again. This is not a malfunction.
Note
- You can sew utility stitches even while the embroidery unit is attached.
- Be sure to turn off the power before installing the embroidery unit. Otherwise, the machine may be damaged.
- Do not touch the inner connector of the embroidery unit. The pins on the embroidery unit connection may be damaged.
- Do not apply strong force to the embroidery unit carriage or pick up the unit by the carriage. Otherwise, the embroidery unit may be damaged.
- Store the embroidery unit in the proper storage case.
1 Turn the main power to OFF, and remove the flat bed attachment.

2 Open the cover of the connection port.

Memo Be sure to replace the cover when the embroidery unit is not installed.
3 Insert the embroidery unit connection into the machine connection port. Push lightly until the unit clicks into place.

① Embroidery unit connection ② Machine connection port ③ Feed dog position switch
Note
- Be sure there is no gap between the embroidery unit and the sewing machine. If there is a gap, the embroidery patterns will not embroider with the correct registration.
- Do not push on the carriage when installing the embroidery unit onto the machine. Moving the carriage may damage the embroidery unit.
- Be sure to set the feed dog position switch to right to lower the feed dogs.
128
BEFORE EMBROIDERING
4 Turn the main power to ON. → The following message will appear.
5 Press OK.

→ The carriage will move to the initialization position.

Note
- A confirmation message to lower the frame-securing lever after the carriage moves to its initial position.

The message will disappear after 15 seconds or press OK to move to the next step.
■ Removing the Embroidery Unit
1 Press either Embroidery or Embroidery Edit, then press [icon]. → The carriage will move to the removal position.
CAUTION
- Always remove the embroidery frame before pressing [icon]. Otherwise, the frame may strike the embroidery foot, and possibly cause injury.
- The embroidery unit will not fit in the storage case if this step is not done.
2 Turn the main power to OFF.
Note
- Be sure to turn the main power to OFF. Otherwise, the machine may be damaged.
3 Hold down the release button, and pull the embroidery unit away from the machine.
① Release button
CAUTION
Do not carry the embroidery unit by holding the release button compartment.
5 Embroidery
129


SELECTING PATTERNS
■ Copyright Information
The patterns stored in the sewing machine and embroidery cards are intended for private use only. Any public or commercial use of copyrighted patterns is an infringement of copyright law and is strictly prohibited.
There are many character and decorative embroidery patterns stored in the machine’s memory (see the “QUICK REFERENCE GUIDE” for a full summary of patterns in the machine’s memory). You can also use patterns from the embroidery cards (sold separately).
Once the machine has finished the initialization and the carriage has moved to the start position, the pattern type selection screen will display.
If another screen is displayed, press Embroidery to display the screen below.

① Embroidery patterns ② Heirloom patterns ③ Border patterns ④ Cross stitch patterns ⑤ Floral alphabet patterns ⑥ Alphabet character patterns ⑦ Frame patterns ⑧ Patterns from an embroidery card (sold separately) ⑨ Patterns saved in the machine’s memory (see page 170) ⑩ Patterns saved in USB media (see page 170) ⑪ Patterns saved on the computer (see page 171)
SELECTING PATTERNS
■ Pattern Selection Screens
There are 7 categories of patterns in this machine. P. 1 P. 3 indicates that there is more than one pattern selection screen for that category.
Embroidery patterns
 Heirloom patterns
 Border patterns

Cross stitch patterns
 Floral alphabet patterns
 Alphabet characters

Frame patterns

5 Embroidery
131


SELECTING PATTERNS
Selecting Embroidery Patterns/Heirloom Patterns/Border Patterns/Cross stitch Patterns/Floral alphabet Patterns
- Select the category of the pattern you want to embroider.
- Press the key of the pattern you want to embroider.
- Press [icon: down-right arrow] to view the next page.
- Press [icon: up-left arrow] to view the previous page.

→ The selected pattern is displayed.
- Press [icon: mirror image] to create a mirror image of the pattern as needed.
- If you make a mistake selecting the pattern, press the key of the pattern you want to embroider.

- Press [icon: SEWING]. → The sewing screen is displayed.
- Proceed to see “VIEWING THE SEWING SCREEN” on page 136 to embroider the pattern.
- To return to the previous screen to select another pattern, press [icon: RETURN].


SELECTING PATTERNS
Selecting Alphabet Character Patterns
1 Press [AA].
2 Press the key of the font you want to embroider.

3 Press [ABC] [abc] [0-9?!] [ÅÅä] to change the selection screen, and then enter the characters that you want to embroider.
- If you want to change the size of a character, select the character and then press [L M S] to change the size. The size changes each time you press the key, from large to medium to small.
- If you make a mistake, press [DELETE] to erase the mistake.
- If the pattern is too small to see clearly, you can use the [CHECK] key to check it.

Memo
If you continue adding characters after changing the size, the new characters will be entered in the new size.
You cannot change the size of the entered characters after combining character stitch patterns.
5 Embroidery
133


SELECTING PATTERNS
4 Press [SEWING button icon].

→ The sewing screen is displayed.
5 Proceed to see “VIEWING THE SEWING SCREEN” on page 136 to embroider the pattern.
- To return to the previous screen to select another pattern, press [RETURN button icon].

Selecting Frame Patterns
1 Press [Frame/Heart icon].
2 Press the key of the frame shape you want to embroider in the top part of the screen.

① Frame shapes ② Frame patterns → Various frame patterns are displayed at the bottom part of the screen.
3 Press the key of the frame pattern you want to embroider.
- If you make a mistake selecting the pattern, press the key of the pattern you want to embroider. → The selected pattern is displayed on the screen.
4 Press [SEWING button icon].

→ The sewing screen is displayed.
134

SELECTING PATTERNS
5 Proceed to see “VIEWING THE SEWING SCREEN” on page 136 to embroider the pattern.
- To return to the previous screen to select another pattern, press RETURN .

Selecting Patterns from Embroidery Cards
■ About Embroidery Cards (Sold Separately)
- Use only embroidery cards manufactured for this machine. Using unauthorized cards may cause your machine to operate incorrectly.
- Embroidery cards sold in foreign countries cannot be used with this machine.
- Store embroidery cards in the hard case.
Note
- Only insert or remove the embroidery card when is displayed, or when the machine is turned off.
- Do not insert the card in a direction other than that shown by the arrow on the card, and do not force the card into the slot strongly. Do not put any object except for the embroidery cards into the slot. Otherwise, your machine may be damaged.
1 Insert the card completely into the slot on the right side of the machine.
- Insert the embroidery card so that the end with a printed arrow is facing the front.

2 Press .

→ The patterns on the embroidery card are displayed on the selection screen.
3 Follow the steps on page 132 to select a pattern.
Selecting Patterns from USB media/Computer
To recall patterns from the computer or USB media, see pages 170 through 172.
5 Embroidery
135
VIEWING THE SEWING SCREEN

① Shows the presser foot code. Attach embroidery foot “W” for all embroidery projects. When the foot presser symbol is displayed on the screen, you are able to sew.
② Shows the boundary for embroidering with the extra large frame (30 cm × 18 cm (approx. 12 inches × 7 inches)).
③ Shows a preview of the selected pattern.
④ Shows the size of the selected pattern.
⑤ Shows how far the sewing position is from the center (when you move the sewing position).
⑥ Shows how many stitches are in the selected pattern and how many stitches have been sewn so far.
⑦ Shows the time necessary to sew the pattern, and the time already spent sewing the pattern (not including time for changing and automatically trimming the thread).
⑧ Shows the number of colors in the selected pattern, and the number of the color currently being sewn.
⑨ Shows the part of the embroidery that will be sewn with the first thread color.
⑩ Shows the order the colors are sewn in.
⑪ Shows the embroidery frames that can be used for the selected pattern. Be sure to use the proper frame (see page 139).
⑫ Shows the degree of rotation of the pattern.
- There is an explanation of each key’s function on the next page.
Key Functions
Using these keys, you can change the size of the pattern, rotate the pattern, etc.

| No. | Display | Key Name | Explanation | Page |
|---|---|---|---|---|
| ⑬ | Image key | Press this key for a preview of the sewn image. | 145 | |
| ⑭ | Arrow keys ( Center key) | Press an arrow key to move the pattern in the direction shown by the arrow. (Press the Center key to return the pattern to the center of the embroidery area.) | 159 | |
| ⑮ | Rotate key | Press this key to rotate the pattern. You can rotate a pattern one degree, 10 degrees or 90 degrees at a time. | 161 | |
| ⑯ | Size key | Press this key to change the size of the pattern. | 160 | |
| ⑰ | Density key | Press this key to change the density of alphabet character or frame patterns. | 162 | |
| ⑱ | Horizontal mirror image key | Press this key to create a horizontal mirror image of the pattern. | 162 | |
| ⑲ | Multi color key | Press this key to change the color of each letter when sewing alphabet character patterns. | 163 | |
| ⑳ | Memory key | Saves a pattern in the machine's memory, USB media or a computer. | 166-169 | |
| ㉑ | Return key | Press this key to return to the pattern type selection screen. | — | |
| ㉒ | Cut/Tension key | Press this key to specify automatic thread cutting, thread trimming or the thread tension. For embroidery, these functions are set automatically. | 154-155 | |
| ㉓ | Forward/Back key | Press this key to move the needle forward or back in the pattern; useful if the thread breaks while sewing or if you want to start again from the beginning. | 151-153 | |
| ㉔ | Starting point key | Press this key to move the needle start position to align the needle with the pattern position. | 159 | |
| ㉕ | Trial key | Press this key to check the position of the pattern. The embroidery frame moves to the desired position so you can check that there is enough space to sew the pattern. | 144 |
Note
- Some operations or functions are not available for certain patterns. If the key display is light gray, you cannot use that function or operation with the selected pattern.

PREPARING THE FABRIC
PREPARING THE FABRIC
CAUTION
- Use fabrics with a thickness of less than 3 mm (approx. 1/8 inch). Using fabrics thicker than 3 mm (approx. 1/8 inch) may cause the needle to break.
- When using layers with thicker batting etc., you can sew more attractive embroidery by adjusting the embroidery presser foot height in the embroidery settings screen (see below).
- In the case of thick terry cloth towels we recommend that you place a piece of water soluble stabilizer on the top surface of the towel. This will help to reduce the nap of the toweling and result in more attractive embroidery.
Note Press [icon], and use [-] and [+] in the EMBROIDERY FOOT HEIGHT display in the embroidery settings screen to adjust the presser foot height.
Attaching Iron-on Stabilizers (backing) to the Fabric
For best results in your embroidery projects, always use stabilizer material for embroidery. Follow the package instructions for the stabilizer being used.
When using fabrics that cannot be ironed (such as towel or fabrics that have loops which expand when ironed) or in places where ironing is difficult, position the stabilizer material under the fabric without fusing it, then position the fabric and stabilizer in the embroidery frame, or check with your authorized dealer for the correct stabilizer to use.
CAUTION
- Always use a stabilizer material for embroidery when sewing stretch fabrics, lightweight fabrics, fabrics with a coarse weave, or fabrics which cause pattern shrinkage. Otherwise, the needle may break and cause injury. Not using a stabilizer material may result in a poor finish to your project.
- Use a piece of stabilizer which is larger than the embroidery frame being used.

① Size of the embroidery frame
② Iron-on stabilizer (backing)
- Iron the iron-on stabilizer material to the wrong side of the fabric.

① Fusible side of stabilizer
② Fabric (wrong side)
Memo
- When embroidering on thin fabrics such as organdy or lawn, or on napped fabrics such as towel or corduroy, use water soluble stabilizer (sold separately) for best results. The water soluble stabilizer material will dissolve completely in water, giving the project a more attractive finish.
138


Hooping the Fabric in the Embroidery Frame
Types of Embroidery Frames
| Extra Large | Large | Medium | Small |
|---|---|---|---|
| Can embroider an area 30 cm × 18 cm (approx. 12 inches × 7 inches) | Can embroider an area 18 cm × 13 cm (approx. 7 inches × 5 inches) | Can embroider an area 10 cm × 10 cm (approx. 4 inches × 4 inches) | Can embroider an area 2 cm × 6 cm (approx. 1 inch × 2-1/2 inches) |
| Use when embroidering connected or combined characters or patterns, or when embroidering large patterns. | Use when embroidering patterns between 10 cm × 10 cm (approx. 4 inches × 4 inches) and 18 cm × 13 cm (approx. 7 inches × 5 inches). | Use when embroidering patterns under 10 cm x 10 cm (approx. 4 inches × 4 inches). | Use for embroidering names or very small patterns. |
Embroidery Frame 26 cm × 16 cm (approx. 10-1/4 inches × 6-1/4 inches) can be used.
Select a frame that matches the pattern size. Frame options are displayed on the LCD.

① Can be used
② Cannot be used
CAUTION
- If you use a frame that is too small, the presser foot may strike the frame during sewing and cause injury.


PREPARING THE FABRIC
■ Inserting the Fabric
Note
- If the fabric is placed loose in the embroidery frame, the embroidery design will sew out poorly. Insert the fabric on a level surface, and gently stretch the fabric taut in the frame. Follow the steps below to insert the fabric correctly.
- Lift-up and loosen the frame adjustment screw and remove the inner frame.

① Frame adjustment screw
② Inner frame
-
Lay the fabric right side up on top of the outer frame.
Re-insert the inner frame making sure to align the inner frame’s \triangle with the outer frame’s \nabla.

① Inner frame
② Outer frame
③ Frame adjustment screw
- Slightly tighten the frame adjustment screw, and then remove the slack in the fabric by pulling on the edges and corners. Do not loosen the screw.

**Memo**
When using the extra large frame, tighten the adjustment screws at the top and bottom of the frame, so that the spaces at the top and bottom of the frame are equal.

-
Gently stretch the fabric taut, and tighten the frame adjustment screw to keep the fabric from loosening after stretching.
- After stretching the fabric, make sure the fabric is taut.

* Make sure the inside and outside frames are even before you start embroidering.

① Outer frame
② Inner frame
③ Fabric

**Memo**
Stretch the fabric from all four corners and all four edges. While stretching the fabric, tighten the frame adjustment screw.


PREPARING THE FABRIC
5 Return the frame adjustment screw to its initial position.

■ Using the Embroidery Sheet When you want to embroider the pattern in a particular place, use the embroidery sheet with the frame.
1 With a chalk pen, mark the area of the fabric you want to embroider.

① Embroidery pattern ② Mark
2 Place the embroidery sheet on the inner frame. Align the guide lines on the embroidery sheet with the mark you made on the fabric.

① Inner frame ② Guide line
3 Gently stretch the fabric so there are no folds or wrinkles, and press the inner frame into the outer frame.

① Inner frame ② Outer frame
4 Remove the embroidery sheet.

Embroidering Small Fabrics or Fabric Edges
Use an embroidery stabilizer to provide extra support. After embroidering, remove the stabilizer carefully. Attach the stabilizer as shown in the examples below. We recommend using a stabilizer for embroidery.
■ Embroidering Small Fabrics Use a temporary spray adhesive to adhere the small piece of fabric to the larger piece in the frame. If you do not wish to use a temporary spray adhesive, attach the stabilizer with a basting stitch.

① Fabric Stabilizer
■ Embroidering Edges or Corners Use a temporary spray adhesive to adhere the small piece of fabric to the larger piece in the frame. If you do not wish to use a temporary spray adhesive, attach the stabilizer with a basting stitch.

① Fabric Stabilizer
5 Embroidery
141
PREPARING THE FABRIC
■ Embroidering Ribbons or Tape Secure with double-sided tape or a temporary spray adhesive.

① Ribbon ② Stabilizer
142
ATTACHING THE EMBROIDERY FRAME
ATTACHING THE EMBROIDERY FRAME
Note Wind and insert the bobbin before attaching the embroidery frame.
1 Press the “Presser Foot Lifter” button to raise the presser foot.

2 Align the embroidery frame guide with the right edge of the embroidery frame holder.

① Embroidery frame holder ② Embroidery frame guide
3 Slide the embroidery frame into the holder, making sure to align the embroidery frame’s △ with the holder’s ▽.

① Arrow mark
4 Lower the frame-securing lever to be level with the frame to secure the embroidery frame in the embroidery frame holder.

① Frame-securing lever
CAUTION
- If the frame-securing lever is not lowered, the embroidery pattern may not sew out correctly or the presser foot may strike the embroidery frame and cause injury.
■ Removing the Embroidery Frame
1 Raise the frame-securing lever.

2 Pull the embroidery frame toward you.

5 Embroidery
143
CONFIRMING THE PATTERN POSITION
CONFIRMING THE PATTERN POSITION
The pattern is normally positioned in the center of the embroidery frame. You can check the layout before starting embroidery and change the position.
Checking the Pattern Position
The embroidery frame moves and shows the pattern position. Watch the frame closely to make sure the pattern will be sewn in the right place.
1 Press [icon].

→ The following screen is displayed.
2 From [icon], press the key for the position that you want to check.

① Selected position → The needle will move to the selected position on the pattern.
Memo To see the entire embroidering area, press [icon]. The embroidery frame moves and shows the embroidery area.

CAUTION
- Make sure the needle is up when the embroidery frame is moving. If the needle is down, it could break and result in injury.
144


Previewing the Completed Pattern
1 Press .

→ An image of the pattern as it will be embroidered appears.
2 Press to select the frame used in the preview.
- Frames displayed in light gray cannot be selected.
- Press to see a full screen preview.
- The pattern can be sewn as it appears in the following display.

→ You can begin sewing from this screen by pressing the “Start/Stop” button.
CONFIRMING THE PATTERN POSITION
3 Press RETURN to return to the original screen.
5 Embroidery
145

SEWING AN EMBROIDERY PATTERN
Sewing Attractive Finishes
There are many factors that go into sewing beautiful embroidery. Using the appropriate stabilizer (see page 138) and hooping the fabric in the frame (see page 139) are two important factors mentioned earlier. Another important point is the appropriateness of the needle and thread being used. See the explanation of threads below.
| Thread | Upper thread | Use embroidery thread, or country embroidery thread intended for use with this machine. Other embroidery threads may not yield optimum results. |
|---|---|---|
| Bobbin thread | Use embroidery bobbin thread intended for use with this machine. When using other kinds of embroidery bobbin thread, use the bobbin case (pink screw) included with this machine (The bobbin case originally installed in the machine has a green screw). (See page 210 for how to remove the bobbin case.) |
Memo
If you use threads other than those listed above, the embroidery may not sew out correctly.
Note
- Before embroidering, check that there is enough thread in the bobbin. If you continue sewing without enough thread in the bobbin, the thread may tangle.
- Do not leave objects in the range of motion of the embroidery frame. The frame may strike the object and cause a poor finish to the embroidery pattern.
- When embroidering on large garments (especially jackets or other heavy fabrics), do not let the fabric hang over the table. Otherwise, the embroidery unit cannot move freely, and the pattern may not turn out as planned.
Embroidery Needle Plate Cover
Under some conditions, based on the type of fabric, stabilizer, or thread being used, there may be some looping in the upper thread. In this case, attach the included embroidery needle plate cover to the needle plate. Attach the cover by inserting the two projections on the underside of the cover into the notches on the needle plate as shown below.

① Groove
② Projection
③ Notch
To remove the embroidery needle plate cover, place your fingernail in the groove and lift the plate out.
CAUTION
- Push the embroidery needle plate cover as far as possible to attach it. If the embroidery needle plate cover is not securely attached, it may cause the needle to break.
Note
- Do not use the embroidery needle plate cover for any applications other than embroidery.


Sewing Embroidery Patterns
Example:

① Embroidery color order ② Cursor
Memo The [+] cursor moves over the pattern, showing which part of the pattern is being sewn.
- Thread the machine with the first color (see “Threading Using the “Automatic Threading” Button” on page 25).

- Press the “Presser Foot Lifter” button to lower the presser foot, and press the “Start/Stop” button to start embroidering. → When the first color is completely sewn, the machine will automatically trim the threads and stop. The presser foot will then automatically be raised. On the embroidery color order display, the next color will move to the top.
Memo If there is thread left over from the beginning of sewing, it may be sewn over as you continue embroidering the pattern, making it very difficult to deal with the thread after the pattern is finished. Trim the threads at the beginning.
-
Remove the thread for the first color from the machine. Thread the machine with the next color.
-
Repeat the same steps for embroidering the remaining colors.

→ When the last color is sewn, “Finish sewing” will appear on the display. Press (CLOSE), and the display will return to the original screen.
Memo The Thread Trimming Function is originally set to trim excess thread jumps (threads linking parts of the pattern, etc.). When an end of upper thread may remain on the surface of the fabric at the beginning of the stitching, depending on the type of thread and fabric that are used. After embroidering is finished, cut off this excess thread. *If the setting has been turned off, trim the excess thread jumps using scissors after the pattern is finished. See page 155 for information on the thread trimming function.
5 Embroidery
147


SEWING AN EMBROIDERY PATTERN
■ When Threading Manually
1 Thread the machine manually with the first color (see “Threading Manually” on page 27).

2 Lower the presser foot, then press the “Start/Stop” button to start embroidering. After 5-6 stitches, press the “Start/Stop” button again to stop the machine.
3 Trim the excess thread at the end of the seam. If the end of the seam is under the presser foot, raise the presser foot, then trim the excess thread.

Memo If there is thread left over from the beginning of sewing, it may be sewn over as you continue embroidering the pattern, making it very difficult to deal with the thread after the pattern is finished. Trim the threads at the beginning.
4 Press the “Start/Stop” button again to restart the machine.
5 Repeat steps 3 and 4 from the previous section.
Sewing Embroidery Patterns Which Use Appliqué
There are some patterns which call for an appliqué inside the pattern.
When sewing an embroidery pattern with an appliqué, the color sewing order display shows “Appliqué Material”, “Appliqué Position”, “Appliqué”, and then the sewing order of the colors around the appliqué.
Memo Depending on the thread color display setting, the display may show [icon], [icon], or [icon].
1 Attach an iron-on stabilizer to the wrong side of the appliqué material.

① Appliqué material (cotton, felt, etc.) ② Iron-on stabilizer
2 Place the appliqué material into the embroidery frame, and then press the “Start/Stop” button to sew the outline of the appliqué.

① Outline of appliqué ② Appliqué material
Memo The embroidery procedure is the same as the basic procedure explained on pages 147 through 148.
→ The machine will sew around the outline of the appliqué pieces and will then stop.
148


SEWING AN EMBROIDERY PATTERN
3 Remove the appliqué material from the embroidery frame, and then cut carefully along the stitching. After cutting, remove all of the stitching thread carefully.
- Carefully cut out the pattern on the outline you just sewed. Do not cut inside the stitching line, as the appliqué fabric will not be caught by the appliqué stitch.

4 Place the base material into the embroidery frame.

① Base material
5 Press the “Start/Stop” button to sew the position of the appliqué.
- Use the same thread color you plan to use when attaching the appliqué in step 7.

① Position of appliqué ② Base material
→ The machine will sew around the position of the appliqué and will then stop.
6 Apply a thin layer of adhesive or spray adhesive to the back of the appliqué piece and attach it to the appliqué position so that it follows the seam of the outline.

Memo If the appliqué material is a lightweight fabric, you may want to use a fusible web on the back to stabilize the fabric and for appliqué placement. Fuse appliqué in place with an iron. Do not remove fabric from the frame to iron the appliqué material.
7 Press the “Start/Stop” button.

Memo Some patterns may not show all three appliqué steps. Sometimes the “Appliqué” step will be shown as a color.
→ The appliqué will then be completed.
8 Change the upper thread and then carry out the rest of the embroidering.

Memo
- Some glue may get onto the presser foot, needle, and needle plate at this time. Finish embroidering the appliqué pattern and then clean away the glue.
- For best sewing results clip all threads between color steps.
149


ADJUSTMENTS DURING THE EMBROIDERY PROCESS
ADJUSTMENTS DURING THE EMBROIDERY PROCESS
Note
- Be careful not to bump the embroidery unit carriage or the presser foot when removing or attaching the embroidery frame. Otherwise, the pattern will not embroider correctly.
If the Bobbin Runs Out of Thread
When the bobbin begins to run out of thread during embroidering, the machine will stop and the message below will appear. Press [icon] and follow the directions below to rethread the lower threading. If very little sewing remains, you can thread 10 final stitches without rethreading the machine by pressing CLOSE. The machine will stop after sewing the 10 stitches.

The bobbin thread is almost empty.
CLOSE [icon]
- Press OK.

The carriage of the embroidery unit will move. Keep your hands etc. away from the carriage.
OK
→ The carriage will move and the thread will be automatically cut.
-
Unlock the frame-securing lever and remove the embroidery frame.
- Be careful not to apply strong force to the fabric at this time. Otherwise, the fabric may loosen in the frame.

- Insert a wound bobbin into the machine, then reattach the embroidery frame.

- Press OK.

OK to move the embroidery carriage to its original position?
OK
→ The carriage will return to its original position.
- To return to the spot in the pattern where you stopped sewing, follow steps 3 through 6 in the next section.
150

If the Thread Breaks During Sewing
- Press the “Start/Stop” button to stop the machine.
- If the upper thread is broken, redo the upper threading. If the bobbin thread is broken, press [icon] and follow the directions in steps 1 through 4 from the previous section to reset the bobbin.
- Press [icon].

- Press [icon], [icon], or [icon] to move the needle back the correct number of stitches before the spot where the thread broke.
- If you cannot move back to the spot where the thread broke, press [icon] to select the color and move to the beginning position of that color, then use [icon], [icon], or [icon] to move ahead to slightly before where the thread broke.

- Press [icon] to return to the original screen.
- Press the “Presser Foot Lifter” button to lower the presser foot, and press the “Start/ Stop” button to continue sewing.

