When You Have a Question, This May Help You
TECHNICAL TERMS:
■ USB This is one of the communication methods between PC (Personal Computer) and peripherals. You can connect your machine to your PC via included USB cable. (Refer to page 111)
■ CompactFlash card This is one of the memory media to save data for PC or digital camera. The memory capacity of the CompactFlash card is from 32MB to 128MB (or more). Compare to the floppy disk, you can store many more stitches. On this machine, you can use 32Mb, 64Mb or 128Mb CompactFlash card. (Refer to page 114)
■ DST This is the extension of Tajima data file (*.dst) that is one of the data formats of embroidery patterns. Tajima data doesn't have any color information, so the machine assigns colors automatically when you load it. (Refer to page 163)
■ Needle number The needles are numbered from right to left. The far right needle is number 1 needle. (Refer to page ix)
■ Needle at the “embroidering position” This is the needle that is placed above the needle hole in the needle plate. The needle bar case is moved to position that particular needle with the next thread color to the “embroidery position”. Also when using the needle threader, the needle that is going to be threaded should be moved to the “embroidery position”. (Refer to page 40)

① Needle ② Needle hole in the needle plate
■ Wiper This is the mechanism for pulling the thread. The wiper pulls the thread when the needle threader is used. Also wiper pulls the thread from the material, when the machine trims the thread. This makes trimming threads after embroidering unnecessary. (Refer to page 39)
When You Have a Question, This May Help You 57
EMBROIDERING TUTORIAL
PATTERNS:
Following patterns can be used to embroider by the machine.
- Embroidery data with *.pes, *.phc or *.dst format. Either CompactFlash card or floppy disk transfers the data to the machine. Also via USB cable, the data can be transferred from the PC to the machine.
- Optional embroidery cards
- Embroidery patterns created by PE-Design
- The patterns saved on the floppy disk by the machine
EMBROIDERING:
Want to set the own embroidery colors instead of the preset colors
- Use the “Change thread color” function by selecting the key on either the “pattern editing” or the “embroidery setting” screen. More details please see the page 128.
- Use the “Temporary needle bar setting” function by selecting the key on the “embroidering” screen. More details please see the page 92.
Want to stop embroidering in the middle of pattern and turn off the power. Then want to resume the embroidery later
- The machine remembers the pattern and the position even after turning off the power. And the machine can resume the embroidery when the machine turns on again. (Refer to page 60)
Getting false thread breakage error
- Check that the position of upper thread is in pretension plates. (Refer to page 36)
- Check that the position of upper thread is around the tension disk pulley. (Refer to page 37)
 ① Pretension plates
② Tension disk pulley
Thread tension changed suddenly
- Thread is caught on a rough edge of the spool of upper thread.
- Upper thread is caught under the spool of thread.
- The thread dust or lint is not gathered under the bobbin’s tension spring.
The frame came out from the carriage Make sure that the positioning pins are placed into the frame’s positioning slot and hole. (Refer to page 31) It is a good idea to turn off the machine once to originate the carriage before you re-sew the pattern.
Want to reset the sewing and start from the scratch Select the “New Embroidery” key on the upper left of the screen. The pattern and all information will be deleted. (Refer to page 48)
58
3 OTHER BASIC PROCEDURES
This chapter provides explanations on operations other than those described in chapter 2, such as sewing a pattern with seven or more colors, changing the needles and changing thread spools.
- Resume the Operation Being Performed Before the Machine Was Turned Off ........ 60
- Changing the Needle ........ 61 Replacing the needle / 61
- Correctly Using the Embroidery Frames ........ 63 Embroidery frame types and applications / 63
- Attaching Iron-On Stabilizer (Backing) to Fabric ........ 64 Ho
OTHER BASIC PROCEDURES
Resume the Operation Being Performed Before the Machine Was Turned Off
The screen that appears after the machine is turned on and OK is touched differs depending on how the machine was previously turned off. If the machine was turned off while an operation was being performed, you can choose to continue the operation being performed before the machine was turned off.
-
Turn on the embroidery machine.

-
When the screen shown below appears after the opening screen, touch OK.
- A message appears, asking if you wish to continue the previous operation or begin a new one.
- If the machine was turned off while an operation was not being performed, the pattern type selection screen appears.
■ To continue the operation being performed before the machine was turned off
-
Touch OK.

- Depending on the screen that was displayed before the machine was turned off, the pattern editing screen, the embroidering settings screen or the embroidering screen appears.
■ To select a pattern and start a new operation
-
Touch CANCEL.

- The pattern type selection screen appears.


Memo
- If SET is not touched to confirm the selection of the pattern in the pattern list screen, the operation cannot be continued.
- The screen that appears when an operation is continued differs depending on the screen that was displayed when the machine was turned off. If the operation in the pattern editing screen is finished: That pattern editing screen appears. If the machine was turned off after a pattern is selected and while the pattern type selection screen or the pattern list screen is displayed: The pattern editing screen for the selected pattern appears. If the machine was turned off while the embroidering settings screen or the embroidering screen is displayed either before or after embroidering: The embroidering settings screen for that pattern appears. If the machine was turned off while embroidering: The embroidering screen appears with the needle positioned at the stitch being sewn when the machine was turned off.


Changing the Needle
If the needle is bent or the tip of the needle is broken, replace the needle with a new one. Use the included allen screw driver to replace the needle with one that is designed specifically for this machine and that passes the test described in "Checking the needle" (on page 15).
Replacing the needle
1 Turn off the embroidery machine.

CAUTION
- Be sure to turn off the embroidery machine before replacing the needle, otherwise injuries may result if the machine starts sewing.
2 Loosen the needle set screw and remove the needle. Hold the needle with your left hand, and then hold the allen screw driver in your right hand and turn the needle set screw counterclockwise.

Note
-
Be sure to use the included allen screw driver to replace the needle, otherwise too much force may be applied to the needle, causing it to break.
-
Do not apply extreme force when loosening or tightening the needle set screw, otherwise the machine may be damaged.

3 With the flat side of the needle toward the back of the machine, insert the needle all the way up until it touches the needle bar stopper. Pass the needle through the hole in the presser foot, and then use the needle changing tool to lift up the needle.

① Needle bar stopper ② Needle ③ Flat side ④ Needle changing tool
Changing the Needle 61

OTHER BASIC PROCEDURES
As shown in the illustration, press ① to extend the needle-mounting clamp ②. Attach the clamp to the needle, and then release the pressed area to clamp the needle. To unclamp the needle, press ① again.

4 While holding the needle in place with your left hand, tighten the needle set screw. Use the allen screw driver to turn the needle set screw clockwise.

CAUTION
- Be sure to insert the needle all the way up until it touches the needle bar stopper and securely tighten the needle set screw with the allen screw driver, otherwise the needle may break or the machine may be damaged.
62
Correctly Using the Embroidery Frames
The various types of embroidery frames and their uses are described below. In addition to the included embroidery frames, the optional cap frame can be used with this embroidery machine.
CAUTION
- Only use embroidery frames of the sizes indicated in the screen, otherwise the embroidery frame may hit the presser foot, which may result in injuries.
Embroidery frame types and applications
\begin{tabular}{|p{0.22\textwidth}|p{0.22\textwidth}|p{0.22\textwidth}|p{0.22\textwidth}|} \hline \textbf{Extra-large embroidery frame} & \textbf{Large embroidery frame} & \textbf{Medium embroidery frame} & \textbf{Small embroidery frame} \ \hline
\hline Embroidering area: 200 mm (H) × 300 mm (W) (7-7/8 inches (H) × 11-3/4 inches (W)) & Embroidering area: 130 mm (H) × 180 mm (W) (5-1/8 inches (H) × 7-1/8 inches (W)) & Embroidering area: 100 mm (H) × 100 mm (W) (4 inches (H) × 4 inches (W)) & Embroidering area: 40 mm (H) × 60 mm (W) (1-1/2 inches (H) × 2-3/8 inches (W)) \ \hline Use when embroidering connecting characters or patterns, combined patterns or large embroidery patterns. & Use when embroidering patterns with a size less than 130 mm (H) × 180 mm (W) (5-1/8 inches (H) × 7-1/8 inches (W)) & Use when embroidering standard-sized patterns. & Use when embroidering small-sized patterns, such as nametags. \ \hline (Refer to "Hooping the Fabric" on page 65.) & & (Refer to "Hooping the Fabric in the Embroidery Frame" on page 28.) & \ \hline \end{tabular}
Cap frame (optional)

Embroidering area: 50 mm (H) × 130 mm (W) (2 inches (H) × 5-1/8 inches (W))
Use when embroidering caps. Baseball (golf) caps, tulip hats and bucket hats can be embroidered with this frame. This frame cannot be used with hats having a front area of 50 mm (2 inches) or less, such as sun visors and children's hats. In addition, it cannot be used with hats that have a brim longer than 80 mm (3-1/8 inches). (For details on attaching this frame, refer to "Using the Optional Cap Frame" on page 169.)
Note
- The embroidery frame indicators show all embroidery frame sizes in which the embroidery pattern can be sewn. Be sure to use an embroidery frame of the most suitable size. If the embroidery frame that is too large is used, the pattern may be misaligned or the fabric may pucker.


OTHER BASIC PROCEDURES
Attaching Iron-On Stabilizer (Backing) to Fabric
In order to prevent shrinkage of the stitching or misaligned patterns, we recommend that iron-on stabilizer (backing) be used for embroidering.
CAUTION
- When embroidering on thin or stretch fabrics, fabrics with a coarse weave or fabrics that easily allow the stitching to shrink, be sure to use iron-on stabilizer (backing) for embroidering. If iron-on stabilizer (backing) is not used while embroidering, the needle may bend or break or the pattern may become misaligned.
- Using a steam iron, affix the iron-on stabilizer (backing) to the back of the fabric.

① Adhesive side of iron-on stabilizer (backing) ② Fabric (wrong side)
- When embroidering fabric that should not be ironed or when embroidering an area that is difficult to iron, hoop a layer of the iron-on stabilizer (backing) under the fabric in the embroidery frame without affixing it.
Note
- Use a piece of iron-on stabilizer (backing) that is larger than the embroidery frame. When framing the fabric in the embroidery frame, be sure that the stabilizer (backing) is clamped on all edges in order to prevent wrinkles in the fabric.

① Area of embroidery frame ② Iron-on stabilizer (backing)
Memo
- When embroidering thin fabrics, such as organza or lawn, use a water-soluble stabilizer (backing). Water-soluble stabilizers dissolve when washed, allowing you to create beautiful embroidery that is not stiff.
- When embroidering fabric with a nap, such as towels or corduroy, hoop a layer of iron-on stabilizer (backing) under the fabric in the embroidery frame without affixing it.
- For other uses of stabilizer (backing), refer to "Stabilizers (Backings)" on page 165.
64


Hooping the Fabric
Hooping the fabric in the extra-large and large embroidery frames
1 Loosen the screw on the outer frame.

① Screw
2 Place the fabric with right side up on top of the outer frame.
- The outer frame does not have a front or back side. Either side can be used as the front.
3 Press the inner frame into the outer frame. First insert the inner frame at the corner with the screw A, next insert the nearby one corner B, and then insert the opposite corner C. Then insert the opposite corner of non screw corner D.

First, align the inner and outer frames at the corner with the screw A. Then, while lightly pulling the fabric in the direction indicated by arrow B so that the fabric is taut, insert the inner frame at corner B. In the same way, lightly pull the fabric in the direction indicated by arrow C and insert corner C, and then lightly pull the fabric in the direction indicated by arrow D and insert corner D.
- Be sure that there are no wrinkles in the fabric after it is stretched in the embroidery frame.
4 While stretching the fabric even more, securely tighten the screw so that the fabric is taut.

- After stretching the fabric, lightly tapping it should produce a drum-like sound.
- Firmly clamp together the inner and outer frames so that their tops are even.

① Outer frame ② Inner frame ③ Right side of fabric ④ Top of inner & outer frames are even
- Using the included disc-shaped screwdriver, firmly tighten the screw.

① Disc-shaped screwdriver
Memo
- To correctly frame the fabric in the embroidery frame, we recommend using a flat surface.

OTHER BASIC PROCEDURES
Using the embroidery sheet
In order to hoop the fabric so that the pattern will be sewn in the correct position, use the guidelines on the embroidery sheet to accurately stretch the fabric in the frame.
1 With a fabric marker, mark the area of the fabric you want to embroider.

2 Place the embroidery sheet on the inner frame. Align the guidelines on the embroidery sheet with the marks that you drew on the fabric.

① Guidelines ② Inner frame
3 Gently stretch the fabric, so that there are no folds or wrinkles.

4 Remove the embroidery sheet.
66

Large/small pieces of fabric
This section provides information on embroidering fabric that is either much larger or much smaller than the embroidery frame.
■ Embroidering large pieces of fabric or heavy clothing
When embroidering large pieces of fabric or heavy pieces of clothing, use a clothespin or binder clip to fasten the excess fabric to the embroidery frame so that it does not hang down from the frame. Embroidering with excess fabric hanging down from the embroidery frame may prevent the frame from moving properly and may result in a misaligned pattern.

• Use a clothespin or binder clip to fasten the excess fabric to the embroidery frame.
■ Embroidering small pieces of fabric
When embroidering pieces of fabric that are smaller than the embroidery frame, use spray fabric adhesive to attach the fabric to stabilizer (backing) hooped in the embroidery frame. With fabrics where you do not wish to use spray adhesive, baste the fabric to the stabilizer (backing).
① Fabric Stabilizer (backing)
■ Embroidering the corner of fabric
When embroidering the corner of a piece of fabric, use spray fabric adhesive to attach the corner of the fabric to stabilizer (backing), and then hoop the stabilizer (backing) in the embroidery frame. With fabrics where you do not wish to use spray adhesive, baste the fabric to the stabilizer (backing).
① Fabric Stabilizer (backing)
■ Embroidering narrow pieces of fabric, such as ribbon
When embroidering narrow pieces of fabric, use spray fabric adhesive to attach the fabric to stabilizer (backing), and then hoop the stabilizer (backing) in the embroidery frame. With fabrics where you do not wish to use spray adhesive, clamp both ends of the fabric, together with the stabilizer (backing), in the embroidery frame.
① Ribbon ② Stabilizer (backing)
Hooping the Fabric 67


OTHER BASIC PROCEDURES
Embroidery Frame Position and Movement
The following provides information concerning the embroidery frame when operating the embroidery machine.
Embroidery frames that cannot be used for embroidering As explained on page 28, the embroidery frame indicators at the top of the screen show the embroidery frames that can be used to sew the currently selected pattern. Embroidery frames with an embroidering area smaller than the pattern cannot be used. In addition, the embroidery frame cannot be used if the embroidery is smaller than the embroidering area but is positioned so that it extends out of the embroidering area of the frame.
Embroidery frames with an embroidering area smaller than the pattern

Patterns that extend out of the embroidering area of the frame

In either of these cases, a message appears on the embroidery machine, warning that the embroidery frame must be changed.

The embroidery machine detects which embroidery frame is installed according to the position of the left arm of the embroidery frame holder. Therefore, the embroidery frame size is determined by the position of the left arm, even if the detected embroidery frame is not actually installed. In addition, if the embroidery frame holder is not installed, the embroidery machine determines that the cap frame (sold separately) is installed. A message indicating that the embroidery frame be replaced may appear even if no embroidery frame is installed.
Moving to the correct position If the center of the embroidery frame is at the needle drop point in the embroidering area, the embroidery frame is correctly positioned, in other words, at the starting position before embroidering. If the embroidery frame is changed, the next frame that is installed will not be correctly positioned. For example, if the extra-large embroidery frame is replaced with the small frame, the following will occur.

① Center of embroidery frame at the correct position ② Needle position when the embroidery frame is replaced
In order to correct the misalignment of this embroidery frame, the embroidery frame automatically moves to the correct position when any of the following are performed.
- The embroidery machine is turned on. The embroidery frame will move.
- The embroidering settings screen is displayed. The embroidery frame will not move if it is correctly positioned.
If the pattern extends out of the embroidering area for the frame, a message appears, indicating that the embroidery frame should be replaced. Either replace the embroidery frame or return to the pattern editing screen and move the embroidering position.
68
• The embroidery frame is replaced while the embroidering settings screen or embroidering screen is displayed, and then the key for checking the embroidering area, for moving the embroidery frame, or for starting embroidering is touched.
The embroidery frame will move. Since the embroidery frame is moved to the correct position and paused, touch the desired key again. If the pattern extends out of the embroidering area for the frame after the frame is moved, a message appears, indicating that the embroidery frame should be replaced. Either replace the embroidery frame or return to the pattern editing screen and adjust the pattern size or embroidering position.
3
Embroidery Frame Position and Movement 69
OTHER BASIC PROCEDURES
Changing the Embroidering Position
When the embroidery machine is purchased, it was adjusted so that the beginning of the stitching was from the center of the pattern. Therefore, move the frame and adjust the embroidering position so that the center of the pattern aligns with the needle drop point at the sewing position. In addition, the angle of the entire pattern can be adjusted if the fabric cannot be hooped evenly within the embroidery frame and the pattern is positioned at an angle on the fabric.
-
Touch [icon: up-left arrow], [icon: up arrow], [icon: up-right arrow], [icon: left arrow], [icon: right arrow], [icon: down-left arrow], [icon: down arrow] and [icon: down-right arrow] in the embroidering settings screen.
Move the embroidery frame so that the needle drop point is at the center of the area where you wish to embroider.

- The embroidery frame moves in the opposite direction of the arrow.
- The pattern in the pattern display area moves in the same direction of the arrow.

① Shows the vertical distance moved ② Shows the horizontal distance moved
- Touch [icon: home/center icon] to move the embroidery frame back to its original position (where the center of the embroidery frame is aligned with the needle drop point at the sewing position).

Finding the sewing position By locking the needle bar (securing the needle and presser foot in the down position), the needle drop point can easily be seen.
- As shown in the illustration, insert the allen screwdriver into the square hole in needle clamp to slowly lower the needle bar down till needle bar stops then clicks into the lock position.
Note
- Make sure that the needle is not lowered beyond the positioning click into the fabric.

- The needle and presser foot are locked in the down position.
70


2 Touch the arrow keys in the embroidery settings screen to move the embroidery frame so that the needle drop point is at the center of the area where you wish to embroider.

- When specifying the starting of stitching, align the needle drop point with the point specified as the starting of stitching. (For details on specifying the starting/ending of stitching, refer to page 87.)
■ Unlocking the needle bar
1 Display the embroidering screen, and then touch the key for any needle bar other than the one that is locked.

► The needle bar is unlocked.

Adjusting the angle Depending on the type of fabric being embroidered, it may not be possible to stretch the fabric in the embroidery frame at the desired angle. In this case, adjust the angle of the pattern so that it is correctly positioned on the fabric.
1 Touch ROTATE ALL.

The screen shown below appears.

Example: Original angle
① Rotates 90 degrees to the left ② Rotates 10 degrees to the left ③ Rotates 1 degree to the left ④ Rotates 90 degrees to the right ⑤ Rotates 10 degrees to the right ⑥ Rotates 1 degree to the right ⑦ Touch this key to return the pattern to its original angle. ⑧ Moves the pattern in the direction of the arrow on the key. ⑨ Enables the embroidering area to be checked ⑩ Touch this key to close this screen.
Changing the Embroidering Position 71


OTHER BASIC PROCEDURES
2 Touch the keys to adjust the pattern to the desired angle. Each touch of a key rotates the pattern.

① Shows the angle of the pattern after a key is touched to change it
- To return the pattern to its original angle (0 degrees), touch [0°] so that it changes to [0°].
3 If necessary, touch the arrow keys to adjust the position of the pattern. For more details, refer to page 70.
4 If necessary, touch [icon] to check the embroidering area. For more details, refer to page 32.
5 After making the desired changes, touch [OK]. The embroidering settings screen appears again.
Memo
- If [EDIT] is touched to return to the pattern editing screen after the entire pattern is rotated, the pattern appears as it did before the rotation angle was specified, but the setting is not cancelled. When the embroidering settings screen is displayed again, the pattern appears with the rotation angle applied. However, if an error occurs, for example, if the pattern is enlarged in the pattern editing screen so that it extends out of the embroidering area when it is rotated, the following error message appears.

① Touch to cancel the rotation setting and give priority to the editing operation performed in the pattern editing screen. ② Touch to return to the pattern editing screen so that the pattern can be re-edited.
Memo
- With this operation, fine adjustments can be made to the angle; also, this operation is particularly useful when embroidering items, such as bags and tubular items, that have limitations to being hooped in the embroidery frame. Example: When embroidering a pillowcase Rotate the pattern 90 degrees to the left before embroidering.

Example: When embroidering a T-shirt Rotate the pattern 180 degrees. Pass the machine bed through from the waist of the T-shirt, not from the neck, and attach the embroidery frame to the machine. Prevent the neck to be stretched when the embroidery frame is moved.

72


Embroidering a Pattern Containing Seven or More Colors
When embroidering a pattern that uses seven or more thread colors, it is necessary to change the thread spools. When changing the thread spools, instruction to change the thread spools will appear with the machine automatically stopping.
Assignment of thread colors to needle bars
Thread colors are automatically assigned by the machine to needle bars 1 to 6, starting with the thread colors that are sewn first. (However, if a new pattern has thread colors that are the same as the previously sewn pattern, the thread colors will be assigned to the same needle bar as before, regardless of the sewing order.)
For example, for a pattern with six thread colors and ten thread color changes, the thread colors are assigned as shown below.

Since the thread colors on needle bars 2 and 3 will be used again after the thread spools are changed, they will not be replaced. However, different colors are assigned to the other needle bars.
Checking if thread spool changes are necessary
When selecting a pattern, the number of thread changes can be viewed, however, which thread colors are used in the pattern cannot be checked on this screen. Whether or not and when thread spools will need to be changed can be checked with the following indicators.
Time until the spools must be changed
This indicator shows the amount of time until the next spool change. When the embroidering screen is displayed, if a length of time appears here, at least one spool change will be required.

① Time until the spools must be changed
For a pattern with seven or more thread colors, the thread spool information is updated when the seventh thread color is needed.
Afterward, the machine adjusts the assignment of thread colors to reduce the number of times that the thread spools will have to be changed.
For example, for a pattern with ten thread colors and thirteen thread color changes, the thread colors are assigned as shown below.

Change thread spools here.
Embroidering a Pattern Containing Seven or More Colors 73
OTHER BASIC PROCEDURES
■ Spool change indicator ( ) The spool change indicator in the stitch navigating screen indicates the number of times that the thread spools will need to be changed and the amount of time between changes.
- Touch [icon: needle with -/+] in the embroidering screen.

► The stitch navigating screen appears.
- Touch [icon: spool with +].

► Each time this key is touched, the next color in the thread color sequence display is selected. After reaching the last color in the thread color sequence display, the scrolling stops.
- Check the position of [icon: spool stack].

① [icon: spool stack] indicates when the thread spools will need to be changed. The thread spools will need to be changed the number of times that this indicator is displayed and between the two thread colors at the point where it is displayed.
② Touch [icon: spool with -] to scroll up through thread color sequence display. Each time this key is touched, the previous color in the thread color sequence display is selected. After reaching the first color in the thread color sequence display, the scrolling stops.
- After checking the desired information, touch [icon: spool with -] or [icon: needle with 0] to return to the first color. And then touch OK.

► The embroidering screen appears again.
74

Changing the Thread Spools with Designs of Seven or More Colors
This section contains details on understanding the change thread spools message and on easily changing the thread spools.
Change thread spools message
When it is necessary to replace the thread spool while embroidering a pattern that contains seven or more colors, the machine automatically stops sewing and the message shown below appears. This message also appears when it is necessary to change the thread spools before beginning to embroider a new pattern. Change the thread spools according to their new assignments.

① The needle bars where the thread spools must be changed appear in color. ② The needle bars where it is not necessary to change the thread spools appear in gray. ③ Touch this key to close the message indicating that the thread spool be changed.
Note
- When the embroidering screen is displayed, the current thread color assignment is stored. If the same thread color is used the next time that the thread spools must be changed, the needle bar will be assigned the same thread color as before.
Memo
- To use a different thread color than the one that was specified, use temporary needle bar setting key, and then change the thread color setting. (For details, refer to "Temporary Needle Bar Setting" on page 92.)
- To minimize changing the thread spools, frequently used thread colors can be specifically assigned to certain needle bars. (For details, refer to "Reserved Needle Bar Settings" on page 94.)
Changing the Thread Spools with Designs of Seven or More Colors 75
OTHER BASIC PROCEDURES
Easily changing the thread spools
When replacing the thread spools, it is necessary to re-thread the upper thread. However, the thread spools can easily be changed when replacing a thread spool whose thread is correctly threaded through the machine.
1 Cut the thread between the thread spool and the thread guide.

2 Change the thread spool.

3 Tie the end of the thread on the new spool with the end of the thread remaining from the previous color.

4 Pull out the old thread just after the needle bar thread guide.

Continue pulling the thread until the knot is above the needle. Cut the knot.
5 Use the automatic needle-threading mechanism to thread the needle with the new thread. (Refer to page 39)
► This completes the changing of the thread spool.
Note
- When pulling out the thread, do not pull the knot through the eye of the needle. If the knot is pulled through the eye of the needle, the needle may be damaged.
76
If the Thread Breaks or the Bobbin Thread Runs Out While Embroidering
If the thread breaks or the bobbin thread runs out while embroidering, the machine will automatically stop. Since some stitches may be sewn with only one thread, go back through the stitching to a point where stitches have already been sewn before continuing embroidering.
Note
- Be careful when going back or forward through the stitching since the embroidery frame moves at the same time.
If the upper thread breaks
-
Re-thread the upper thread. (Refer to page 35.)
-
Touch [icon: V-/+] .

► The stitch navigating screen appears.
- Touch [icon: V-1] and [icon: V-10] to go back through the stitching to a point where stitches have already been sewn.

① Each touch of this key moves one stitch back through the stitching. ② Each touch of this key moves ten stitches back through the stitching.
The embroidery frame moves. Go back to the point where stitches have already been sewn.

If the needle bar is moved back too far through the stitching, touch [icon: V+1] or [icon: V+10] to go forward through the stitching.
3

① Each touch of this key moves one stitch forward through the stitching. ② Each touch of this key moves ten stitches forward through the stitching.
- Touch OK.

► The embroidering screen appears again.
- Touch [icon: LOCK], and then press the start/stop button to continue embroidering.


OTHER BASIC PROCEDURES
If the bobbin thread breaks or runs out
- Press the thread trimming button.

*   The upper thread is trimmed.
*   If the bobbin thread breaks or runs out, also trim the upper thread.
- Remove the stitches sewn only with the upper thread. Pull the trim end of the upper thread.

* If the stitches cannot be cleanly removed, trim the thread with scissors.
- If the bobbin thread ran out, replace the bobbin at this point in the procedure.
- Replace the bobbin with a bobbin wound with bobbin thread. (Refer to page 19.)

*   If the hook cover can be opened, replace the bobbin without removing the embroidery frame from the machine.
*   If the machine bed is hidden, for example, with a bag-shaped piece of fabric, or if the hook cover cannot be opened, temporarily remove the embroidery frame. (Refer to page 45.) After replacing the bobbin, re-attach the embroidery frame. (Refer to page 30.)

**Note**
If the embroidery frame is removed before embroidering of the pattern is finished, be careful of the following, otherwise the pattern may become misaligned.
*   Do not apply extreme pressure to the framed fabric and cause it to become loose.
*   When removing and re-attaching the embroidery frame, do not allow the frame to hit the carriage or the presser foot.
    If the carriage is hit and moves, turn the machine off, then on again. The correct frame position at the time that the machine was stopped is stored in the machine’s memory, and the embroidery frame is returned to the correct position.
*   When the embroidery frame is re-attached, make sure that the pins on the left and right arms of the embroidery frame holder securely fit into the holes in the handles on the embroidery frame.
- Go back through the stitching in the same way as that described in step 2 of “If the upper thread breaks” on page 77, and then continue embroidering.
78

Embroidering From the Beginning or Middle of the Pattern
If you wish to restart embroidering from the beginning, for example, if trial embroidery was sewn and an incorrect thread tension was used or if the wrong thread color was used, restart the embroidering using the forward/backward stitch key. In addition, you can go forward or back through the stitching by thread color or by stitch to start stitching at the any position of the pattern.
Note
- Be careful when going back or forward through the stitching since the embroidery frame moves at the same time.
- Press the start/stop button to stop the machine.

- If necessary, change the fabric framed in the embroidery frame or trim and remove the sewn stitches.
- Touch [icon: needle with -/+].

*The stitch navigating screen appears.*
■ To start sewing from the beginning
- Touch [icon: needle with 0].

① Touch this key to return to the beginning of the first color.
▶ If the stitching had advanced to the second color or later, the needle bar case moves and the needle bar for the first color is moved to the sewing position. In addition, the embroidery frame moves to the starting position.

OTHER BASIC PROCEDURES
■ To select the stitch from where embroidering is to begin
3 Touch [icon: thread color -] and [icon: thread color +] to select a color in the thread color sequence, and then touch [icon: stitch -1], [icon: stitch -10], [icon: stitch -100], [icon: stitch +1], [icon: stitch +10] and [icon: stitch +100] to select the stitch.

① Touch this key once to return to the beginning of the stitching for the color being sewn. Afterward, each touch of this key returns to the beginning of sewing for the previous thread color. ② Each touch of this key advances to the beginning of sewing the next thread color. ③ Each touch of this key moves one stitch back through the stitching. ④ Each touch of this key moves ten stitches back through the stitching. ⑤ Each touch of this key moves one hundred stitches back through the stitching. ⑥ Each touch of this key moves one stitch forward through the stitching. ⑦ Each touch of this key moves ten stitches forward through the stitching. ⑧ Each touch of this key moves one hundred stitches forward through the stitching. ⑨ The thread color at the top of the thread color sequence display is the color of the area currently selected. ⑩ Touch this key to close this screen.
► The needle bar case moves and the current needle bar moves to the sewing position, and then the embroidery frame moves and current needle position is indicated.
4 After selecting the stitch from where embroidering is to begin, touch [icon: OK].

► The embroidering screen appears again.
5 Touch [icon: LOCK/START/STOP] , and then press the start/stop button to begin embroidering.
► Embroidering begins from the specified point.
Resume Embroidering After Turning Off the Machine
In either of the following cases, the remaining stitches of the embroidery are stored in the machine’s memory.
- If the machine's power switch is pressed to turn off after stopping embroidering. Cut the thread before the machine's main power switch is turned off, otherwise the thread may be pulled or may catch when the carriage returns to its initial position after the machine is turned on again.
- If the machine was accidentally turned off, for example, due to a power outage, while it was embroidering. The remainder of the embroidery can be sewn when the machine is turned on again; however, some of the stitches that were already sewn may be sewn again.
Note
- Be careful when going back or forward through the stitching since the embroidery frame moves at the same time.
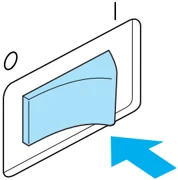
- Set the main power switch to “I” to turn on the machine.

- When the screen shown below appears after the opening screen, touch OK.

► A message appears, asking if you wish to continue embroidering or start a new operation.
Resume Embroidering After Turning Off the Machine 81

