Resolution
- Press the Menu button. You see this screen:
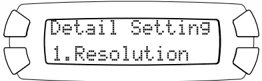
- Press OK. Then press the bottom left button (next to Resolution) to choose from these settings:
| Setting | Results |
|---|---|
| Best | Prints at 1440 × 720 dpi |
| Photo | Prints at 720 × 720 dpi |
Color Effect
- Press the Menu button, then press the bottom left button (next to Resolution) until you see Color Effect on the screen.
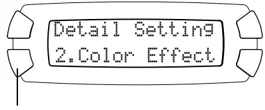
- Press OK. Then press the bottom left button to choose from these settings:
| Setting | Results |
|---|---|
| Color | Prints in color or grayscale |
| Sepia | Prints with a sepia tone |
Auto Correct
- Press the Menu button, then press the bottom left button (next to Resolution) until you see Auto Correct on the screen.
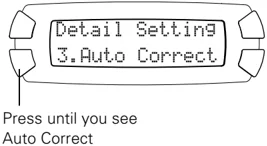
Printing From a Memory Card 99
- Press OK. Then press the bottom left button to choose from these settings:
| Setting | Results |
|---|---|
| None | Uses no automatic correction |
| P.I.M. | Prints using PRINT Image Matching information for improved image quality (your digital camera must support PRINT Image Matching) |
| Exif | Prints using Exif Print information for improved image quality (your digital camera must support Exif Print) |
| Auto Photo Fine | Prints enhanced images; printing takes longer, but print quality is better than images printed without correction |
Enhance Resolution
If you are printing low-resolution images, or images that contain digital noise, use this setting.
- Press the Menu button, then press the bottom left button (next to Resolution) until you see Enhance Res. on the screen.
- Press OK. Then press the bottom left button to choose from these settings:

| Setting | Results |
|---|---|
| On | Removes digital noise in photos and enhances the resolution of low-resolution images |
| Off | Does not remove digital noise or enhance resolution |
100 Using Memory Cards
Brightness
- Press the Menu button, then press the bottom left button (next to Resolution) until you see Brightness on the screen.
- Press OK. Then press the bottom left button to choose from these settings:

Press until you see Brightness
Contrast
- Press the Menu button, then press the bottom left button (next to Resolution) until you see Contrast on the screen.
- Press OK. Then press the bottom left button to choose from these settings:

Press until you see Contrast
Printing From a Memory Card 101
Sharpness
- Press the Menu button, then press the bottom left button (next to Resolution) until you see Sharpness on the screen.
- Press OK. Then press the bottom left button to choose from these settings:

Press until you see Sharpness
Saturation
- Press the Menu button, then press the bottom left button (next to Resolution) until you see Saturation on the screen.
- Press OK. Then press the bottom left button to choose from these settings:

Press until you see Saturation
102 Using Memory Cards
Date
- Press the Menu button, then press the bottom left button (next to Resolution) until you see Date on the screen.
- Press OK. Then press the bottom left button to choose from these settings:
Press until you see Date
Time
- Press the Menu button, then press the bottom left button (next to Resolution) until you see Time on the screen.
- Press OK. Then press the bottom left button to choose from these settings:

Press until you see Time
Printing From a Memory Card 103

Print Information
By turning this function on, you can print information about each of your digital images, such as exposure time, shutter speed, F number, and ISO rate. You can only print this information if your images comply with the Exif standard.
- Press the Menu button, then press the bottom left button (next to Resolution) until you see Print Info on the screen.
- Press OK. Then press the bottom left button to choose from these settings:
Press until you see Print Info
Fit to Frame
- Press the Menu button, then press the bottom left button (next to Resolution) until you see Fit to Frame on the screen.
- Press OK. Then press the bottom left button to choose from these settings:

Press until you see Fit to Frame
104 Using Memory Cards

Hi Speed
This setting allows you to perform bidirectional printing for greater speed.
- Press the Menu button, then press the bottom left button (next to Resolution) until you see Hi Speed on the screen.
- Press OK. Then press the bottom left button to choose from these settings:
Press until you see Hi Speed
Scanning a Photo to a Memory Card
Follow these steps to scan an image to a memory card and save it in JPEG format:
- Make sure your RX500 is not connected to your computer or your computer is turned off.
- Open the memory card cover:
- Make sure the memory card light (next to the memory card slots) is off and that no cards are in any of the slots. Then insert a card into the correct slot (see page 84 to identify the slot you need).
Note: It won’t be possible to insert the card fully; this is normal.

Memory card cover
Scanning a Photo to a Memory Card 105

The memory card light flashes, then turns green.
 Memory card light
Caution: Do not insert more than one card into a shared memory card slot.
Note: If the card is not properly formatted, you see a message on the LCD screen. Press the button indicated on the screen to format the card. Any data stored on the card will be erased.
-
Open the scanner lid.
-
Place your photo face down on the glass in the upper left corner. Move your photo about 0.1 inch from the top and side edge so the entire photo is scanned.
 Orient the photo as shown
Move the photo in about 0.1 inch from the edges
-
Close the scanner lid.
-
Press the Scan button to enter scan mode.
You see an LCD screen similar to the one to the right. If necessary, press the upper left button until To Photo Card appears.

-
To Photo Card OK Press until you see To Photo Card
-
Press the OK button.
You can also scan to your computer or create an e-mail with the scanned image attached. See the instructions beginning on page 79.
106 Using Memory Cards
-
Use the buttons next to the LCD screen to select the following options:
- Graphic for the document type
- Photo for the image quality
- Auto for the scan area; if the edges of the photo are light in color, select Max. for the scan area
-
Press the OK button. You see a message on the LCD screen instructing you to place your original on the scanner glass and press the \diamond Color button.
-
Press the \diamond Color button. The photo is scanned to the epscan folder on your memory card. Wait for scanning to finish, then remove the card.
Caution: Never open the scanner unit while scanning or copying, or you could damage the RX500.
Scanning a Photo to a Memory Card 107

108 Using Memory Cards
Maintaining the RX500
If you notice a decline in print quality, follow the instructions in this chapter to check and clean the print head. You’ll also find instructions on checking ink levels and replacing ink cartridges, aligning the print head, and transporting the RX500.
See these sections:
■ “Cleaning the Print Head” below
■ “Replacing Ink Cartridges” on page 111
■ “Aligning the Print Head” on page 115
■ “Transporting the RX500” on page 118
Cleaning the Print Head
If your printouts are unexpectedly light, or dots or lines are missing, you may need to clean the print head. This unclogs the nozzles so they can deliver ink properly. Print head cleaning uses ink, so clean it only if quality declines.
Note: You can also use a printer software utility to clean the print head right from your computer. Select the ? or Help button on your printer settings window for instructions on running the print head cleaning utility.
-
Make sure the RX500 is turned on but not printing, and the ! error light is off. (If the ! error light is flashing or on, you may need to replace an ink cartridge; see page 111 for details.)
-
Press the Setup button to enter setup mode. You see an LCD screen similar to this:

109
- Press the top left button (next to Ink levels) until you see this on the LCD screen:
 4. Press the ◇ Color button.
Cleaning takes about 30 seconds, during which Head Cleaning appears on the LCD screen.
Caution: Never turn off the RX500 while Head Cleaning appears on the LCD screen, unless it hasn’t moved or made noise for more than 5 minutes.
- When you again see the LCD screen shown on the right, run a nozzle check to confirm the print head nozzles are clean.
 Make sure letter-size paper is loaded (see page 13 for instructions). Press the top left button until you see Nozzle Check on the LCD screen, then press the ◇ Color button. The nozzle check pattern prints.
Note: You can also use a printer software utility to print a nozzle check right from your computer. Select the ? or Help button on your printer settings window for instructions on running the nozzle check utility.
- Examine the nozzle check pattern you print. It should look like this:
 Each line should be complete, with no gaps in the dot pattern. If your printout looks okay, you’re done.
If you see any gaps in the dot pattern, clean the print head again.
If you don’t see any improvement after cleaning three or four times, check the solutions beginning on page 121. You can also turn the RX500 off and wait overnight—this allows any dried ink to soften—and then try cleaning the print head again.
Caution: When you don’t turn on your RX500 for a long time, the print quality can decline. It’s a good idea to turn it on at least once a month to maintain good print quality.
110 Maintaining the RX500
Replacing Ink Cartridges
To check ink levels, follow these steps:
-
Press the Setup button to enter setup mode.
-
If necessary, press the upper left button next to the LCD screen until Ink Levels is displayed, then press the ◇ Color button.
You see the amount of ink available in each cartridge: C (Cyan), M (Magenta), Y (Yellow), K (Black), LC (Light Cyan), and LM (Light Magenta).
Tip: To view all the ink levels, wait for them to scroll across the screen.

- When done, press the OK button.
When your ink starts getting low, make sure you have replacement cartridges available. You can’t print if a cartridge is empty.
I nstalling New Cartridges
Make sure you have a new ink cartridge before you begin. Once you start replacing an ink cartridge, you must complete all the steps in one session. Use these cartridges:
When you need new ink cartridges, contact your dealer. You can also call the Epson Store℠ at (800) 873-7766 or visit www.epsonstore.com (U.S. sales only). In Canada, please call (800) 463-7766 for dealer referral.
Caution: To ensure good results, use genuine Epson ink cartridges and do not refill them. Other products may cause damage to your RX500 not covered by Epson’s warranty.
You can’t print if an ink cartridge is empty. Leave the empty cartridge installed in the RX500 until you have a replacement. Otherwise the ink remaining in the print head nozzles may dry out.
Warning: Keep ink cartridges out of the reach of children. If ink gets on your hands, wash them thoroughly with soap and water. If ink gets in your eyes, flush them thoroughly with water.
Follow these steps to replace an ink cartridge:
-
If an ink cartridge is empty: Look at the LCD screen to see which cartridge is empty, then press the ◇ Color button.
If an ink cartridge is low: Press the Setup button to enter setup mode, then press the upper left button next to the LCD screen until Replace Ink is displayed. Then press the ◇ Color button.
-
When you see Open the scanner on the LCD screen, use the side grips to open the scanner unit, as shown, making sure to keep the scanner lid closed on top.

112 Maintaining the RX500
- Wait for the ink cartridge holder to move to the replacement position on the far right, then open its cover by pulling it back up and toward you.
Caution: Never attempt to open the cartridge holder’s cover while the print head is moving. Wait until the cartridges have moved to the replacement position.

Open the cover from the back
- Identify the cartridge you need to replace. Press in the tab at the back of the cartridge to release it, then lift the cartridge straight out. Dispose of it carefully.

Note: The illustration above shows the black ink cartridge being removed. Only remove the cartridge(s) you need to replace.
- Unwrap the new cartridge.
Caution: Don’t remove any labels or seals from the cartridge.
Replacing Ink Cartridges 113
- Insert the new cartridge into the holder. Press down firmly until it clicks into place.

If you need to replace other ink cartridges, repeat steps 4 through 6 before continuing with step 7.
- Close the cartridge cover. (It should click into place.)
Caution: If you find it difficult to close the cover, make sure all the cartridges are firmly seated. Press down on each newly installed cartridge until you hear it click into place. Do not attempt to force the cover closed.

- Lower the scanner unit.
The RX500 begins charging the ink delivery system and Charging appears on the LCD screen. Wait for the message to disappear before using the RX500.
Caution: Never turn off the RX500 while Charging appears on the LCD screen, unless it hasn't moved or made noise for more than 5 minutes. This may cause incomplete charging of the ink.
Ink charging uses ink, so it's best to install new ink cartridges or used cartridges with a relatively high level of ink. Used cartridges with little ink remaining may become empty immediately after being installed.
114 Maintaining the RX500
Aligning the Print Head
If your printouts look grainy or vertical lines appear jagged, you may need to align the print head.
You can also use the buttons on the RX500 to align the print head (see the on-screen Reference Guide for instructions). For best results, we recommend you use the print head alignment utility, as described in this section.
- Make sure the RX500 is turned on and not printing, and the ! error light is off.
- Load several sheets of plain letter-size paper (see page 13 for instructions).
- Do one of the following:
Windows: Right-click the [icon] icon on the Windows taskbar and click Print Head Alignment.
Macintosh OS X: Double-click EPSON Printer Utility in your Applications folder. Select SP RX500 Series in the Printer List and click OK. Then click the [A^A] Print Head Alignment button.
Macintosh OS 8.6 to 9.x: From your application's File menu, choose Page Setup or Print. Click the [icon] button in the printer settings or page setup dialog box. Then click the [A^A] Print Head Alignment button.
Aligning the Print Head 115
- Follow the on-screen instructions to print the black vertical alignment pattern. Your printout should something look like this:

- Examine the printout and choose the best square in each of the four sets. (The best square should have no visible bands, or the least visible bands.)
116 Maintaining the RX500
- In the on-screen window, select the number for each of these squares in the corresponding pull-down menu.

This procedure shows OS X screens. Screens for other operating systems will look similar.
-
If the best square in each set is number 5, click Next. Otherwise, click Realignment and follow the on-screen instructions to print a new black vertical alignment pattern. Repeat this step until the best square for each set is number 5.
-
Follow the on-screen instructions to print a color vertical alignment pattern. Repeat steps 5 through 7 to correct color vertical alignment.
-
When you're done, click Finish.
Aligning the Print Head 117
Transporting the RX500
If you move your RX500 some distance, you need to prepare it for transportation in its original box or one of a similar size.
Caution: To avoid damage, always leave the ink cartridges installed when transporting the RX500. Never transport or store the printer on its side or in a tilted or upside-down position.
- Press the ☉ On button to turn on the RX500. Wait until the scanner carriage moves to the home position (toward the left side) and the print head locks in the far right position. Then turn off the RX500.
- Open the scanner lid and slide the transportation lock to the 🔒 locked position. Close the scanner lid.
- Unplug the power cord from the electrical outlet. Then disconnect the USB cable from your computer.
- Disconnect the TPU cable from the TPU connector on the back of the RX500.
- Remove any paper from the sheet feeder and output tray, then remove the paper support and feeder guard.
- Close the output tray.
- Lift up the scanner unit.
118 Maintaining the RX500
- Remove the orange print head holder from its storage area and install it as shown to prevent the print head from moving during transport. If you can’t find the orange print head holder, tape the print head to the case.

Caution: Be sure to remove the print head holder or the tape after installing the RX500 in its new location.
-
Lower the scanner unit carefully until it clicks back into place.
-
Repack the RX500 and its attachments in the original box using the protective materials that came with them.
Caution: Keep the RX500 level as you transport it.
After transporting the RX500, remove the print head holder or tape securing the print head, unlock the transportation lock, and make a test copy. If you notice a decline in quality, clean the print head (see page 109); if output is misaligned, align the print head (see page 115).
Transporting the RX500 119
120 Maintaining the RX500
Solving Problems
If you have a problem with the RX500, check the messages on the LCD screen, run a nozzle check (see page 109), or see “Problems and Solutions” below. For problems with scanning or printing from your computer, or with uninstalling the software, double-click the SP RX500 Reference Guide icon on your computer desktop.
If none of the solutions solve your problem, see “Where To Get Help” on page 123.
Problems and Solutions
Check the solutions below if you’re having trouble using the RX500 in stand-alone mode.
Copying Problems
- Make sure your paper is positioned on the right side of the sheet feeder behind the tab, with the left edge guide resting lightly against its left side. Don’t load paper above the arrow on the left edge guide.
- Make sure your paper is loaded short edge first.
- Make sure your original is positioned in the top left corner of the glass, with the top edge of the original facing left. Place it at least 0.1 inch from the edge of the glass to avoid cropping the image.
- Make sure you pressed the Copy button to enter copy mode.

Move the photo or document in about 0.1 inch from the edges
121
■ Make sure to select the copy layout you want. See page 24 for instructions.
■ If you select Auto Fit Page to copy a document with white or very light edges, the original size may not be recognized. Select Actual as the Reduce/ Enlarge setting (see page 23) and use the Optional Zoom setting to adjust the size of your copy (see page 27).
Paper Feeding Problems
■ If paper doesn’t feed, remove it from the sheet feeder. Fan the paper, load it against the right side behind the tab, and slide the left edge guide against the paper (but not too tightly).
■ If paper jams, follow these steps:
-
Press the ☉ On button to turn off the RX500.
-
Lift up the scanner unit and remove any paper that’s inside, including any small pieces that may have torn off.
Caution: Clear paper jams by pulling the paper out towards the front of the RX500. Never pull the paper out in the direction of the sheet feeder.
-
Reload the paper. Make sure the edges are not creased or folded.
-
Turn the RX500 back on and press the ◇ Color button to clear the error.
Copy Quality Problems
If you have any problems with the quality of your copies, try these solutions:
■ Make sure the document is placed flat against the scanner glass. If only part of the image is blurred, your document may be wrinkled or warped.
■ Make sure the RX500 is not tilted or placed on an uneven surface.
■ Clean the print head; see page 109 for instructions.
■ If a dotted line appears in the image, clean the scanner glass with a soft, dry, lint-free cloth (paper towels are not recommended). If the glass is still not clean, use a small amount of glass cleaner on a soft cloth. Make sure you wipe off any remaining liquid. Don’t spray glass cleaner directly on the glass.
122 Solving Problems
■ Make sure your paper isn’t damp, curled, or loaded face down; the printable side, which is usually whiter or brighter, should be face up. Load new paper face up. Use Epson papers for proper saturation and absorption of genuine Epson inks.
■ Use a support sheet with special paper or load your paper one sheet at a time.
■ If you see jagged vertical lines, align the print head as described on page 115.
■ The ink cartridges may be old or low on ink; see page 111 for instructions on replacing an ink cartridge.
Where To Get Help
If you need help with the RX500 or Epson Scan software, see “Epson Support” below. If you need help with any other software included with the printer, see page 124.
Epson Support
Epson provides technical assistance 24 hours a day through the electronic support services and automated telephone services:
To speak to a technical support representative, dial:
- US: (562) 276-4382, 6 AM to 6 PM, Pacific Time, Monday through Friday
- Canada: (905) 709-3839, 6 AM to 6 PM, Pacific Time, Monday through Friday
Toll or long distance charges may apply.
Before you call, please have the following information ready:
- Product name (Epson Stylus Photo RX500)
- Product serial number (located on the back)
- Proof of purchase and date of purchase
- Computer configuration
- Description of the problem
You can purchase ink cartridges, paper, manuals, and accessories from the Epson Store at (800) 873-7766, or visit www.epsonstore.com (U.S. sales only). In Canada, please call (800) 463-7766 for dealer referral.
Other Software Technical Support
| Software | Telephone | Online and E-mail |
|---|---|---|
| Epson Smart Panel | (510) 445-8616 | www.newsoftinc.comtech@newsoftinc.com |
| ArcSoft PhotoImpression | (510) 440-99018:30 AM–5:30 PM, Pacific Time, Monday through Friday | www.arcsoft.com/techmainsupport@arcsoft.com |
| ABBYY FineReader Sprint | (510) 226-6719 | www.abbyyusa.comsupport@abbyyusa.com |
124 Solving Problems
Requirements and Notices
Windows System Requirements
To use your RX500 and its software, your system should have:
- Microsoft® Windows compatible PC with Pentium® 300 MHz or better processor
- Microsoft Windows 98 SE, Windows Me, Windows 2000, or Windows XP
- 128MB RAM (256MB or more of RAM recommended)
- VGA monitor or better with at least 256 colors
- At least 200MB of free hard disk space (300MB or more recommended)
- CD-ROM or DVD drive for installing the software
- Windows-compliant, built-in USB port and a shielded USB “AB” cable.
Macintosh System Requirements
To use the RX500 and its software, your system should have:
- iMac™ series, Power Macintosh® G3 or G4, PowerBook,® iBook,™ or eMac™
- Mac® OS 8.6 through OS 9.x, or OS X 10.2 through OS X 10.3 (Mac OS 9.1 or Mac OS 10.2 through 10.3 recommended)
- At least 128MB of available RAM (256MB or more recommended)
- At least 200MB of free hard disk space (300MB or more recommended)
- VGA monitor or better with at least 256 colors
- CD-ROM or DVD drive for installing the printer software
- Built-in USB port and a shielded USB “AB” cable.
125
Important Safety Instructions
Before using your RX500, read and follow these safety instructions:
■ Be sure to follow all warnings and instructions marked on the RX500.
■ Use only the type of power source indicated on the RX500 label.
■ Connect all equipment to properly grounded power outlets. Avoid using outlets on the same circuit as air control systems or other high-load devices that regularly switch on and off.
■ Place the RX500 near a wall outlet where the plug can be easily unplugged.
■ Don’t let the power cord become damaged or frayed.
■ If you use an extension cord with the RX500, make sure the total ampere rating of the devices plugged into the extension cord does not exceed the cord’s ampere rating. Also, make sure the total ampere rating of all devices plugged into the wall outlet does not exceed the wall outlet’s ampere rating.
■ Avoid electrical outlets controlled by wall switches or automatic timers.
■ Keep your RX500 and computer away from potential sources of electromagnetic interference, such as loudspeakers or cordless telephone base units.
■ Avoid locations that are subject to rapid changes in heat or humidity, shocks or vibrations, or dust.
■ Leave enough room around the RX500 for sufficient ventilation.
■ Don’t place the RX500 near a radiator or heating vent or in direct sunlight.
■ Place the RX500 on a flat, stable surface that extends beyond its base in all directions. It will not operate properly if it is tilted or at an angle. Leave enough space in front of the RX500 (at least 9 inches) so it doesn’t tip forward and fall off of the work surface.
■ Turn off and unplug the RX500 before cleaning. Clean with a damp cloth only. Don’t spill liquid on it.
■ Always turn the RX500 off using the \text\textcircledP On button. Don’t turn off the power using a switch on a power strip or unplug the RX500 until the \text\textcircledP On light is off and Turning off disappears from the LCD panel.
■ Don’t block or cover openings in the RX500 case or insert objects through the slots.
■ Except as specifically explained in your documentation, do not attempt to service the RX500 yourself.
■ Unplug the RX500 and refer servicing to qualified service personnel under the following conditions: if the power cord or plug is damaged; if liquid has entered the product; if the product has been dropped or the case damaged; if the product does not operate normally or exhibits a distinct change in performance. Adjust only those controls that are covered by the operating instructions.
126 Requirements and Notices
■ Before transporting the RX500, make sure the print head is capped in the far right position and secured by the orange print head holder or tape, and the scanner is secured by the transportation lock.
■ When storing or transporting the RX500, do not tilt it, stand it on its side, or turn it upside down. Otherwise ink may leak from the cartridge.
■ This product includes a lamp component that contains mercury (Hg). Please consult your state and local regulations regarding disposal or recycling. Do not put in the trash.
■ Don’t remove the memory card or turn off this product while the memory card light is flashing.
■ Use only memory cards compatible with the RX500.
■ See the documentation for your memory card for specific instructions about how to use the card.
I nk Cartridge Safety Instructions
■ Leave the ink cartridges installed. Removing the cartridges can dehydrate the print head and may prevent the RX500 from printing.
■ Keep ink cartridges out of the reach of children and do not drink the ink.
■ Be careful when you handle used ink cartridges; there may be ink remaining around the ink supply port. If ink gets on your skin, wash it off with soap and water. If it gets in your eyes, flush them immediately with water.
■ Don’t put your hand inside the RX500 or touch the cartridge during printing.
■ Don’t move the print head by hand; you may damage the printer.
■ Don’t shake cartridges after you remove them from their packages; this might cause leakage.
■ Install the ink cartridge immediately after you remove it from its package. Leaving the cartridge unpacked for a long time before use may result in reduced print quality.
■ Don’t use a cartridge beyond the date printed on the cartridge package. For best results, use up the ink cartridges within six months of installing them.
■ Store ink cartridges in a cool, dark place. Store each ink cartridge so that the bottom of its package faces down.
■ After bringing an ink cartridge inside from a cold storage site, allow it to warm up at room temperature for at least three hours before using it.
■ Don’t remove or tear the label on an ink cartridge; this can cause leakage.
Important Safety Instructions 127
- Don’t dismantle cartridges or refill them; you could damage the print head.
- Don’t touch the green IC chip on the cartridge. This may affect normal operation and printing.
- If you remove an ink cartridge for later use, protect the ink supply area from dirt and store it in the same environment as the RX500. There is a valve in the ink supply port, making covers or plugs unnecessary, but care is needed to prevent the ink from staining items that the cartridge touches. Don’t touch the ink cartridge ink supply port or surrounding area.
LCD Panel Safety Instructions
- Use only a dry soft cloth to clean the LCD display. Don’t use liquid or chemical cleaners.
- If the LCD display is damaged, contact your dealer.
- If LCD solution gets on your skin, wash it off thoroughly with soap and water. If it gets in your eyes, flush them immediately with water.
128 Requirements and Notices
Legal Notices
FCC Compliance Statement
For United States Users
This equipment has been tested and found to comply with the limits for a Class B digital device, pursuant to Part 15 of the FCC Rules. These limits are designed to provide reasonable protection against harmful interference in a residential installation. This equipment generates, uses, and can radiate radio frequency energy and, if not installed and used in accordance with the instructions, may cause harmful interference to radio or television reception. However, there is no guarantee that interference will not occur in a particular installation. If this equipment does cause interference to radio and television reception, which can be determined by turning the equipment off and on, the user is encouraged to try to correct the interference by one or more of the following measures:
■ Reorient or relocate the receiving antenna.
■ Increase the separation between the equipment and receiver.
■ Connect the equipment into an outlet on a circuit different from that to which the receiver is connected.
■ Consult the dealer or an experienced radio/TV technician for help.
WARNING
The connection of a non-shielded equipment interface cable to this equipment will invalidate the FCC Certification of this device and may cause interference levels which exceed the limits established by the FCC for this equipment. It is the responsibility of the user to obtain and use a shielded equipment interface cable with this device. If this equipment has more than one interface connector, do not leave cables connected to unused interfaces. Changes or modifications not expressly approved by the manufacturer could void the user’s authority to operate the equipment.
For Canadian Users
This Class B digital apparatus complies with Canadian ICES-003.
Cet appareil numérique de la classe B est conforme à la norme NMB-003 du Canada.
Legal Notices 129
Declaration of Conformity
According to 47CFR, Part 2 and 15 for: Class B Personal Computers and Peripherals; and/or CPU Boards and Power Supplies used with Class B Personal Computers:
We: Epson America, Inc. Located at: MS 3-13 3840 Kilroy Airport Way Long Beach, CA 90806 Telephone: (562) 290-5254
Declare under sole responsibility that the product identified herein complies with 47CFR Part 2 and 15 of the FCC rules as a Class B digital device. Each product marketed is identical to the representative unit tested and found to be compliant with the standards. Records maintained continue to reflect the equipment being produced can be expected to be within the variation accepted, due to quantity production and testing on a statistical basis as required by 47CFR §2.909. Operation is subject to the following two conditions: (1) this device may not cause harmful interference, and (2) this device must accept any interference received, including interference that may cause undesired operation.
Trade Name: Epson Type of Product: Multifunction printer Model: C171A
ENERGY STAR Compliance
As an ENERGY STAR® Partner, Epson has determined that this product meets the ENERGY STAR guidelines for energy efficiency. The EPA ENERGY STAR office equipment program is a voluntary partnership with the computer and office equipment industry to promote the introduction of energy-efficient personal computers, monitors, printers, fax machines, and copiers in an effort to reduce air pollution caused by power generation.

130 Requirements and Notices
Epson America, Inc. Limited Warranty
What Is Covered: Epson America, Inc. (“Epson”) warrants to the original retail purchaser that the Epson product covered by this limited warranty statement, if purchased new and used in the United States or Canada, conforms to the manufacturer’s specifications and will be free from defects in workmanship and materials for a period of one (1) year from the date of original purchase. Epson also warrants that the consumable ink cartridges enclosed with the product will perform to the manufacturer’s specified usage, which usage may expire before the expiration of the limited warranty for the Epson product. For warranty service, you must provide proof of the date of original purchase.
What Epson Will Do To Correct Problems: Should your Epson product prove defective during the warranty period, please call the Epson Connection$^{SM}$ at (562) 276-4382 (U.S.) or (905) 709-3839 (Canada) for warranty repair instructions and return authorization. An Epson service technician will provide telephone diagnostic service to determine whether the product requires service. If service is needed, Epson will, at its option, exchange or repair the product without charge for parts or labor. If Epson authorizes an exchange for the defective unit, Epson will ship a replacement product to you, freight prepaid, so long as you use an address in Canada or the U.S. (excluding Puerto Rico and U.S. Possessions). Shipments to other locations will be made freight collect. You are responsible for securely packaging the defective unit and returning it to Epson within five (5) working days of receipt of the replacement. Epson requires a debit or a credit card number to secure the cost of the replacement product in the event that you fail to return the defective one. If your product is being repaired, Epson will direct you to send your product to Epson or its authorized service center, where the product will be fixed and sent back to you. You are responsible for packing the product and for all costs to and from the Epson authorized service center. When warranty service involves the exchange of the product or a part, the item replaced becomes Epson property. The replacement product or part may be new or refurbished to the Epson standard of quality, and, at Epson’s option, may be another model of like kind and quality. Epson’s liability for replacement of the covered product will not exceed the original retail selling price of the covered product. Exchange products and parts assume the remaining warranty period of your original product covered by this limited warranty.
What This Warranty Does Not Cover: This warranty does not apply to refurbished or reconditioned products. This warranty covers only normal use in the United States and Canada. This warranty is not transferable. This warranty does not cover any color change or fading of prints or reimbursement of materials or services required for reprinting. This warranty does not cover damage to the Epson product caused by parts or supplies not manufactured, distributed or certified by Epson. This warranty does not cover ribbons, ink cartridges or third party parts, components, or peripheral devices added to the Epson product after its shipment from Epson, e.g., dealer or user-added boards or components. Epson is not responsible for warranty service should the Epson label or logo or the rating
Epson America, Inc. Limited Warranty 131
label or serial number be removed or should the product fail to be properly maintained or fail to function properly as a result of misuse, abuse, improper installation, neglect, improper shipping, damage caused by disasters such as fire, flood, and lightning, improper electrical current, software problems, interaction with non-Epson products, or service other than by an Epson Authorized Servicer. If a claimed defect cannot be identified or reproduced, you will be held responsible for the costs incurred.
THE WARRANTY AND REMEDY PROVIDED ABOVE ARE EXCLUSIVE AND IN LIEU OF ALL OTHER EXPRESS OR IMPLIED WARRANTIES INCLUDING, BUT NOT LIMITED TO, THE IMPLIED WARRANTIES OF MERCHANTABILITY, NON-INFRINGEMENT OR FITNESS FOR A PARTICULAR PURPOSE. SOME LAWS DO NOT ALLOW THE EXCLUSION OF IMPLIED WARRANTIES. IF THESE LAWS APPLY, THEN ALL EXPRESS AND IMPLIED WARRANTIES ARE LIMITED TO THE WARRANTY PERIOD IDENTIFIED ABOVE. UNLESS STATED HEREIN, ANY STATEMENT OR REPRESENTATIONS MADE BY ANY OTHER PERSON OR FIRM ARE VOID. EXCEPT AS PROVIDED IN THIS WRITTEN WARRANTY, NEITHER EPSON AMERICA, INC. NOR ITS AFFILIATES SHALL BE LIABLE FOR ANY LOSS, INCONVENIENCE, OR DAMAGE, INCLUDING DIRECT, SPECIAL, INCIDENTAL OR CONSEQUENTIAL DAMAGES, RESULTING FROM THE USE OR INABILITY TO USE THE EPSON PRODUCT, WHETHER RESULTING FROM BREACH OF WARRANTY OR ANY OTHER LEGAL THEORY.
In Canada, warranties include both warranties and conditions.
Some jurisdictions do not allow limitations on how long an implied warranty lasts, and some jurisdictions do not allow the exclusion or limitation of incidental or consequential damages, so the above limitations and exclusions may not apply to you. This warranty gives you specific legal rights, and you may have other rights which vary from jurisdiction to jurisdiction.
Epson America, Inc. ■ P.O. Box 93012 ■ Long Beach, CA 90809-3012
132 Requirements and Notices
Index
A Aligning print head, 115 to 117
B Borderless printing, 24, 41 to 42, 51 to 54, 98
C Canceling copies, 27 Cleaning print head, 109 to 110 Color Management, turning off, 45, 50 Color Restoration setting, 58 ColorSync, 45 Copying adjusting shade, 26 borderless photos, 24 canceling, 27 changing copy size, 23, 27 from card to computer, 85 to 88 layout settings, 24 to 25 number of copies, 22 paper size, 23 paper type, 22 print quality, 23 problems, 121 to 123 restoring defaults, 27 saving settings, 26 thick documents, 20, 29 with a computer, 28 to 33
D Date, adding to prints, 103 Declaration of Conformity, 130 Default settings, 27, 38 Digital noise, removing, 100 Documentation, description, 10 DPOF images, printing, 94 to 96
E Editing scanned text, 59 E-mail, scanning files to, 59, 81 to 82 Envelopes, 17 to 18 EPSON Scan, starting, 61, 64 Exif Print, 7, 100
F Fax, scanning to, 59 FCC statement, 129 Film holder, 75 to 77 Film, scanning, 74 to 79 Fit to Frame setting, 104 Full Auto Mode, 63
H Help, 123 to 124 Hi Speed setting, 105 Home Mode, 63, 64 to 66
133
I Index forms, 89 to 93 Ink cartridge ordering, 111 to 112 replacing, 111 to 114 safety instructions, 127 to 128 Ink Jet Transparencies, loading, 15 Iron-On Transfer Paper, loading, 16
L Layout settings copy, 24 to 25 print, 40, 45, 98
M Macintosh automatic photo copying, 86 to 88 color management settings, 45, 50 controlling printing, 45 to 46, 48 page layout settings, 43, 45, 47 photo printing, 51 to 54 print quality, 45, 48 removing memory card, 85 system requirements, 125 Marquee, adjusting, 67
Memory cards adding date to prints, 103 adding time to prints, 103 compatible, 83 copying files to and from, 85 to 88 digital noise, 100 Fit to Frame setting, 104 Hi Speed setting, 105 inserting and removing, 84 to 85 layout settings, 98 paper type settings, 96 to 97 print information, adding, 104 printing DPOF images, 94 to 96 requirements, 83 scanning to, 105 to 107 selecting photos, 92 to 94 sepia tone, 99 Monitoring printing, 38, 45 to 46, 48 Moving RX500, 118 to 119
N Nozzle check, printing, 110
134 Index
P
Paper copy settings, 22 feed problems, 122 for borderless printing, 51 loading, 13 to 16 memory card settings, 96 to 97 ordering, 124 settings in printer driver, 54 to 55 Photo RPM, 39, 49, 50 Photo Stickers, loading, 16 Photos printing, 41 to 42, 51 to 54 restoring color, 58, 68 to 74 sharing on web, 59 Previewing scans, 65 Print head aligning, 115 to 117 cleaning, 109 to 110 PRINT Image Matching, 7, 100 Print quality, 23, 37, 39, 45, 48, 49, 50 Problems copy quality, 122 to 123 copying, 121 to 122 paper feeding, 122 Professional Mode, 63, 64 to 66
R
Red-eye correction, 58 Resolution, enhancing, 100 Restoring color in photos, 58, 68 to 74 Restoring default setting, 27
S
Safety instructions, 126 to 128 Scanning adjusting image size, 67 film and slides, 74 to 79 Full Auto Mode, 63 Home Mode, 63, 64 to 66 previewing scans, 65 Professional Mode, 63, 64 to 66 to application, 59, 63 to 66 to editable text, 59 to e-mail, 59, 81 to 82 to fax, 59 to file, 60 to 62, 79 to 80 to memory card, 105 to 107 Sepia tone, printing with, 99 Slides, scanning, 74 to 79 SmartPanel copying, 28 to 33 using, 58 to 59 Software, description, 11 Supplies, ordering, 124 Support, 123 to 124 System requirements, 125
T
Technical support, 123 to 124 Text files, scanning to, 59 Time, adding to prints, 103 Transporting RX500, 118 to 119
Index 135
W Warranty, 131 to 132 Windows automatic photo copying, 86 to 87 controlling printing, 38 default settings, 38 page layout settings, 40 photo printing, 41 to 42 print quality, 37 system requirements, 125
136 Index
Epson Stylus Photo RX500 Parts

How To Order Epson Ink and Paper
To order Epson ink cartridges and paper, contact your dealer or call the Epson Store at (800) 873-7766, or visit www.epsonstore.com (U.S. sales only). In Canada, please call (800) 463-7766 for dealer referral.
Epson Ink Cartridges
Black: T048120
Cyan: T048220
Light Cyan: T048520
Magenta: T048320
Light Magenta: T048620
Yellow: T048420
Epson Papers
| Paper name | Size | Part number |
|---|---|---|
| Epson Premium Bright White Paper | Letter (8.5 x 11 inches) | S041586 |
| Epson Photo Quality Ink Jet Paper | Letter (8.5 x 11 inches) | S041062 |
| A4 (8.3 x 11.7 inches) | S041061 | |
| Legal (8.3 x 14 inches) | S041067 | |
| Epson Photo Paper | Panoramic (8.3 x 23 inches) | S041145 |
| Epson Glossy Photo Paper | Borderless 4 x 6 inches, non-perforated | S041458 |
| 4 x 6 inches, perforated edges | S041134/S041671 | |
| Letter (8.5 x 11 inches) | S041141/S041649/S041272/S041271 | |
| Epson ColorLife Photo Paper | Letter (8.5 x 11 inches) | S041500 |
| Epson Matte Paper Heavyweight | Borderless 8 x 10 inches | S041467 |
| Letter (8.5 x 11 inches) | S041257 | |
| Epson Double-Sided Matte Paper | Letter (8.5 x 11 inches) | S041568 |
| Epson Premium Glossy Photo Paper | Letter (8.5 x 11 inches) | S041286/S041667 |
| Borderless 4 x 6 inches | S041727 | |
| Borderless 5 x 7 inches | S041464 | |
| Borderless 8 x 10 inches | S041465 | |
| Epson Premium Semigloss Photo Paper | Letter (8.5 x 11 inches) | S041331 |
| Epson Premium Luster Photo Paper | Letter (8.5 x 11 inches) | S041405 |
| Epson Photo Quality Self Adhesive Sheets | A4 (8.3 x 11.7 inches) | S041106 |
| Epson Ink Jet Transparencies | Letter (8.5 x 11 inches) | S041064 |
| Epson Iron-On Transfer Paper | Letter (8.5 x 11 inches) | S041153 |
| Epson Glossy Photo Greeting Card Kit | Letter (8.5 x 11 inches) | S041606 |
| Epson Semigloss Scrapbook Photo Paper | Letter (8.5 x 11 inches) | SCR1001 |
| PremierArt Matte Scrapbook Photo Paper for Epson | Letter (8.5 x 11 inches) | SCR1002 |
Epson Stylus Photo RX500 Parts

How To Order Epson Ink and Paper
To order Epson ink cartridges and paper, contact your dealer or call the Epson Store at (800) 873-7766, or visit www.epsonstore.com (U.S. sales only). In Canada, please call (800) 463-7766 for dealer referral.
Epson Ink Cartridges
Black: T048120
Cyan: T048220
Light Cyan: T048520
Magenta: T048320
Light Magenta: T048620
Yellow: T048420
Epson Papers
| Paper name | Size | Part number |
|---|---|---|
| Epson Premium Bright White Paper | Letter (8.5 x 11 inches) | S041586 |
| Epson Photo Quality Ink Jet Paper | Letter (8.5 x 11 inches) | S041062 |
| A4 (8.3 x 11.7 inches) | S041061 | |
| Legal (8.3 x 14 inches) | S041067 | |
| Epson Photo Paper | Panoramic (8.3 x 23 inches) | S041145 |
| Epson Glossy Photo Paper | Borderless 4 x 6 inches, non-perforated | S041458 |
| 4 x 6 inches, perforated edges | S041134/S041671 | |
| Letter (8.5 x 11 inches) | S041141/S041649/S041272/S041271 | |
| Epson ColorLife Photo Paper | Letter (8.5 x 11 inches) | S041500 |
| Epson Matte Paper Heavyweight | Borderless 8 x 10 inches | S041467 |
| Letter (8.5 x 11 inches) | S041257 | |
| Epson Double-Sided Matte Paper | Letter (8.5 x 11 inches) | S041568 |
| Epson Premium Glossy Photo Paper | Letter (8.5 x 11 inches) | S041286/S041667 |
| Borderless 4 x 6 inches | S041727 | |
| Borderless 5 x 7 inches | S041464 | |
| Borderless 8 x 10 inches | S041465 | |
| Epson Premium Semigloss Photo Paper | Letter (8.5 x 11 inches) | S041331 |
| Epson Premium Luster Photo Paper | Letter (8.5 x 11 inches) | S041405 |
| Epson Photo Quality Self Adhesive Sheets | A4 (8.3 x 11.7 inches) | S041106 |
| Epson Ink Jet Transparencies | Letter (8.5 x 11 inches) | S041064 |
| Epson Iron-On Transfer Paper | Letter (8.5 x 11 inches) | S041153 |
| Epson Glossy Photo Greeting Card Kit | Letter (8.5 x 11 inches) | S041606 |
| Epson Semigloss Scrapbook Photo Paper | Letter (8.5 x 11 inches) | SCR1001 |
| PremierArt Matte Scrapbook Photo Paper for Epson | Letter (8.5 x 11 inches) | SCR1002 |