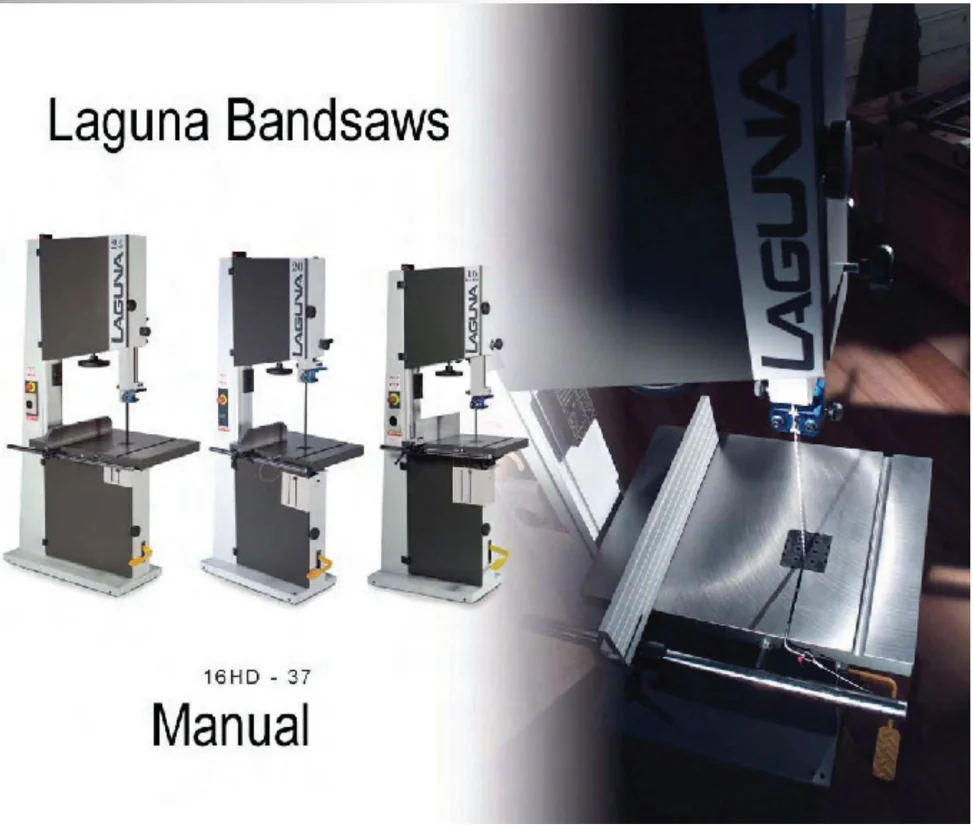
LAGUNA BANDSAWS
16HD-37 MANUAL
LAGUNA TOOLS 2072 Alton Parkway Irvine, California 92606 Ph: 800.234.1976 www.lagunatools.com
© 2018, Laguna Tools, Inc. LAGUNA® and the LAGUNA Logo® are the registered trademarks of Laguna Tools, Inc. All rights reserved.
This page is blank.
Chapter 1.Safety rules and warranty Pg. 4-5
Chapter 2.Getting to know your bandsaw Pg. 6-13 Specification Pg. 6 Noise emission Pg. 7 Receiving your machine Pg. 7 Introduction to bandsaws Pg. 8 What you will receive with your machine Pg. 9 Parts of the bandsaw Pg. 10-13 Where to locate your bandsaw Pg. 13
Chapter 3. Assembling your bandsaw Pg. 14-36 Unpacking your machine Pg. 14-15 Assembling your bandsaw Pg. 16-22 Adjusting the bandsaw Pg. 23-36
Chapter 4. Using your bandsaw Pg. 37-40
Chapter 5. Blades Pg. 41-39 Introduction Pg. 41 Blade terms Pg. 41-36 Blade selection Pg. 36-48
Chapter 6. Maintenance and troubleshooting Pg. 49-56
Chapter 7. Accessories Pg. 57
Chapter 8. Electrical drawings Pg. 58-62
Chapter 9. Spare parts and exploded view drawings Pg. 63-64
3
Read First!!!
Safety Rules
As with all machinery there are certain hazards involved with the operation and use. Using each one with caution will considerably lessen the possibility of personal injury. However, if normal safety precautions are overlooked or ignored, personal injury to the operator may result. If you have any questions relative to the installation and operation, do not use the equipment until you have familiarized yourself with the machine.
Read carefully before operating the band saw
- Keep the working area clean and be sure adequate lighting is available.
- Do not wear loose clothing, gloves, bracelets, necklaces or ornaments. Wear face, eye, respiratory and body protection devices as indicated for the opera tion or environment.
- Be sure that the power is disconnected from the machine before making adjustments or fitting and removing an attachment.
- Never leave the machine with the power on.
- Do not use dull, gummy or cracked blades.
- Be sure that the keys and adjusting wrenches have been removed and all the nuts and bolts are secured.
Limited Warranty
New machines and accessories sold by Laguna Tools carry a one-year warranty effective from the date of shipping. Machines sold through dealers must be registered with Laguna Tools within 30 days of purchase to be covered by this warranty. Laguna Tools guarantees all new machines and accessories sold to be free of manufacturers' defective workmanship, parts and materials. We will repair or replace, without charge, any parts determined by Laguna Tools, Inc. to be a manufacturer's defect. We require that the defective item/part be returned to Laguna Tools with the complaint. Any machines returned to Laguna Tools must be returned with packaging in the same manner in which it was received. If a part or blade is being returned it must have adequate packaging to ensure no damage is received during shipping. In the event the item/part is determined to be damaged due to lack of maintenance, cleaning or misuse/abuse, the customer will be responsible for the cost to replace the item/part, plus all related shipping charges. This limited warranty does not apply to natural disasters, acts of terrorism, normal wear and tear, product failure due to lack of maintenance or cleaning, damage caused by accident, neglect, lack of or inadequate dust collection, misuse/abuse or damage caused where repair or alterations have been made or attempted by others.
Laguna Tools, Inc. is not responsible for additional tools or modifications sold or performed (other than from/by Laguna Tools, Inc.) on any Laguna Tools, Inc. machine. Warranty maybe voided upon the addition of such described tools and/or modifications, determined on a case-by-case basis.
Software purchased through Laguna Tools Inc. is not covered under this warranty and all technical support must be managed through the software provider. Software is non-refundable.
Normal user alignment, adjustment, tuning and machine settings are not covered by this warranty. It is the responsibility of the user to understand basic machinery operation, settings and procedures and to properly maintain the equipment in accordance with the standards provided by the manufacturer.
Parts, under warranty, are shipped at Laguna Tools, Inc.'s cost either by common carrier, FEDEX ground service or a similar method. Technical support to install replacement parts is primarily provided by phone, fax, e-mail or Laguna Tools Customer Support Website. The labor required to install replacement parts is the responsibility of the user.
Laguna Tools is not responsible for damage or loss caused by a freight company or other circumstances not in our control. All claims for loss or damaged goods must be notified to Laguna Tools within twenty-four hours of delivery. Please contact our Customer Service Department for more information.
Only new machines sold to the original owner are covered by this warranty. For warranty repair information, call 1-800-332-4094.
Bandsaw Specifications (02/28/2008)
| Model | 16HD classic | 16HD | LT18 | Resaw Master | LT20 | LT24x17 | LT24x24 | LT28 | LT32 | LT37 |
|---|---|---|---|---|---|---|---|---|---|---|
| HP | 4.5 | 4.5 | 4.5 | 6 | 6 | 6 | 6 | 7-1/2 | 10 | 15 |
| Resaw | 13 | 16 □/□ | 18 3/8 | 18 | 20 3/8 | 17 5/8 | 24 | 18 | 20 | 24 |
| Weight (net)lbs | 435 | 465 | 510 | 561 | 585 | 725 | 755 | 1034 | 1137 | 1610 |
| Volts | *220 | *220 | *220 | *220 | *220 | *220 | *220 | 220 3φ | 220 3φ | 220 3φ |
| Amp Breaker | 30 | 30 | 30 | 50/1φ 30/3φ | 50/1φ 30/3φ | 50/1φ 30/3φ | 50/1φ 30/3φ | 35/3φ | 40/3φ | 50/3φ |
| Min blade | *1/16 | *1/16 | *1/16 | †3/8-1 3/8 | *1/8 | *1/8 | *1/8 | *1/8 | *1/8 | *1/8 |
| Max blade | 1 3/8 | 1 3/8 | 1 3/8 | 2 | 1 1/8 | 1-1/2 | 1-1/2 | 1-3/4 | 1-3/4 | 2 |
| Throat | 15-1/2 | 15-1/2 | 17 | 17 | 19 | 23-1/4 | 23-1/4 | 27 | 30-1/2 | 36 |
| Table size | 16-1/2x22-3/4 | 16-1/2x22-3/4 | 19x25 | 19x25 | 19x25 | 24x34-1/2 | 24x34-1/2 | 28x38 | 28x42 | 24x34-1/2 |
| Blade length | 145 | 150 | 158 | 161 | 176 | 183 | 201 | 201 | 227 | 261 |
| Table height | 33-1/2 | 33-1/2 | 33-1/2 | 33-1/2 | 35 | 35 | 35 | 37 | 38-1/2 | 42 |
| Height | 76-1/2 | 76-1/2 | 77-1/2 | 77 | 86 | 96 | 96 | 87 | 99 | 113 |
| Rack/pin | YES | YES | YES | YES | YES | YES | YES | YES | YES | YES |
| Foot brake | YES | YES | YES | YES | YES | YES | YES | YES | YES | YES |
| Guides | LG | LG | LG | LG | LG | LG | LG | LG | LG | LG |
| Base size | 15x27 | 15x27 | 15X27 | 15x27 | 15x29 | 15x41 3/8 | 15x41 3/8 | 15-3/4x41 3/8 | 21x47 | 23x54 |
All length in inches
Laguna Tools (LG)
- = With optional cool block kit.
- = 1 or 3 phase available.
† = With optional longer lower thrust shaft
φ = phase
Electrical subject to change base on special motor request (if available) and/or electrical codes in your local area.
Noise emission
Notes concerning noise emission: Given that there exists a relationship between noise level and exposure times, it is not precise enough to determine the need for supplementary precautions. The factors affecting the true level of exposure to operators are clearly the amount of time exposed, the characteristics of the working environment, other sources of dust and noise, etc.: for example, adjacent machines, in other words the level of ambient noise. It is possible that exposure level limits will vary from country to country.
Measuring system Standard ISO 7960 - annex J ( NFE 64-209 )
| Measuring system | Standard ISO 7960 - annex J ( NFE 64-209 ) | |
|---|---|---|
| Measurements tolerance | < 4 dB | |
| Working, without aspiration | ||
| L Aeq | LW (A) | Lpc |
| 84,7 dB (A) | 97,1 dBw (A) | 5,1 mW (A) < 130 dB (A) |
Receiving your machine
Note: It is probable that your machine will be delivered by a third party. Before you unpack your new bandsaw you will need to first inspect the packing, invoice and shipping documents supplied by the driver. Insure that there is no visible damage to the packing or the machine. You need to do this prior to the driver leaving. All damage must be noted on the delivery documents and signed by you and the delivery driver. You must then contact the seller [Laguna Tools] as soon as practical. If damage is found after delivery, contact the seller as soon as practical.

I ntroduction to bandsaws
This bandsaw is designed to give you years of safe service. Read this owner's manual in its entirety before assembly or use.
The bandsaw is generally defined as a saw blade in the form of an endless steel band that rotates around two or more wheels. This blade is a continuous metal band with teeth on one side. As the wheels rotate, so does the band, which creates the continuous sawing action. Because the direction of the blade is always downward toward the table, there is little danger [except for special cuts] that the wood will be thrown back at the operator, which is called a kickback. There is always danger of kickback when a circular saw is being used. For safety reasons many woodworkers prefer the bandsaw especially when cutting small pieces. The unique feature of the bandsaw is that the work piece can be rotated around the blade creating a curve. It is the tool most often used when curves have to be cut in wood. Because the bandsaw blade is fairly thin, it can cut thick stock with a minimum of horsepower. For this reason the bandsaw is often used when valuable pieces of wood are made into a thin piece of veneer.
8
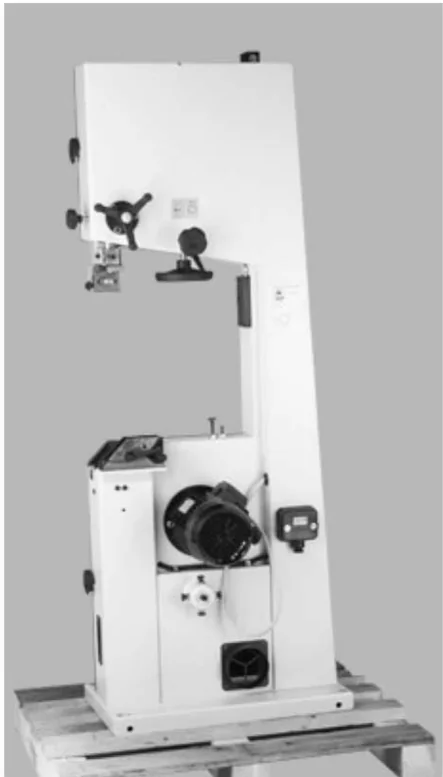
What you will receive with the bandsaw.
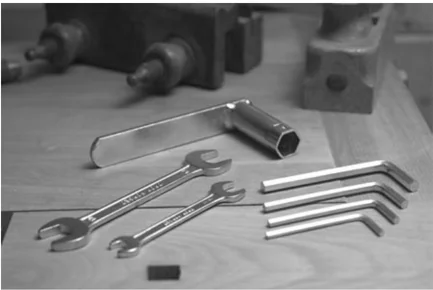
Tool Kit
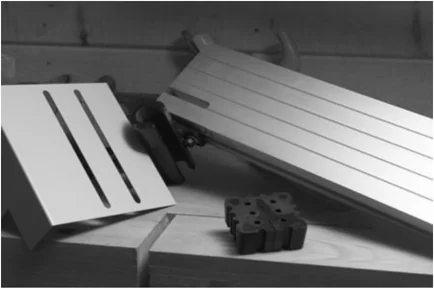
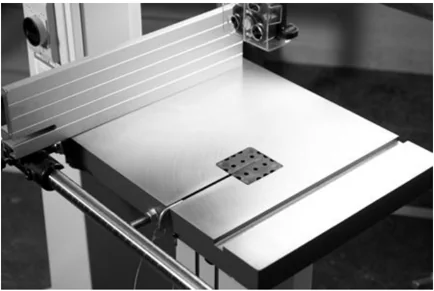
Fence, table insert, and door guard
Table
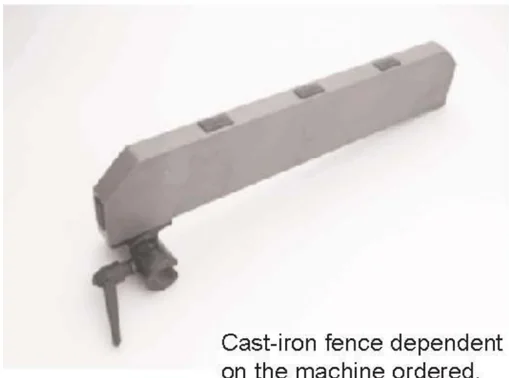
Cast-iron fence dependent on the machine ordered.
Parts of the bandsaw
The bandsaw does not have many parts. The major parts are discussed in this manual. If you are not familiar with the bandsaw, take the time to read this section and become familiar with the machine.
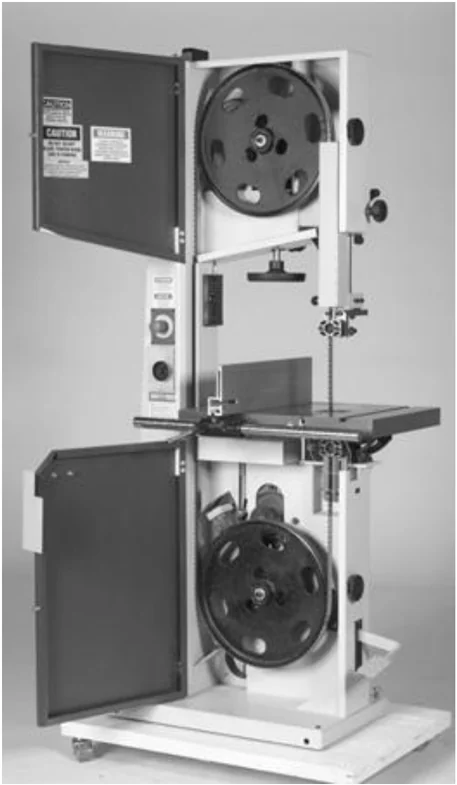
Flywheel
The blade is suspended over two wheels that are covered with rubber called a tire. The tire cushions the blade and protects the teeth from coming in contact with the metal of the flywheel. The lower wheel is the drive wheel and is attached to the motor with a rubber drive belt. The lower flywheel powers the blade and pulls the blade down through the work piece. The top wheel has two functions. One function is to balance or track the blade on the wheels, and the second one is to tension the blade. Both functions are adjustable.
10
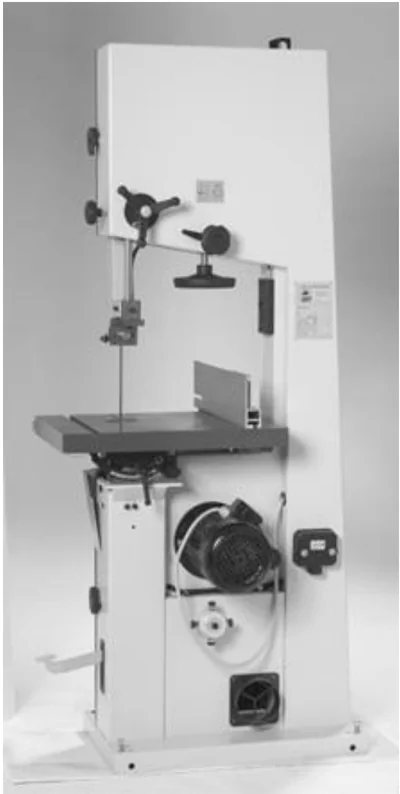
Body
The body of the bandsaw is a "U"-shaped frame, which houses all the parts of the machine. This is the heart of the bandsaw and has to be very rigid as it takes the strain of the blade being tensioned.
Table
The table supports the workpiece and can tilt to produce cuts at various angles. It has a groove to the right-hand side of the blade which is used to guide the miter gauge. In the center there is a plastic table insert which the blade passes through. Should the blade wander off center, this table insert will protect the blade from damage as it is soft and will not damage the blade. The table also supports the adjustable fence, which is used for parallel cuts. There is an aligning pin, which joins both sides of the table and stops the table from warping [attached by a wire]. The pin must always be fitted in the table and only removed when removing or fitting a blade.
Blade guides
There are two sets of blade guides, one above and one below the table. The function of the guides is to give the blade stability and ensure that the blade movement left / right, forward / back is kept to a minimum. The guides above the table are fitted to a shaft that has vertical adjustment. The upper guides are adjustable so that the guides are held just above the job being cut. This gives the blade the maximum amount of stability and also keeps the amount of blade that is exposed to a minimum. If you are using blades narrower than 1/4", you will need to purchase a cool block guide system.
Guards
When running, the blade can be very dangerous and the amount of blade that is exposed must be kept to a minimum. The machine is supplied with a number of guards all of which MUST be installed and used while the machine is running. There is a guard that is attached to the lower door and is adjustable vertically once the door is closed. There is a hinged guard on the guide vertical adjustment shaft. The guard is only opened to install or remove the blade. There is a clear plastic guard on the upper blade guide. This guard must be adjusted just above the wood being cut.
Drive
The drive [power] is supplied to the machine by an electric motor located at the back of the machine. It powers the lower flywheel through a rubber drive belt and is controlled by switches that are mounted on the frame vertical post at the front of the machine. It is also controlled by switches on the upper door and the
foot brake.
Electrical connection
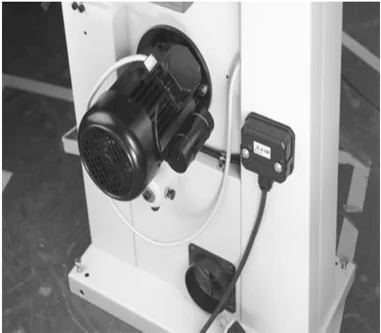
This is achieved by connecting the electrical supply to a terminal box located at the back of the machine. Never connect directly to the electrical motor, and all electrical connections must be conducted by a qualified electrician. For detailed instructions see the assembly section of the manual.
Brake
The machine is supplied with a foot brake. It is located close to the ground on the righthand side of the machine. It has two functions. First, to remove the power to the motor, which is achieved with a switch that is mounted on the body of the machine. The second function is to slow the lower flywheel and this is achieved by applying a brake pad to the flywheel. The more pressure that is applied, the faster the flywheel slows.
Dust collection
The bandsaw produces a lot of sawdust, so extraction is very important. This is achieved by connecting a dust extraction hose to the back of the machine with a minimum capacity of 1,000 CFM.
Identification
There is a plate at the back of the machine listing all the manufacturing data including the serial number, model, blade length etc.
Tension scale
Tension scales are designed to indicate the compression of a spring. As a rule, the greater the spring compression, the greater the tension on the blade. The tension scale does not register until the blade is relatively taut and is located on the inside of the body vertical post. The tension scale is a general reference and not a rule.
Tilt and tension mechanism
The upper wheel is attached to the tilt and tension mechanism. This mechanism adjusts the wheel so that the bandsaw blade can be adjusted for tracking. This is achieved by a screwed handle at the back of the machine that pushes on the mechanism and adjusts the axis of the wheel so that it runs true with the lower wheel. The second function is to tension the blade, which is achieved by adjusting the upper flywheel vertically. A handle is located below the wheel
and, when rotated, will move the wheel up or down. The mechanism has a spring, which helps to keep the tension constant as the blade expands and contracts with the heat generated by the cutting action. The lower flywheel is also adjustable for tracking and has 4 bolts at the back of the machine that adjust the wheel shaft. The lower wheel is factory set and should not need adjustment.
Fence
The fence is located to the left of the blade and is used to assist in parallel cuts. It is adjustable for the drift of the blade and also the thickness of the cut.
Where to locate your bandsaw
Before you remove your bandsaw from the pallet, select the area where you will use your machine. There are no hard and fast rules for its location but below are a few guidelines.
- There should be an area at the front and back of the machine suitable for the length of wood that you will be cutting. If you intend to use your saw for scrollwork, this may not be important but should be considered at this stage.
- Adequate lighting. The better the lighting, the more accurate and safely you will be able to work
- Solid floor. You should select a solid flat floor, preferably concrete or something similar.
- Close to power source and dust collection.
Unpacking your machine
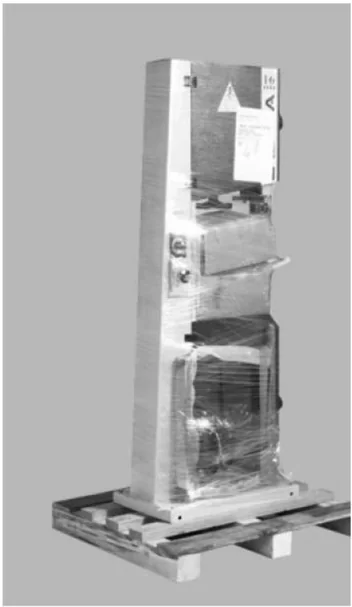
To unpack your machine, you will need tin snips, knife and a wrench.
- Using the tin snips, cut the banding that is securing the machine to the pallet. WARNING: EXTREAM CAUTION MUST BE USED BECAUSE THE BANDING WILL SPRING AND COULD CAUSE INJURY.
- Lift the box off and discard.
- Using the knife, cut the plastic wrap from the top. The table, motor, fence and accessories that were ordered could be attached to the side of the machine and extreme caution must be taken that the parts do not fall and cause injury or damage. Remove them in order from the top and set aside.
- Place the motor on the pallet behind the machine. Ensure that there is no tension on the motor wiring. It is recommended that the motor be assembled to the bandsaw prior to removing the bandsaw from the pallet [see mounting motor]. If you decide to remove the bandsaw prior to assembling the motor to the bandsaw, ensure that there is no tension on the motor wiring at any stage of the operation.
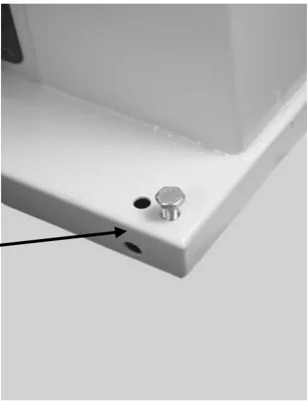
- Remove the base mounting bolts that secure the machine to the pallet [shown removed].
- It is recommended that the machine be removed from the pallet by lifting it with a hoist or forklift. There is an eyebolt at the top of the machine, and this should NEVER be used to lift the machine. It is used to secure the machine horizontally during ship ping only and is not designed to take the load of the machine.
Place a sling through the bandsaw as shown below behind the tension-adjusting wheel and lift vertically.
Remove the pallet and lower to the floor.
The machine can be lifted using a forklift truck, sliding it onto the forks or by using a forklift "SLING", as shown with a lifting capability of 2,000 Kg (440lb).
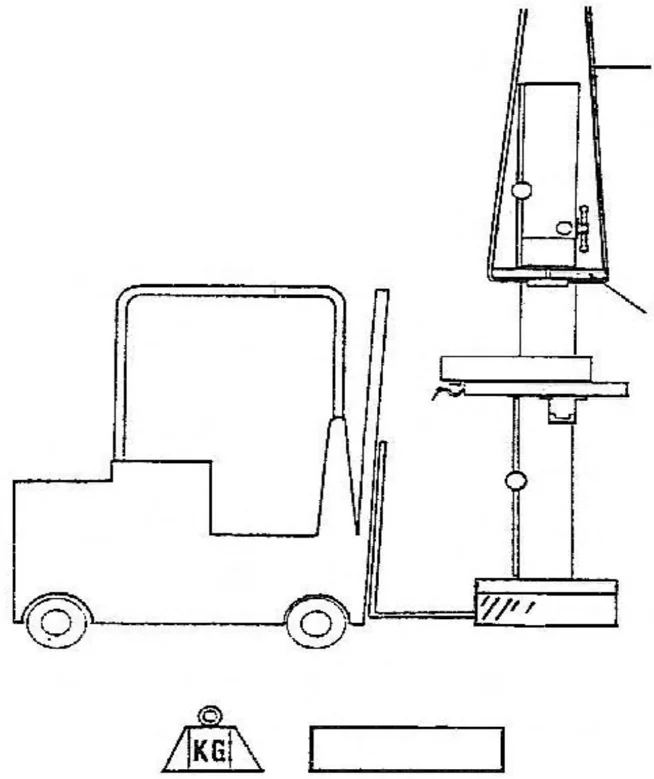
If no lifting device is available, the machine can be removed from the pallet as follows: Note: The machine is heavy, and if you have any doubt about the described procedure, seek professional assistance. Do not attempt any procedure that you feel is unsafe or that you do not have the physical capability of achieving. With two or more people, move the machine so that the base of the bandsaw is over the edge of the pallet. Tilt the bandsaw away from the pallet so that the base of the machine touches the floor, slide the pallet from under the machine and then move the bandsaw to the vertical position so that it is completely resting on the floor
15
Mounting the motor
Two people are required to assemble the motor to the bandsaw; build up wooden blocks to the right height to rest the motor on. One person holds the motor in position, and the other will fit the drive belt and the bolts.
- Remove the two mounting nuts on the rear of the machine. Make sure that there are washers between the bolts and the inside face of the machine.
- Hold the bolts to prevent them pushing through.
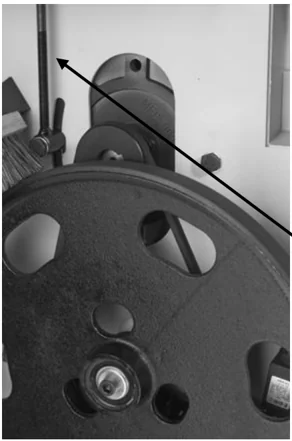
- Using a block to support the motor, guide the motor onto the mounting bolts. Insure that the drive belt is on both the motor pulley and the fly wheel pulley. The drive belt can be fitted later if you prefer, but it is preferable to assemble it at this stage. If you decide to fit the drive belt after fitting the motor, you will have to adjust the motor to its lowest position and once fitted the motor back up to the tensioned position.
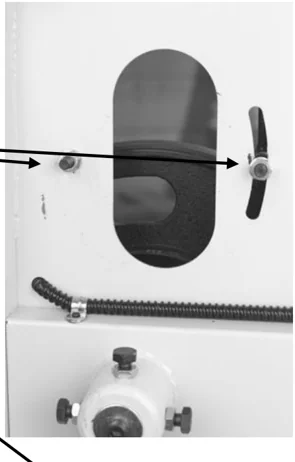
Belt tensioning bolt
- Once the belt is mounted on both the pulley "V" grooves, apply tension by adjusting the tensioning bolt, using the supplied 17 mm wrench. The correct tension is 3/16" deflection when using your thumb on one side of the belt. If the tension is too tight, you will experience motor strain: if it is too loose you will experience belt slippage and lack of power. After a few hours of operation it is necessary to check that the tension is correct, as the belts will bed into the "V" grooves. As a guide, the belt should have the same tension/deflection as the fan or alternator belt on your car.
16
Mobility kit
If you have purchased a mobility kit, now is the ideal time to fit it as the table has not been fitted to the machine and the bandsaw is lighter, but the mobility kit can be fitted later if you require it.
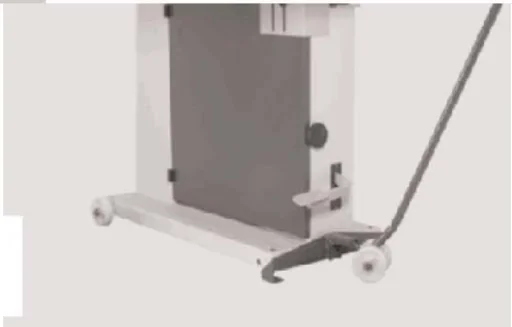
Mobility kit assembly procedure
- Rest the bandsaw on a 2" X 4" wood or something similar.
- Fit the shaft through the base of the bandsaw.
- Fit the wheels, washers and split pins as shown on both sides of the base.
- Fit the front bracket as shown. Note the number of holes in the bracket may vary depending on the bracket supplied.
Note: The mobility kit may be supplied with 2 spacers that are used to adapt it for other machines. Discard the spacers.
Note: Leveling bolts and a flat head counter sunk screw are provided with the machine. If you are fitting a mobility kit you will not need the bolts/screw. Discard them.
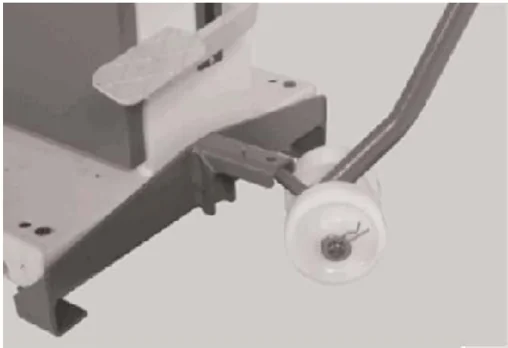
Close up of the back wheel assembly.
17
Installing the Table
Two people are required to mount the table to the machine.
- Remove the lock-down bolt, handle and the pin from the trunnion.
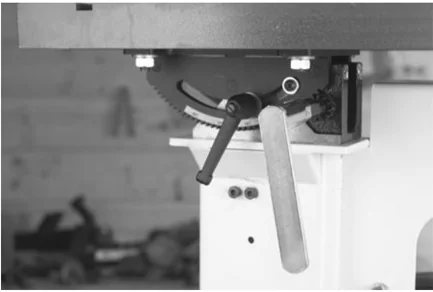
- Position the table on the trunnion, taking care not to damage any of the table or trunnion surfaces.
- While one person supports the table, the other person feeds the bolts and the lock down through the trunnion slots.
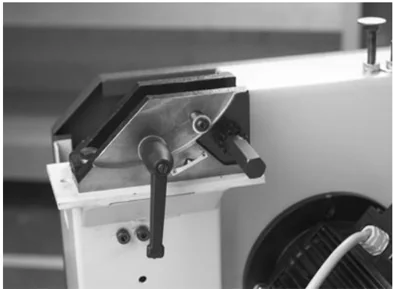
- The table can be tilted to a maximum of 45 degrees away from the column. To angle the table, remove the table insert to allow the blade to pass through the hole. Loosen the lock-down handle, using the supplied wrench. Crank the trunnion gear so that the table moves to the required angle and lock in position. To return the table to the zero position, reverse the procedure.
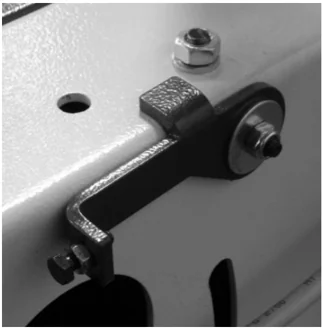
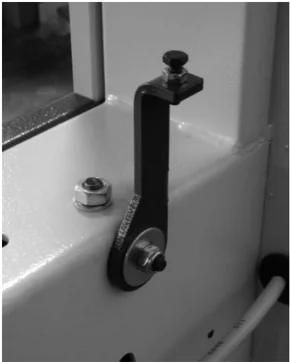
The bandsaw is supplied with a zero stop that is adjustable and comes factory set
Table insert
The machine is supplied with a removable table insert. The holes of the insert improve the dust collection near the blade. Adjusting screws at the bottom of the table allows the insert to be adjusted vertically so that the level between the table and the insert are level. It is recommended that the insert be replaced when the slot becomes
Insert
18
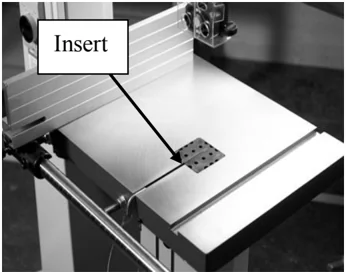
too wide; this will ensure that the job is supported efficiently and safely. When the insert is replaced, you will have to sand the sides so that the insert fits correctly in the table hole. You will also have to cut the blade slot to suit your machine.
19
Fence
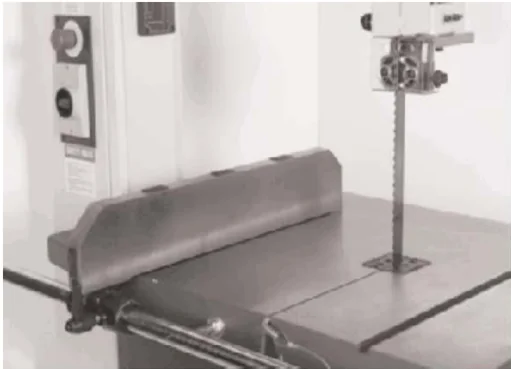
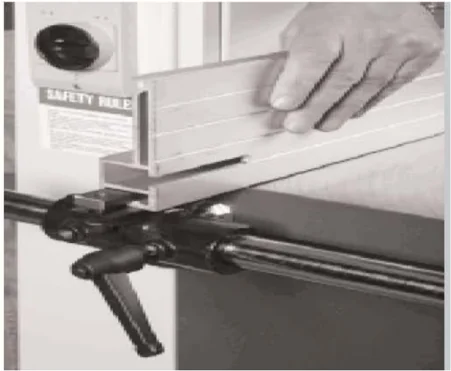
The bandsaw is supplied with a cast iron or aluminum fence depending on the machine that you purchased. Assemble the fence to the cast-iron bracket with the bolts and steel block provided. Adjustment and squaring of the fence will be covered later in the manual. Slide the bracket onto the round steel bar [attached to the table]. The fence is used to the left of the blade, so ensure that it is on the correct side of the table before locking in position with the ratchet handle provided. Note: The aluminum fence can be fitted so that it can be used in high or low position [also covered later in the manual]..
Dust collection
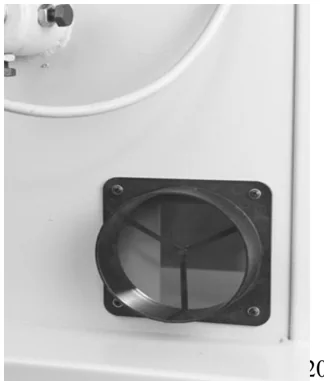
The bandsaw must be connected to a dust collection system or machine. As a general rule the stronger the extraction, the better; but 1,000 cubic feet a minute is the minimum that should be used. The diameter of the dust collection port on the bandsaw is 4". Most US standard hoses are 4" in diameter. You can purchase a step-down adaptor from Laguna Tools or from your local hardware store in the plumbing or heating department if you use a smaller hose.
Bottom blade guard
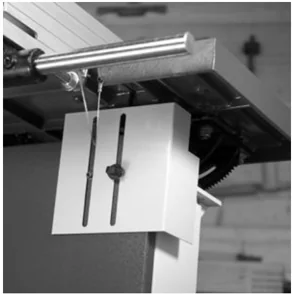
It is very important to have the blade covered for safety. A guard is provided at the top of the lower door. This guard must be moved vertically and clamped in position before operating the bandsaw. To open the door, the guard will have to be lowered. Should the blade break, this guard protects the operator from the blade escaping under the table. To assemble the guard remove the thumbscrew that you will find stored on the inside of the door.
 Align the guard on the bolt and install the thumbscrew on the outside of the door.
Foot brake
A foot brake is attached to an arm inside the machine with two bolts. As it is moved down, a switch removes power to the motor. Continued downward movement contacts a brake pad that slows the lower flywheel. Should the blade break the foot brake only slows the lower flywheel and the upper flywheel may still be rotating, so care must be exercised when opening the doors. To assemble the foot brake, remove the bolts from the arm inside the bandsaw. Push the foot brake through the slot on the side of the bandsaw and assemble to the arm with the two screws.
Leveling the bandsaw
After you have located your bandsaw in its final position, you will have to level it [only applicable if you have not fitted a mobility kit]
- Place a spirit level on the table. You will have to level the saw in both directions [parallel with the saw blade and at 90 degrees to the saw blade].
- The base of the machine is provided with four threaded leveling holes and bolts. You can also bolt the machine to the floor [bolts not provided]
- If you decide to bolt the machine to the floor, you will have to level it with shims [shims not provided]. Do not over tighten the machine to the floor, as it could cause the machine to vibrate.
- When leveling the machine that is not bolted to the floor, insert the leveling bolts into the 4 corner holes. Make sure that you use the headless screw in the hole at the front on the lower door. If you use a bolt with a
 21
 21
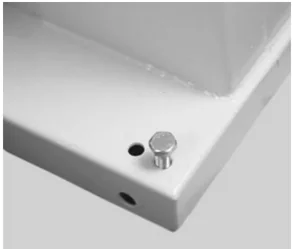
head, the door will not be able to be opened. 5. Adjust the bolts so that the machine is level in both planes and does not rock.
22
Electrical connection
Note the machine is not supplied with an electrical cord or plug, as the size of the cable and the type of plug will be dependent on the installation.
A qualified electrician must carry out the electrical installation. The main connection should be made using the terminal box shown. Ensure that the main supply corresponds with that of the machine, single phase or three-phases. Use wiring suitable for the power of the motor, which is 230 volts, and the cable is required.
All machines require the minimum of a 30-amp circuit breaker regardless of the phase.
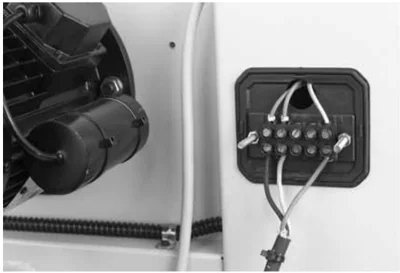
Connect the electrical wires to the terminals opposite the wires going to the machine. On a single-phase machine you will find 3 wires. On a 3-phase machine you will find 4. On the machine you will see a wire that is yellow and green, which is the ground wire; the other colored wires are power. In either 1-phase or 3-phase it does not matter what color combination you use. Green is ground; all other wiring is power (there is no neutral). On single-phase the wiring can be interchanged as you wish; it would not affect the rotation of the
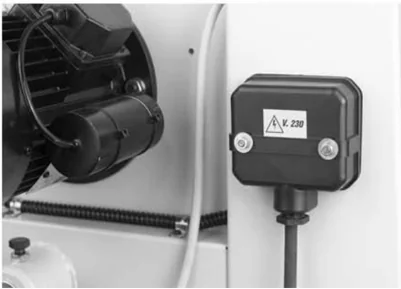
motor. The direction of rotation of machines with a single phase supply is predetermined during production. On a 3-phase machine the lower wheel must rotate in a clockwise rotation. If it rotates in a counterclockwise direction you need to swap locations of 2 of the power leads, and it will rotate in the correct direction.
24
Before starting the machine
- Read and understand the instruction manual before operating the saw.
- If you are still not thoroughly familiar with the operation of the bandsaw, get advice from a qualified person.
- Make sure the machine is properly grounded and that the wiring codes are followed.
- Do not operate the bandsaw while under the influence of drugs, alcohol, medicine or if tired.
- Always wear eye protection, safety glasses or a safety shield, and hearing protection.
- Wear dust mask; long-term exposure to the fine dust created by the band saw is not healthy.
- Remove your tie, rings, watch and all jewelry. Roll up your sleeves; you do not want anything to get caught in the saw.
- Make sure that the guards are in place and use them at all times. The guards protect you from coming in contact with the blade.
- Make sure that the saw blade teeth point downward towards the table.
- Adjust the upper blade guard so that it is just clearing the material being cut.
- Make sure that the blade has been properly tensioned and tracked.
- Stop the machine before removing the scrap piece from the table.
- Always keep your hands and fingers away from the blade.
- Make sure that you use the proper size and type of blade.
- Hold the work piece firmly against the table. Do not attempt to saw stock that does not have a flat surface facing down, unless a suitable support is used.
- Use a push stick at the end of a cut. This is the most dangerous time because the cut is complete and the blade is exposed. Push sticks are commercially available.
- Hold the wood firmly and feed it into the blade at a moderate speed.
- Turn off the machine if you have to back the material out of an uncompleted or jammed cut.
25