Chapter 1
Getting Ready

- TURNING THE MACHINE ON/OFF ........ 18
- LCD SCREEN ........ 19
- ■ Display Precautions ........ 19
- ■ Key Functions ........ 20
- Using the Machine Setting Mode Key ........ 22
- Using the Machine Operation Mode Key ........ 23
- ■ Contents of Each Category ........ 23
- Using the Pattern Explanation Key ........ 24
- LOWER/UPPER THREADING ........ 25
- Winding the Bobbin ........ 25
- ■ Using the Supplemental Spool Pin ........ 25
- ■ Winding the Bobbin Using the Spool Pin ........ 27
- Setting the Bobbin ........ 28
- Pulling Up the Bobbin Thread ........ 28
- Upper Threading ........ 29
- Using the Twin Needle ........ 32
- CHANGING THE PRESSER FOOT ........ 34
- Removing the Presser Foot ........ 34
- Attaching the Presser Foot ........ 34
- CHANGING THE NEEDLE ........ 35
- ■ Checking the Needle ........ 35
- ■ About the Needle ........ 37
- ■ Fabric/Thread/Needle Combinations ........ 37
- SEWING LARGE PIECES OF FABRIC ........ 38
TURNING THE MACHINE ON/OFF
TURNING THE MACHINE ON/OFF
WARNING
- Use only regular household electricity as the power source. Using other power sources may result in fire, electric shock, or damage to the machine.
- Make sure that the plugs on the power cord are firmly inserted into the electrical outlet and the power supply jack on the machine.
- Do not insert the plug on the power cord into an electrical outlet that is in poor condition.
- Turn the main power to OFF and remove the plug in the following circumstances:
- when you are away from the machine
- after using the machine
- when the power fails during use
- when the machine does not operate correctly due to a bad connection or a disconnection
- during electrical storms
CAUTION
- Use only the power cord included with this machine.
- Do not use extension cords or multi-plug adapters with many other appliances plugged in to them. Fire or electric shock may result.
- Do not touch the plug with wet hands. Electric shock may result.
- When unplugging the machine, always turn the main power to OFF first. Always grab the power cord plug or power cord connector to remove it from the wall outlet or power cord jack connector. Pulling on the cord may damage the cord, or lead to fire or electric shock.
- Do not allow the power cord to be cut, damaged, modified, forcefully bent, pulled, twisted, or bundled. Do not place heavy objects on the cord. Do not subject the cord to heat. These things may damage the cord, or cause fire or electric shock. If the cord or plug is damaged, take the machine to your authorized dealer for repairs before continuing use.
- Unplug the power cord if the machine is not to be used for a long period of time. Otherwise, a fire may result.
- When leaving the machine unattended, either the main switch of the machine should be turned to OFF or the plug must be removed from the socket-outlet.
- When servicing the machine or when removing covers, either the machine or the electrical set must be unplugged.
- For U.S.A. only This appliance has a polarized plug (one blade wider than the other). To reduce the risk of electrical shock, this plug is intended to fit in a polarized outlet only one way. If the plug does not fit fully in the outlet, reverse the plug. If it still does not fit, contact a qualified electrician to install the proper outlet. Do not modify the plug in any way.
- Insert the power cord into the power cord jack connector, then insert the plug into a wall outlet.

① Main power switch ② Power cord
- Turn the main power switch to “I” to turn on the machine.

① OFF ON
- Turn the main power switch to “O” to turn off the machine.

LCD SCREEN
LCD SCREEN
Display Precautions
- Only touch the display with your finger or the touch pen included with the machine. Do not use a mechanical pencil, screwdriver or any other hard or sharp objects. In addition, do not press the display with extreme pressure, otherwise damage to the display may result.
- All or part of the display may sometimes become darker or lighter due to fluctuations in the surrounding temperature or other changes in the environment. This is not a sign of a malfunction. If the display is difficult to read, adjust its brightness (see page 22).
- The display may be dark immediately after the machine is turned on. This is a normal characteristic of the backlight and is not a sign of a malfunction. After approximately 10 minutes, the display should reach its normal level of brightness.
- If you are not directly facing the display, the colors may be distorted or the screen may be difficult to read. This is a normal characteristic of the display and is not a malfunction. Be sure to sit in front of the display while using it.
When the machine is turned on, the opening screen appears. The machine can be set so that the opening screen is not displayed (see page 22). Lightly press the display with your finger. Depending on the setting, either “Q-01 Piecing stitch (Middle)”, “1-01 Straight stitch (Left)” or “1-03 Straight stitch (Middle)” is automatically selected (see page 22).
Memo It may take some time until the opening screen appears. This is not a sign of a malfunction.

① Shows whether the machine is set for a single needle or twin needle, and the needle position when the machine is stopped. The desired needle position can be set (see page 22).
For a single needle
Single needle/down position Single needle/up position
For a twin needle
Twin needle/down position Twin needle/up position
② Presser foot code Attach the indicated presser foot before sewing. ③ Shows the number for the selected stitch (only for utility stitches). ④ Shows a preview of the selected stitch. ⑤ Shows the current page number and the total number of pages available.


LCD SCREEN
Key Functions
With your finger or the touch pen, press a key at the top of the display ( ) to change the screen that is displayed.

Operation panel
| No. | Key | Name | Function | Page |
|---|---|---|---|---|
| ① | Machine setting mode key | Press this key to change the needle stop position, turn the buzzer on/off, adjust the pattern or screen, and change other machine settings. | 22 | |
| ② | Machine operation mode key | Press this key to see descriptions for upper threading, winding the bobbin, changing the presser foot, and other operations for using the machine. | 23 | |
| ③ | Presser foot / Needle exchange key | Press this key when changing the needle or presser foot. Pressing this key locks all keys and operation buttons so that parts can safely be changed. Press this key again to unlock the keys and buttons. When machine operations are displayed, the screen for the needle/presser foot replacement mode is not displayed. | 34, 35 | |
| ④ | Utility stitch key | Press this key to select a straight stitch, zigzag stitch, buttonhole, blind hem stitch, or other stitch (utility stitch) commonly used in quilting or garment sewing. | 52 | |
| ⑤ | Character/Decorative Stitch key | Press this key to select character or decorative stitches. | 102 |


LCD SCREEN
Screen
| No. | Key | Name | Function | Page |
|---|---|---|---|---|
| ⑥ | [Icon] | Drop feed key | For free-motion sewing, press this key to lower the feed dogs (free-motion sewing mode). In addition, the key automatically appears as [Icon] and the feed dogs are lowered when button sewing is selected. | 62, 94 |
| ⑦ | [Icon] | Screen lock key | Press this key to lock the screen. When the screen is locked, the various settings, such as the stitch width and stitch length, are locked and cannot be changed. Press this key again to unlock the settings. | 49 |
| ⑧ | [Icon] | Sewing type selection key | Press this key when you need help selecting the appropriate stitch for a sewing application and when you need instructions on how to sew a selected stitch. This key is very helpful for beginners. | 54 |
| ⑨ | [Icon] | Pattern explanation key | Press this key to see how a selected stitch can be used. | 24 |
| ⑩ | [Image of Stitch Selection Display] | Stitch selection display | Press the key for the stitch that you want to sew. Press one of the [Icons] keys to change the pattern selection screen. | 52 |
| ⑪ | [Icon] | Pivot key | Press this key to select the pivot setting. When the pivot setting is selected, stopping the machine lowers the needle and slightly raises the presser foot automatically. In addition, when sewing is restarted, the presser foot is automatically lowered. • If this key appears as [Icon], it cannot be used. | 47 |
| ⑫ | [Icon] | Automatic reinforcement stitch key | Press this key to select the automatic reinforcement stitching (reverse stitching) setting. If you select this setting before sewing, the machine will automatically sew reinforcement stitches at the beginning and end of stitching (depending on the selected stitch, reverse stitches may be sewn). Press this key again to cancel the setting. | 45 |
| ⑬ | [Icon] | Automatic thread cutting key | Press this key to select the automatic thread cutting setting. If you select this setting before sewing, the machine will automatically sew reinforcement stitches (or reverse stitches, depending on the selected stitch) and trim the threads when the "Reverse/Reinforcement Stitch" button is pressed. Press this key again to cancel the setting. | 46 |
| ⑭ | [Icon] | Mirror image key | Press this key to create a mirror image of the selected stitch. • If this key appears as [Icon], it cannot be used. | 53 |
| ⑮ | [Icon] | Needle mode selection key (single/twin) | Before sewing with the twin needle, press this key to select the setting for twin needle sewing. Each time this key is pressed, the setting switches between that for single needle sewing and twin needle sewing. • If this key appears as [Icon], it cannot be used. | 32 |
| ⑯ | RESET | Reset key | Press this key to return the selected stitch saved settings to the original settings. | 53 |
| ⑰ | MEMORY | Manual memory key | Change the stitch settings (zigzag width and stitch length, thread tension, automatic thread cutting or automatic reinforcement stitching, etc.), then save them by pressing this key. | 53 |
| ⑱ | [Image of Width/Length keys] | Stitch width and stitch length keys | Shows the stitch width (zigzag width) and the stitch length settings of the currently selected stitch. Press [+] or [-] to adjust the stitch width and stitch length settings. • If [Icon] mm appears, the setting cannot be adjusted. | 44 |
| ⑲ | [Image of Tension keys] | Thread tension keys | Shows the thread tension setting of the currently selected stitch. The thread tension is usually set automatically. Press [+] or [-] to adjust the thread tension setting. | 45 |
LCD SCREEN
Using the Machine Setting Mode Key
Press [icon] to change the needle stop position, turn the buzzer on/off, adjust the pattern or screen, and change other basic machine settings. The settings specified here are the default settings.
Press [icon] to display the previous or next page.

① Select whether the needle stops in the raised or lowered position when the machine is stopped. ② Select whether to use the sewing speed controller or to adjust the zigzag width (see page 61). ③ Make adjustments to the character and decorative stitches (see page 106). ④ Select whether the screen containing quilting stitches ([icon]) or utility stitches ([icon]) is the first screen that is displayed. ⑤ Select whether "1-01 Straight stitch (Left)" or "1-03 Straight stitch (Middle)" is the utility stitch that is automatically selected when the machine is turned on.
Cannot be selected if the quilting stitch category ([icon]) is selected for "INITIAL STITCH PAGE".

① Change the height of the presser foot when sewing is stopped when the pivot setting is selected (see page 47). Adjust the presser foot to one of the three heights (3.2 mm, 5.0 mm and 7.5 mm). ② Change the height of the presser foot when the machine is set to free-motion sewing mode (see page 62). ③ Adjust the presser foot pressure between 1 (light) and 4 (firm).
- Set the pressure to 3 for normal sewing. ④ When set to "ON", the thickness of the fabric is automatically detected by an internal sensor while sewing, so the fabric can be fed smoothly (see pages 43, 48 and 62). When "PRESSER FOOT PRESSURE" is set to "1", this function is not available even if it is set to "ON".

① Adjust the brightness of the display.
- Press [minus icon] to make the screen lighter.
- Press [plus icon] to make the screen darker.
Adjust the brightness so that the contrast between [black square] and [striped rectangle] can be clearly seen.
② Turn on/off the buzzer. ③ Turn on/off the needle area and work area lights. ④ Select whether or not the opening screen appears when the machine is turned on. ⑤ Select one of the 3 display languages: [English], [French], [Spanish]
Memo
The latest version of software is installed in your machine. Check with your local authorized Brother dealer or our web site (www.brother.com) for notification of available updates (see page 149).
Using the Machine Operation Mode Key
Basic machine operations and other information based on the contents of this Operation Manual are stored in this machine.
Press ? to open the screen shown below. Six categories are displayed at the top of the screen. Press a key to see more information about that category.
Contents of Each Category
| Names of Machine Parts and Their Functions | Sewing Basics | Troubleshooting |
|---|---|---|
| Presser foot lever | Upper threading | |
| Sewing speed controller | Bobbin winding | |
| Handwheel | Changing the needle | |
| Flat bed attachment with accessory compartment | Changing the presser foot | |
| Knee lifter | Setting the bobbin | |
| Foot controller |
| Main Buttons | Useful Functions | Maintenance |
|---|---|---|
| “Thread Cutter” button | Pivoting | Cleaning the race and bobbin case |
| “Presser Foot Lifter” button | Automatic drop feed | |
| “Start/Stop” button | Automatic fabric sensor system | |
| “Reverse/Reinforcement Stitch” button | ||
| “Needle Position” button |

LCD SCREEN
Example: Displaying information about upper threading
- Press [icon: question mark with sewing machine].
- Press [BASIC OPERATION]. → A list of basic operations appears in the lower half of the screen.
- Press [icon: threading diagram] (upper threading).

→ The instructions for threading the machine appear.
- Press [icon: diagonal arrow pointing down-right] to view the next page.

- When you are finished with the instructions, press [CLOSE].
Using the Pattern Explanation Key
To learn more about the uses for a stitch, select the stitch, and then press [icon: book with speech bubble] to see a description of the selected stitch.
Example: Displaying information on the use for [icon: stitch 4-01].
- Select [icon: stitch 4-01], and then press [icon: book with speech bubble].
→ Uses for [icon: stitch 4-01] appear.
- When you are finished with the instructions, press [CLOSE].
24

LOWER/UPPER THREADING
Winding the Bobbin
This section describes how to wind thread onto a bobbin. With this machine, you can use the supplemental spool pin to wind the bobbin while sewing using the main spool pin.
CAUTION
- The included bobbin was designed specifically for this sewing machine. If bobbins from other models are used, the machine will not operate correctly. Use only the included bobbin or bobbins of the same type (part code: SA156, SFB: XA5539-051).

■ Using the Supplemental Spool Pin While sewing, the bobbin can conveniently be wound.

① Supplemental spool pin
1 Turn on the machine, and then open the top cover.
2 Align the groove in the bobbin with the spring on the bobbin winder shaft, and then set the bobbin on the shaft.

① Groove in bobbin ② Spring on bobbin winder shaft
3 Set the supplemental spool pin in the “up” position.

① Supplemental spool pin
4 Place the spool of thread on the supplemental spool pin so that the thread unwinds from the front. Then, slide the spool cap as far as possible onto the supplemental spool pin to secure the thread spool.

① Supplemental spool pin ② Spool cap ③ Thread spool
CAUTION
- If the thread spool and/or spool cap are set incorrectly, the thread may tangle on the spool pin and cause the needle to break.
- Use the spool cap (large, medium, or small) that is closest in size to the thread spool. If a spool cap smaller than the thread spool is used, the thread may become caught in the slit on the end of the spool.
Note When using cross-wound thread on a thin spool, use the small spool cap, and leave a small gap between the cap and the thread spool.
① Gap Cross-wound thread ③ Spool cap (small)
25

LOWER/UPPER THREADING
5 While holding the thread from the spool in your right hand, hold the end of the thread with your left hand, and then pass the thread through the thread guide.

① Thread guide
6 Pass the thread under the pin on the bobbin winding thread guide, and then pass it around the pretension disk.
- Make sure that the thread passes under the pretension disk.

① Pin ② Pretension disk
7 Wind the thread clockwise around the bobbin four or five times.

8 Pass the end of the thread through the guide slit in the bobbin winder seat, and then pull the thread to the right to cut it with the cutter.

① Guide slit ② Bobbin winder seat
CAUTION
- Be sure to follow the process described. If the thread is not cut with the cutter, and the bobbin is wound, when the thread runs low, it may tangle around the bobbin.
9 Slide the bobbin holder to the left until it snaps into place.
- When the bobbin holder is set to the left, it works as a switch to make the bobbin wind automatically.

① Bobbin holder (switch)
→ The bobbin stops spinning automatically when it is full, and the bobbin holder returns to its original position.
10 Cut the thread, and then remove the bobbin.

Note
When removing the bobbin, pull up only on the bobbin. Do not pull on the bobbin winder seat, otherwise it may become loose, resulting in damage to the machine.
CAUTION
- Setting the bobbin improperly may cause the thread tension to loosen, breaking the needle and possibly resulting in injury.
26


LOWER/UPPER THREADING
■ Winding the Bobbin Using the Spool Pin
The main spool pin cannot be used to wind the bobbin while sewing. For details, see “Using the Supplemental Spool Pin” on page 25.

- Turn on the machine.
- Open the top cover.
- Align the groove in the bobbin with the spring on the bobbin winder shaft, and then slide the bobbin onto the shaft.

① Groove in bobbin ② Spring on bobbin winder shaft
- Pivot the spool pin so that it angles upward, and then place the spool of thread on the spool pin.
- Make sure that the thread unwinds from the front.

① Spool cap ② Thread spool ③ Spool pin
- Slide the spool cap as far as possible onto the spool pin, and then return the spool pin to its original position.
- While holding the thread from the spool with both hands, pull the thread through the lower notch in the thread guide plate, then through the upper notch.

① Lower notch in the thread guide plate ② Upper notch in the thread guide plate
- Pass the thread through the thread guide.

① Thread guide
- Pass the thread under the pin on the bobbin winding thread guide, and then pass it around the pretension disk.
- Make sure that the thread passes under the pretension disk.

① Pin Pretension disk
- Follow steps 7 through 10 on page 26.
27
LOWER/UPPER THREADING
Setting the Bobbin
This section describes how to set a bobbin wound with thread into the machine. You can begin sewing without pulling up the bobbin thread. If you wish to pull up the bobbin thread, for example, when sewing gathers, follow the procedure described in the next section.
CAUTION
- Use a bobbin thread that has been correctly wound. Otherwise, the needle may break or the thread tension will be incorrect.
- Press the “Presser Foot Lifter” button to raise the presser foot.
- Slide the bobbin cover latch to the right, and then remove the bobbin cover.

① Bobbin cover ② Latch
-
Hold the bobbin with your right hand and hold the end of the thread with your left hand.
-
Insert the wound bobbin into the bobbin case so that the thread unwinds in the direction of the arrow.
CAUTION
- Be sure to hold down the bobbin with your finger and unwind the bobbin thread correctly. Otherwise, the thread may break or the thread tension will be incorrect.
-
Lightly hold down the bobbin with your right hand, and then, while slightly pulling the thread with your left hand, guide it through the groove.
-
After guiding the thread completely through the groove, pull it toward you to cut it with the cutter.
① Cutter
- Attach the bobbin cover by inserting the tab in the lower-left corner of the bobbin cover, then lightly press down on the right side of the cover until it snaps into place.
① Tab
Pulling Up the Bobbin Thread
There may be some sewing applications where you may want to pull up the bobbin thread, for example, when making gathers or with free-motion quilting. Follow the procedure described below to pull up the bobbin thread.
Memo Thread the upper thread before pulling up the bobbin thread. For details, see “Upper Threading” on page 29.
- Follow steps ❶ through from the previous section to insert the bobbin into the bobbin case.
28


2 Guide the bobbin thread through the groove, following the arrow in the illustration.
Note
- Do not cut the thread with the cutter.
- Do not attach the bobbin cover.

3 While lightly holding the upper thread, press the “Needle Position” button twice to lower, then raise the needle.

4 Gently pull the upper thread to pull up the bobbin thread.

→ A loop of the bobbin thread comes out from the hole in the needle plate.
5 Pull out about 100 mm of the bobbin thread, and then pass it under the presser foot toward the rear of the machine, making it even with the upper thread.

① Upper thread ② Bobbin thread
6 Attach the bobbin cover.
LOWER/UPPER THREADING
Upper Threading
This section describes how to thread the machine and the needle. The machine is marked with numbers that indicate the threading order.
CAUTION
- Be sure to thread the machine properly. Improper threading can cause the thread to tangle and break the needle, leading to injury.
- When using accessories not included with this machine, attach the accessory to the machine after threading the machine.

1 Turn on the machine.
2 Press the “Presser Foot Lifter” button to raise the presser foot.
→ The upper thread shutter opens so the machine can be threaded.

① Upper thread shutter
Memo This machine is equipped with an upper thread shutter, allowing you to check that the upper threading is performed correctly.
1 Getting Ready
29
LOWER/UPPER THREADING
3 Press the “Needle Position” button to raise the needle.

Note If you try to thread the needle with the needle threader lever without raising it, damage to the machine may result.
4 Pivot the spool pin so that it angles upward, and then place the spool of thread on the spool pin.
- Make sure that the thread unwinds from the front.

① Spool cap ② Thread spool ③ Spool pin
5 Slide the spool cap as far as possible onto the spool pin, and then return the spool pin to its original position.
CAUTION
- If the thread spool and/or spool cap are set incorrectly, the thread may tangle on the spool pin and cause the needle to break.
- Use the spool cap (large, medium, or small) that is closest in size to the thread spool. If a spool cap smaller than the thread spool is used, the thread may become caught in the slit on the end of the spool and cause the needle to break.
6 While holding the thread from the spool with both hands, pull the thread through the lower notch in the thread guide plate, then through the upper notch.

① Lower notch in the thread guide plate ② Upper notch in the thread guide plate
7 While holding the thread from the spool in your right hand, hold the end of the thread with your left hand, and then guide the thread through the groove, following the arrows in the illustration.

8 Guide the thread down, up, then down through the groove, as shown in the illustration.

① Upper thread shutter
Memo Look through the take-up lever check window to check the position of the take-up lever. Before threading the machine, make sure that the take-up lever is in the raised position.

① Upper thread shutter ② Thread take-up lever check window
9 Pass the thread through the needle bar thread guide (marked "6").
- Hold the thread with both hands and fully pass it through the guide, as shown in the illustration.

① Needle bar thread guide
30
LOWER/UPPER THREADING
10 Pass the thread through the thread guide disks (marked “7”).
- Make sure that the thread passes through the groove in the thread guide.
- Make sure that the thread securely enters the thread guide disks, otherwise the needle may not be threaded.

① Groove in thread guide
11 Pull the thread up through the thread cutter to cut the thread, as shown in the illustration.

① Thread cutter
Note When using thread that quickly winds off the spool, such as metallic thread, it may be difficult to thread the needle if the thread is cut. Therefore, instead of using the thread cutter, pull out about 80 mm (approx. 3 inches) of thread after passing it through the thread guide disks (marked “7”).

① 80 mm or more
12 Lower the needle threader lever slowly until it clicks.
- The hook is rotated and passes through the eye of the needle.
Note
- If the needle threader lever is lowered quickly, the needle may not be threaded.
- Make sure that no objects, such as the fabric, are touching the hook.

① Hook Needle thread lever
13 Release the needle threader lever. → The thread passes through the eye of the needle.
14 Carefully pull the end of thread that was passed through the eye of the needle.
Note Do not pull the thread strongly. Otherwise, the needle may bend or break.
- If a loop was formed in the thread passed through the eye of the needle, carefully pull on the loop of thread through to the back of the needle.

15 Pull out about 100 mm (approx. 3-4 inches) of the thread, and then pass it under the presser foot toward the rear of the machine.

① 100 mm
16 Press the “Presser Foot Lifter” button to lower the presser foot before starting to sew.
Memo This completes the upper threading procedure.
Note
- The needle threader can be used with home sewing machine needles 75/11 through 100/16. For details on appropriate needle and thread combinations, see “Fabric/Thread/Needle Combinations” on page 37.
- If automatic needle threading could not be completed correctly, repeat the procedure, starting with the needle bar thread guide (marked “6”).
- Some needles cannot be threaded with the needle threader. In this case, instead of using the needle threader after passing the thread through the needle bar thread guide (marked “6”), manually pass the thread through the eye of the needle from the front.


LOWER/UPPER THREADING
Using the Twin Needle
Using the twin needle, you can sew two parallel lines of the same stitch. Although the same bobbin thread is used, interesting patterns can be sewn by threading each needle with a different color of thread. Both upper threads should have the same thickness and quality. The twin needle can only be used with patterns where [icon] appears when they are selected. Check the “STITCH SETTING CHART” at the end of this manual for patterns that can be used with the twin needle.
CAUTION
- Use only twin needles made for this machine (part code X59296-151). Other needles could break, resulting in damage.
- Be sure to set the twin needle mode when using the twin needle. Using the twin needle while the machine is in single needle mode could cause the needle to break, resulting in damage.
- Do not sew with bent needles. The needle could break and cause injury.
- When using the twin needle, be sure to use presser foot “J”. In case bunched stitches may occur, use the presser foot “N”.
1 Press [icon], and then install the twin needle (see “CHANGING THE NEEDLE” on page 35).

2 Thread the machine for the first needle according to the procedure for threading a single needle (see “Upper Threading” on page 29).

3 Pass the thread through the needle bar thread guide, and then manually thread the needle on the left side.
- Do not use needle threader when threading a twin needle.

① Needle bar thread guide
4 Set the supplemental spool pin in the “up” position.

① Supplemental spool pin
5 Place the additional spool of thread on the supplemental spool pin so that the thread unwinds from the front. Then, slide the spool cap as far as possible onto the supplemental spool pin to secure the thread spool.

① Spool cap ② Supplemental spool pin ③ Thread spool
6 While holding the thread from the spool in your right hand, hold the end of the thread with your left hand, and then pass the thread through the thread guide.
- Do not pass the thread through the bobbin winding thread guide.

① Bobbin winding thread guide ② Thread guide
32

LOWER/UPPER THREADING
7 While holding the thread from the spool with both hands, pull the thread through the lower notch in the thread guide plate, then through the upper notch. Hold the end of the thread with your left hand, and then guide the thread through the groove, following the arrows in the illustration.

① Shutter
8 Without passing the thread through the needle bar thread guide, manually thread the needle on the right side.

① Needle bar thread guide
Note The needle threader cannot be used. Manually pass the thread through the eye of the needle from the front. If the needle threader is used, damage to the machine may result.
9 Press , or press in the screen.
10 Select a stitch.
Note If appears as after a stitch is selected, the twin needle cannot be used with the selected stitch.
11 Press to select the setting for twin needle sewing.
- The stitch width becomes narrower than with single needle sewing.

① Single needle/twin needle setting → appears.
CAUTION
- Be sure to set the twin needle mode when using the twin needle. Using the twin needle while the machine is in single needle mode could cause the needle to break, resulting in damage.
12 Press the “Start/Stop” button after lowering the presser foot lever.
Memo To change the sewing direction with the twin needle, raise the needle from the fabric, raise the presser foot lever, and then turn the fabric.

33


CHANGING THE PRESSER FOOT
CHANGING THE PRESSER FOOT
CAUTION
- Always press [icon] in the operation panel before changing the presser foot. If [icon] is not pressed and the “Start/Stop” button or another button is pressed, the machine will start and may cause injury.
- Always use the correct presser foot for the selected stitch. If the wrong presser foot is used, the needle may strike the presser foot and bend or break, and may cause injury.
- Only use presser feet made for this machine. Using other presser feet may lead to accident or injury.
Removing the Presser Foot
- Press the “Needle Position” button to raise the needle.

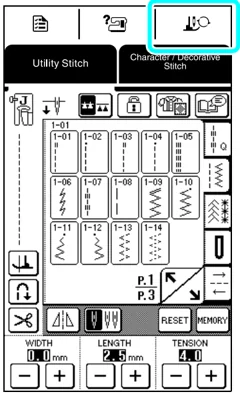
- Press [icon].
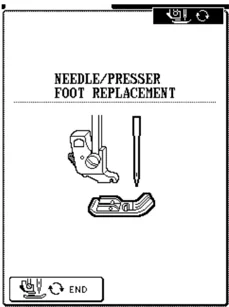
 → The screen changes, and all keys and operation buttons are locked.
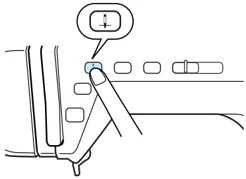
- Raise the presser foot lever.
- Press the black button on the presser foot holder to remove the presser foot.
 ① Black button
② Presser foot holder

 → The screen changes, and all keys and operation buttons are locked.
 ① Black button
② Presser foot holder
Attaching the Presser Foot
- Place the presser foot under the holder, aligning the pin on the foot with the notch in the holder, and then lower the presser foot lever so that the presser foot pin snaps into the notch in the holder.
 ① Notch
② Pin
- Press [icon], or press [icon] in the screen. → All keys and operation buttons are unlocked, and the previous screen is displayed.
- Raise the presser foot lever.
 ① Notch
② Pin
34


CHANGING THE NEEDLE
CHANGING THE NEEDLE
CAUTION
- Always press [icon] in the operation panel before changing the needle. If [icon] is not pressed and the “Start/Stop” button or another operation button is pressed accidentally, the machine will start and injury may result.
- Use only sewing machine needles made for home use. Other needles may bend or break and may cause injury.
- Never sew with a bent needle. A bent needle will easily break and may cause injury.
Checking the Needle
Place the flat side of the needle on a flat surface (such as the needle plate or a piece of glass) and check that the gap between the needle and the flat surface is even.
Note Never use bent or blunt needles.

① Even gap ② Flat surface (bobbin cover, glass, etc.)
1 Press the “Needle Position” button to raise the needle.
2 Press [icon].

→ The screen changes, and all keys and operation buttons are locked.

35


CHANGING THE NEEDLE
3 Use the included screwdriver to turn the needle clamp screw toward the front of the machine to loosen it, and then remove the needle.

Note Do not apply extreme force when loosening or tightening the needle clamp screw, otherwise damage to the machine may result.
4 With the flat side of the needle facing the back, insert the new needle until it touches the needle stopper. Use the screwdriver to securely tighten the needle clamp screw.

① Needle stopper ② Hole for setting the needle ③ Flat side of needle
CAUTION
- Be sure to push in the needle until it touches the stopper, and securely tighten the needle clamp screw with a screwdriver. If the needle is not completely inserted or the needle clamp screw is loose, the needle may break or the machine may be damaged.
5 Press , or press in the screen.
→ All keys and operation buttons are unlocked, and the previous screen is displayed.
36

CHANGING THE NEEDLE
About the Needle
The sewing machine needle is probably the most important part of the sewing machine. Choosing the proper needle for your sewing project will result in a beautiful finish and fewer problems. Below are some things to keep in mind about needles.
- The smaller the needle number, the finer the needle. As the numbers increase, the needles get thicker.
- Use fine needles with lightweight fabrics, and thicker needles with heavyweight fabrics.
- To avoid skipped stitches, use ball point needle (gold colored) 90/14 with stretch fabrics.
- To avoid skipped stitches, use ball point needle (gold colored) 90/14 when sewing character or decorative stitches.
- Use a 90/14 to 100/16 needle with transparent nylon threads, regardless of the fabric being sewn.
- A home sewing machine needle 75/11 is inserted in the sewing machine.
Fabric/Thread/Needle Combinations
The following table provides information concerning the appropriate thread and needle for various fabrics. Please refer to this table when selecting a thread and needle for the fabric you wish to use.
\begin{tabular}{|l|l|l|c|l|} \hline \multicolumn{2}{|c|}{\textbf{Fabric}} & \multicolumn{2}{c|}{\textbf{Thread}} & \textbf{Size of needle} \ \cline{3-4} \multicolumn{2}{|c|}{} & \textbf{Type} & \textbf{Size} & \ \hline Medium weight fabric & Broadcloth & Cotton & 60 - 80 & 75/11 - 90/14 \ \cline{2-5} & Taffeta & Synthetic mercerized & 60 - 80 & \ \cline{2-5} & Flannel, Gabardine & Silk or silk finished & 50 & \ \hline Lightweight fabric & Lawn, Batiste & Cotton & 60 - 80 & 65/9 - 75/11 \ \cline{2-5} & Georgette & Synthetic mercerized & 60 - 80 & \ \cline{2-5} & Challis, Satin & Silk & 50 & \ \hline Heavyweight fabric & Denim & Cotton & 30 - 50 & 90/14 - 100/16 \ \cline{2-5} & Corduroy & Synthetic mercerized & 50 & \ \cline{2-5} & Tweed & Silk & 50 & \ \hline Stretch fabric & Jersey & Thread for knits & 50 - 60 & Ball point needle (gold colored) 75/11 - 90/14 \ \cline{2-5} & Tricot & & & \ \hline Easily frayed fabrics & & Cotton thread & 50 - 80 & 65/9 - 90/14 \ \cline{3-5} & & Synthetic thread & & \ \cline{3-5} & & Silk thread & 50 & \ \hline For top stitching & & Synthetic mercerized & 30 & 90/14 - 100/16 \ \cline{3-5} & & Silk & 30 & \ \hline \end{tabular}
Memo For transparent nylon thread, always use needle 90/14 - 100/16. The same thread is usually used for the bobbin thread and upper threading.
CAUTION
- Be sure to follow the needle, thread, and fabric combinations listed in the table. Using an improper combination, especially a heavyweight fabric (i.e., denim) with a small needle (i.e., 65/9 - 75/11), may cause the needle to bend or break, and lead to injury. Also, the seam may be uneven, the fabric may pucker, or the machine may skip stitches.
37

SEWING LARGE PIECES OF FABRIC
SEWING LARGE PIECES OF FABRIC
The wide table makes sewing large pieces of fabric easier.

CAUTION
- Do not move the sewing machine while the wide table is attached, otherwise damage or injuries may occur.
- Do not use the wide table for other purposes such as an ironing board. This can cause damage and injury.
1 Open up the legs at the bottom of the wide table. Pull out the four legs until they snap into place.

2 Turn off the power and pull the flat bed attachment to the left.

→ With the flat bed attachment removed, free-arm sewing is possible.
3 Install the wide table. Keeping the wide table level, slowly slide it into place until the mounting hook clicks into position. Rotate the rubber foot attached to the bottom of each leg to adjust the height. Make sure that the wide table is either at the same level or slightly lower than the surface of the needle plate.

① Mounting hook
4 When you are finished using the wide table, remove it. While slightly lifting up the wide table, pull it off to the left.

Memo The knee lifter can be stored attached to the bottom of the wide table.

5 Install the flat bed attachment back in its original position.
CAUTION
- Do not install or remove the wide table with force, otherwise the mounting hook may be damaged.
① Mounting hook
38
