SEWING THE STITCHES
6 Gently hold the end of the upper thread, and then start sewing.
- Once sewing is completed, the machine automatically sews reinforcement stitches, then stops.
- If the automatic thread cutting setting is selected before sewing, the machine will automatically cut the thread at the end of stitching.

→ A buttonhole starts to sew from the front of the presser foot to the back.
Note
- If the fabric does not feed, for example, because it is too thick, press + in the length display to increase the stitch length.
- When sewing is finished, raise the buttonhole lever to its original position.
7 Insert a pin along the inside of a bar tack at the end of the buttonhole, and then insert the seam ripper into the center of the buttonhole and cut towards the pin.
Note Be careful not to cut the stitches with the seam ripper.

① Pin Seam ripper
CAUTION
- When using the seam ripper to open the buttonhole, do not put your hand or finger in the path of the ripper. The ripper may slip and cause injury.
For keyhole buttonholes, use the included eyelet punch to make a hole in the rounded end of the buttonhole. Then, insert a pin along the inside of the bar tack, insert a seam ripper into the hole made with the eyelet punch, and then cut towards the pin.

① Pin Eyelet punch
3 Utility Stitches
89


SEWING THE STITCHES
Sewing Stretch Fabrics
When sewing a buttonhole on stretch fabrics, press or , and use a gimp thread.
- Hook the gimp thread onto the back of buttonhole foot "A", and then pull the ends of the gimp thread under the presser foot. Pass the thread ends through the grooves at the front of the presser foot, and then temporarily tie them.
- Use #5 embroidery thread or lace yarn for the gimp thread.

① Upper thread
-
Lower the presser foot lever, and then start sewing.
- Set the stitch width to the width of the gimp thread.
-
When sewing is finished, gently pull the gimp thread to remove any slack, and then use a handsewing needle with a large eye to pull the gimp thread to the wrong side of the fabric.
-
Tie the ends together, and then trim the excess.
- After using the seam ripper to cut the threads sewn over the buttonhole, trim the threads.
Buttons That Do Not Fit into the Button Holder Plate
Use the markings on the presser foot scale to set the size of the buttonhole. The distance between the markings on the presser foot scale is 5 mm (approx. 3/16 inch). Add together the diameter and thickness of the button, and then set the button holder plate to the calculated value.

① Button holder plate ② Presser foot scale ③ Finished measurement (diameter + thickness) ④ 5 mm (approx. 3/16 inch)
Example: For a button with a diameter of 15 mm (approx. 9/16 inch) and a thickness of 10 mm (approx. 3/8 inch), the scale should be set at 25 mm (approx. 1 inch).

① Thickness: 10 mm (approx. 3/8 inch) ② Diameter: 15 mm (approx. 9/16 inch)
90


Darning
Use darning stitches for mending and other applications.
| Stitch Key | Stitch Name | Presser Foot | Applications | Stitch width [mm (inch)] | Stitch length [mm (inch)] | Twin Needle | ||
|---|---|---|---|---|---|---|---|---|
| Auto | Manual | Auto | Manual | |||||
| 4-13 | Darning | Darning of medium weight fabric | 7.0 (1/4) | 2.5 - 7.0 (3/32 - 1/4) | 2.0 (1/16) | 0.4 - 2.5 (1/64 - 1/16) | NO | |
| 4-14 | Darning | Darning of heavyweight fabric | 7.0 (1/4) | 2.5 - 7.0 (3/32 - 1/4) | 2.0 (1/16) | 0.4 - 2.5 (1/64 - 1/16) | NO |
Darning is sewn from the front of the presser foot to the back, as shown below.

① Reinforcement stitching
- Select a stitch.
- Set the scale on buttonhole foot “A” to the desired length of the darning, and then attach the buttonhole foot.
Memo
The maximum length for darning is 28 mm (approx. 1-1/16 inches).

① Presser foot scale
② Finished measurement
③ 7 mm wide (approx. 1/4 inch)
④ 5 mm (approx. 3/16 inch)
- Hold the outside frame of the buttonhole foot toward the back with your finger, and then lower the presser foot so that it aligns with the area to be darned.

Note
- Slide the outside frame of the buttonhole foot backward as far as possible, making sure that there is no gap behind the part of the foot marked “A”, as shown in the illustration. If the buttonhole foot is not slid back as far as possible, the darning will not be sewn at the correct size.
- Pass the thread under the presser foot.

SEWING THE STITCHES
4 Pull down the buttonhole lever.
- The buttonhole lever should be positioned behind the metal bracket on the buttonhole foot, as shown in the illustration.

① Buttonhole lever

① Metal bracket
5 Gently hold the end of the upper thread, and then start sewing.
- Once sewing is completed, the machine automatically sews reinforcement stitches, then stops.
- If the automatic thread cutting setting is selected before sewing, the machine will automatically cut the thread at the end of stitching.

Note
If the fabric does not feed, for example, because it is too thick, press + in the length display to increase the stitch length.
Bar Tacks
Bar tacks are one type of reinforcement stitching used to strengthen points subject to strain, such as ends of pocket openings and slits.
| Stitch Key | Stitch Name | Presser Foot | Applications | Stitch width [mm (inch)] | Stitch length [mm (inch)] | Twin Needle | ||
|---|---|---|---|---|---|---|---|---|
| Auto | Manual | Auto | Manual | |||||
| 4-15 | Bar tack | Reinforcement at opening of pocket, etc. | 2.0 (1/16) | 1.0 - 3.0 (1/16 - 1/8) | 0.4 (1/64) | 0.3 - 1.0 (1/64 - 1/16) | NO |
1 Press 4-15.
2 Set the scale on buttonhole foot “A” to the desired length of the darning, and then attach the buttonhole foot.
Memo
The bar tack length can be set between 5 and 28 mm (approx. 3/16 and 1-1/16 inches). Bar tacks are usually between 5 and 10 mm (approx. 3/16 and 3/8 inch) (This differs depending on the application.)

① Presser foot scale
② Finished measurement
③ 5 mm (approx. 3/16 inch)


SEWING THE STITCHES
3 Position the fabric so that the opening of the pocket moves toward you during sewing. Hold the outside frame of the buttonhole foot toward the back with your finger, check the first needle drop point, and then lower the presser foot.

① First needle drop point: 2 mm (approx. 1/16 inch)
Note
- Slide the outside frame of the buttonhole foot backward as far as possible, making sure that there is no gap behind the part of the foot marked "A", as shown in the illustration. If the buttonhole foot is not slid back as far as possible, the bar tack will not be sewn at the correct size.
- Pass the thread under the presser foot.

4 Pull down the buttonhole lever.
- The buttonhole lever should be positioned behind the metal bracket on the buttonhole foot, as shown in the illustration.

① Buttonhole lever

① Metal bracket
5 Gently hold the end of the upper thread, and then start sewing.
- Once sewing is completed, the machine automatically sews reinforcement stitches, then stops.
- If the automatic thread cutting setting is selected before sewing, the machine will automatically cut the thread at the end of stitching.

■ Bar Tacks on Thick Fabrics
Place a piece of folded fabric or cardboard beside the fabric being sewn to level the buttonhole foot and allow for easier feeding.

① Presser foot ② Thick fabric
Note If the fabric does not feed, for example, because it is too thick, press + in the length display to increase the stitch length.
3 Utility Stitches
93


Button Sewing
Buttons with 2 or 4 holes can be sewn on.
Note
Make sure that the automatic thread cutting setting is not selected when sewing on buttons.
| Stitch Key | Stitch Name | Presser Foot | Applications | Stitch width [mm (inch)] | Stitch length [mm (inch)] | Twin Needle | ||
|---|---|---|---|---|---|---|---|---|
| Auto | Manual | Auto | Manual | |||||
| 4-16 | Button sewing | M | Attaching buttons | 3.5 (1/8) | 2.5 - 4.5 (3/32 - 3/16) | — | — | NO |
1 Press 4-16.
→ automatically changes to , and the feed dogs are lowered.
Memo
When button sewing is selected, cannot be set.
2 Raise the presser foot lever.
3 Attach button fitting foot “M”, slide the button along the metal plate and into the presser foot, and then lower the presser foot lever.

① Button
② Metal plate
4 Turn the handwheel toward you to check that the needle correctly goes into the holes of the button without touching it.
CAUTION
- Make sure the needle does not strike the button during sewing. The needle may break and cause injury.
5 Gently hold the end of the upper thread, and then start sewing.
- Once sewing is completed, the machine automatically sews reinforcement stitches, then stops.
- If the automatic thread cutting setting is selected before sewing, the machine will automatically cut the thread at the end of stitching.
Note
- To attach the button more securely, repeat the procedure.
- Adjust the stitch width to the distance between the holes in the button.
6 With scissors, cut the upper and bobbin threads at the beginning of the stitching, pull the upper thread at the end of the stitching to the wrong side of the fabric, and then tie it with the bobbin thread.

Memo
If a different stitch is selected, returns to its original setting.


Attaching a 4-Hole Button
Sew the two holes toward the front. Then, raise the presser foot, move the fabric so that the needle goes into the back two holes, and then sew them in the same way.

Attaching a Button with a Shank
- Pull the shank lever toward you.

① Shank lever
Eyelets
Eyelets can be used for making belt holes and other similar applications.
| Stitch Key | Stitch Name | Presser Foot | Applications | Stitch width [mm (inch)] | Stitch length [mm (inch)] | Twin Needle | ||
|---|---|---|---|---|---|---|---|---|
| Auto | Manual | Auto | Manual | |||||
| 4-17 | Eyelet | N | For making eyelets, holes on belts, etc. | 7.0 (1/4) | 7.0 6.0 5.0 (1/4 15/64 3/16) | 7.0 (1/4) | 7.0 6.0 5.0 (1/4 15/64 3/16) | NO |
-
Press 4-17, and then attach presser foot “N”.
-
Press – or + in the width display or – or + in the length display to set the size of the eyelet.

□ mm
□ mm
□ mm
- Lower the needle into the fabric at the beginning of the stitching, lower the presser foot lever, and then start sewing.
- Reinforcement stitches are automatically sewn at the end of the stitching.
- If the automatic thread cutting setting is selected before sewing, the machine will automatically cut the thread at the end of stitching.

① Starting point of stitching
- When sewing is finished, pull the two ends of the upper thread between the button and the fabric, wind them around the shank, and then tie them together.

- Tie the ends of the bobbin thread together at the beginning and end of the stitching on the wrong side of the fabric
SEWING THE STITCHES
3
Utility Stitches
95
SEWING THE STITCHES
4 Use the eyelet punch to cut a hole in the center of the stitching.

Multi-Directional Sewing (Straight Stitch and Zigzag Stitch)
Use these stitches to attach patches or emblems to pant legs, shirt sleeves, etc.
Memo Pass the free arm through the tubular piece of fabric, and then sew in the order shown in the illustration.

1 Remove the flat bed attachment to enable free-arm sewing.

2 Pass the free arm through the fabric.
3 Press [5-07], and then attach presser foot "N".

Memo For details on the stitches, refer to the "STITCH SETTING CHART" at the end of this manual.
4 Insert the needle into the fabric at the starting point of the stitching, and then sew seam 1.

① Starting point of stitching
5 Press [5-04], and then sew seam 2.
- The fabric will move sideways, so guide the fabric with your hands to sew straight.

6 Press [5-02], and then sew seam 3.

96
SEWING THE STITCHES
7 Press [icon: 5-06], and then sew seam 4.
- The fabric will move sideways, so guide the fabric with your hands to sew straight.

Memo Zigzag stitches can also be used with multi-directional sewing.
Zipper Insertion
■ Centered Zipper Use for bags and other such applications.
1 Press [icon: 1-03].
- Be sure to select the straight stitch with the middle (center) needle position.

Memo For details on the stitches, refer to the “STITCH SETTING CHART” at the end of this manual.
2 Attach presser foot “J”, sew straight stitches up to the zipper opening, and then sew basting stitches to the top of the fabric.

① Wrong side of fabric ② End of zipper opening ③ Basting ④ Reverse stitching
3 Press open the seam allowance, align the seam with the center of the zipper, and then baste the zipper in place.

① Wrong side of fabric ② Basting ③ Zipper teeth
4 Remove presser foot “J”, and then attach the pin on the right side of zipper foot “I” to the presser foot holder.

① Right side ② Left side ③ Needle drop point
CAUTION
- When using zipper foot “I”, make sure the straight stitch, middle (center) needle position is selected. Turn the handwheel to make sure the needle does not strike the presser foot. If another stitch is selected, the needle will strike the presser foot, causing the needle to break and possibly causing injury.
5 Topstitch around the zipper, and then remove the basting.

CAUTION
- Make sure the needle does not strike the zipper during sewing. If the needle strikes the zipper, the needle may break, leading to injury.
97


SEWING THE STITCHES
■ Side Zipper Use for side zippers on skirts or dresses.
1 Press [Image of stitch selection screen showing 1-03 selected].
- Be sure to select the straight stitch with the middle (center) needle position.

2 Attach presser foot “J”, sew straight stitches to the zipper opening, and then sew basting stitches to the edge of the fabric.

① Basting ② End of zipper opening ③ Reverse stitching ④ Wrong side of fabric
3 Press the seam allowance open and align the folded hem along the teeth of the zipper, while maintaining 3 mm (approx. 1/8 inch) of sewing space.

① Zipper pull tab ② Zipper teeth ③ End of zipper opening ④ 3 mm (approx. 1/8 inch) ⑤ Wrong side of fabric
4 Remove presser foot “J”, and then attach the presser foot holder to the pin on the right side of zipper foot “I”.

① Right side ② Left side ③ Needle drop point
CAUTION
- When using zipper foot “I”, make sure the straight stitch, middle (center) needle position is selected. Turn the handwheel to make sure the needle does not strike the presser foot. If another stitch is selected, the needle will strike the presser foot, causing the needle to break and possibly causing injury.
5 Set the presser foot in the 3 mm (approx. 1/8 inch) margin.
6 Starting from the end of the zipper opening, sew to a point about 50 mm (approx. 2 inches) from the edge of the fabric, then stop the machine.
7 Pull down the zipper slider, then continue sewing to the edge of the fabric.

① 3 mm (approx. 1/8 inch) ② 50 mm (approx. 2 inch)
CAUTION
- Make sure the needle does not strike the zipper during sewing. If the needle strikes the zipper, the needle may break, leading to injury.
98

SEWING THE STITCHES
8 Close the zipper, turn the fabric over so that the surface faces up, and then baste the other side of the zipper to the fabric.

① Front of garment (wrong side of fabric) ② Back of garment (surface of fabric) ③ Basting ④ Front of garment (surface of fabric)
9 Remove the presser foot, and then attach the pin on the left side of the zipper foot to the presser foot holder.

① Right side ② Left side ③ Needle drop point
10 Set the fabric so that the left edge of the presser foot touches the edge of the zipper teeth.
11 Sew reverse stitches at the closed end of the zipper, then continue sewing.
12 Stop sewing about 50 mm (approx. 2 inches) from the edge of the fabric, leave the needle in the fabric, and remove the basting stitches.
13 Open the zipper and sew the rest of the seam.

① Basting ② Reverse stitching ③ 7 to 10 mm (approx. 1/4 to 3/8 inch) ④ 50 mm (approx. 2 inches)
3 Utility Stitches
99
SEWING THE STITCHES
100
Chapter 4
Character/
Decorative
Stitches

- SELECTING STITCH PATTERNS ........ 102
- ■ Stitch Selection Screens ........ 102 Selecting Decorative Stitch Patterns/7 mm Decorative Stitch Patterns/Satin Stitch Patterns/
- 7 mm Satin Stitch Patterns/Cross Stitch Patterns/Utility Decorative Stitch Patterns ........ 103
- Alphabet Patterns ........ 103
- SEWING STITCH PATTERNS ........ 105
- Sewing Attractive Finishes ........ 105
- Basic Sewing ........ 105
- Adjusting Patterns ........ 106
- EDITING STITCH PATTERNS ........ 108
- ■ Key Functions ........ 108
- Changing the Pattern Size ........ 109
- Changing the Pattern Length (7 mm Satin Stitch Patterns Only) ........ 109
- Creating a Vertical Mirror Image ........ 109
- Creating a Horizontal Mirror Image ........ 109
- Selecting a Single/Repeating Pattern ........ 110
- Changing the Thread Density (Satin Stitch Patterns Only) ........ 110
- Returning to the Beginning of the Pattern ........ 111
- COMBINING STITCH PATTERNS ........ 112
- Before Combining Patterns ........ 112
- Combining Patterns from Different Categories ........ 112
- Combining Stitch Patterns of Different Sizes ........ 114
- Combining Stitch Patterns of Different Orientations ........ 115
- Combining Stitch Patterns of Different Lengths ........ 116
- Creating Step Patterns (7 mm Satin Stitch Patterns Only) ........ 117
- ■ Examples of Pattern Combinations ........ 118
- USING THE MEMORY FUNCTION ........ 119
- Stitch Data Precautions ........ 119
- ■ Types of Stitch Data That Can Be Used ........ 119
- ■ Computers and Operating Systems with the Following Specifications Can Be Used ........ 119
- ■ Precautions on Using the Computer to Create and Save Data ........ 119
- ■ Trademarks ........ 119
- Saving Stitch Patterns in the Machine’s Memory ........ 119
- ■ If the Memory Is Full ........ 120
- Saving Stitch Patterns to the Computer ........ 121
- Retrieving Stitch Patterns from the Machine’s Memory ........ 122
- Retrieving Stitch Patterns from the Computer ........ 123
SELECTING STITCH PATTERNS
SELECTING STITCH PATTERNS
■ Stitch Selection Screens
Press [Character / Decorative Stitch] to display the screen shown below.

① Decorative stitch patterns ② 7 mm decorative stitch patterns ③ Satin stitch patterns ④ 7 mm satin stitch patterns ⑤ Cross stitch patterns ⑥ Utility decorative stitch patterns ⑦ Alphabet patterns (gothic font) ⑧ Alphabet patterns (handwriting font) ⑨ Alphabet patterns (outline style) ⑩ Patterns stored in “MY CUSTOM STITCH™” (see page 135) ⑪ Patterns saved in the machine’s memory (see page 122) ⑫ Patterns saved on the computer (see page 123) ⑬ Press this key to create your own stitches with the “MY CUSTOM STITCH™” function (see page 128).
Press [Arrow Icon] to display the previous or next page.
- The patterns in screens ②, ④ and ⑥ have a stitch width of 7 mm or less. Both the stitch length and width can be adjusted.
① Decorative stitch patterns ② 7 mm decorative stitch patterns ③ Satin stitch patterns ④ 7 mm satin stitch patterns ⑤ Cross stitch patterns
⑥ Utility decorative stitch patterns ⑦ Alphabet patterns (gothic font) ⑧ Alphabet patterns (handwriting font) ⑨ Alphabet patterns (outline style)
Note When the screen is locked ([Lock Icon]), no key other than [Lock Icon] and the [Utility Stitch | Character / Decorative Stitch] keys can be operated.

SELECTING STITCH PATTERNS
Selecting Decorative Stitch Patterns/ 7 mm Decorative Stitch Patterns/ Satin Stitch Patterns/ 7 mm Satin Stitch Patterns/Cross Stitch Patterns/Utility Decorative Stitch Patterns
1 Press Character / Decorative Stitch, and then press the key for the category containing the pattern that you want to sew.

2 Select a stitch pattern that you want to sew.
- Press \searrow to display the next page.
- Press \nwarrow to display the previous page.
- Press CLOSE to return to the screen of pattern categories.

\rightarrow An image of the selected stitch pattern is displayed below the symbol of the appropriate presser foot.
3 To combine patterns, select the next pattern.
- Press CHECK to check the selected pattern combination.
- If the wrong pattern was selected, press DELETE to erase the pattern, and then select the new stitch pattern.

Alphabet Patterns
Three alphabet patterns are available in different styles. The procedure for selecting a character is the same with all styles.
1 Press Character / Decorative Stitch, and then press the key for the character style that you want to sew.

103

SELECTING STITCH PATTERNS
2 Press [ABC] [abc] [0~9 &?!] [Aa□] to display a selection screen of characters, and then select a character. Repeat this step until you have selected all of the characters.
- If a wrong character was selected, press [DELETE] to erase the character, and then select the new character.
- To select a different character style, press [CLOSE], and then select the new character style.
- Press [CHECK] to check the selected characters.

→ An image of the selected characters is displayed below the symbol of the appropriate presser foot.
Example: To select "Bus"
1 Press [AB].

2 Press [B].

3 Press [abc].

4 Press [u], then [s].

→ "Bus" appears.
- A maximum of 70 characters can be combined.


SEWING STITCH PATTERNS
SEWING STITCH PATTERNS
Sewing Attractive Finishes
Note
- To achieve the best results when sewing character/decorative stitches, check the table below for the proper fabric/needle/thread combinations.
- Other factors, such as the type or thickness of the fabric being sewn or the type of stabilizer material used, also affect the stitching. Therefore, be sure to sew a few trial stitches before sewing your project.
- Since shrinkage or bunched stitches may result when satin stitches are sewn, be sure to affix stabilizer material to the fabric.
- While sewing, guide the fabric with your hands so that it will be fed straight.
Fabric
When sewing on stretch fabrics, lightweight fabrics, or fabrics with coarse weaves, attach stabilizer on the wrong side of the fabric. If you do not wish to do so, place the fabric on a thin paper such as tracing paper.
① Fabric
② Stabilizer
③ Thin paper
 Thread
#50 - #60
Needle
With lightweight, regular, or stretch fabrics: Brother ballpoint needle (golden colored)
With heavyweight fabrics: home sewing machine needle 90/14
Presser foot
Monogramming foot "N".
Using another presser foot may give inferior results.
Basic Sewing
- Select a stitch pattern.
- Attach presser foot "N".
- Place the fabric under the presser foot, pull the upper thread under the presser foot and to the side, and then lower the presser foot lever.
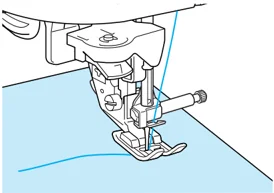
- Press the "Reverse/Reinforcement Stitch" button to sew reinforcement stitches, and then press the "Start/Stop" button to start sewing.


CAUTION
- When sewing 7 mm satin stitch patterns and the stitches are bunched, lengthen the stitch length. If you continue sewing when the stitches are bunched, the needle may bend or break (see "Adjusting the Stitch Length" on page 44).
Memo If the fabric is pulled or pushed during sewing, the pattern may not be sewn correctly. In addition, depending on the pattern, there may be movement to the left and right as well as to the front and back. Therefore, guide the fabric with your hands so that it will be fed straight.
105

SEWING STITCH PATTERNS
5 Press the “Start/Stop” button to stop the machine, and then press the “Reverse/Reinforcement Stitch” button to sew reinforcement stitches.

Memo
- When sewing character stitch patterns, the machine automatically sews reinforcement stitches at the end of the stitching, then stops (The machine is automatically set to sew reinforcement stitches at the beginning and end of each character.)

- After sewing is finished, trim any excess thread.

Note
When sewing some patterns, the needle will stop in the raised position while the fabric is fed due to the operation of the needle bar separation mechanism which is used in this machine. At such times, a clicking sound different from the sound generated during sewing will be heard. This sound is normal and is not the sign of a malfunction.
Adjusting Patterns
Depending on the type and thickness of the fabric being sewn, the sewing speed, whether or not stabilizer material is used, etc., the desired result may not be achieved. If this occurs, press [icon], and then perform the following adjustment using the same sewing conditions as those used for your project. If the pattern is still misaligned after making adjustments with [icon] selected, adjust each pattern separately.
1 Press [icon], and then press [icon] on P. 6 of the screen.

2 Attach presser foot “N”, and then sew the pattern.

3 Compare the sewn pattern with the following illustration.

106


SEWING STITCH PATTERNS
4 Press [icon of document with stitch].

If the pattern is bunched together: Press [+] in the FINE ADJUST VERTI. display. Each press of the key increases the value and lengthens the pattern.
[Diagram showing a bunched pattern transforming into a stretched one]
If the pattern is stretched: Press [-] in the FINE ADJUST VERTI. display. Each press of the key decreases the value and shortens the pattern.
[Diagram showing a stretched pattern transforming into a bunched one]
If the pattern is skewed to the left: Press [+] in the FINE ADJUST HORIZ. display. Each press of the key increases the value and moves the pattern to the right.
[Diagram showing a left-skewed pattern transforming into a centered one]
If the pattern is skewed to the right: Press [-] in the FINE ADJUST HORIZ. display. Each press of the key decreases the value and moves the pattern to the left.
[Diagram showing a right-skewed pattern transforming into a centered one]
5 Sew the pattern again. If the pattern still is not sewn correctly, adjust it again. Continue making adjustments until the pattern is sewn correctly.
Memo You can sew with the settings screen on the display.
6 After the pattern is sewn correctly, quit making adjustments. Press CLOSE to return to the previous screen.
Note The adjustment made will remain until changed again.
ABC 4 Character/Decorative Stitches
107


EDITING STITCH PATTERNS
EDITING STITCH PATTERNS
Using the editing functions, you can change the patterns in a variety of ways, such as resizing them or flipping them to create a mirror image.
Memo Depending on the pattern that is selected, some editing functions may not be available.

■ Key Functions

Changing the Pattern Size
After selecting a stitch pattern, press [L S] until the desired size is selected.

Memo
- Stitch patterns entered after the pattern size was changed are added at the selected size until it is changed again.
- You cannot change the size of stitch patterns once they have been combined.
Actual size
L
A A A
S
A A A
Creating a Vertical Mirror Image
After selecting a stitch pattern, press [icon] to flip the pattern vertically.
Changing the Pattern Length
(7 mm Satin Stitch Patterns Only)
If 7 mm satin stitch patterns are selected, the pattern length can be changed without changing the zigzag width or stitch length. After selecting a stitch pattern, press [D 3] to select one of the five settings available.

Creating a Horizontal Mirror Image
After selecting a stitch pattern, press [icon] to flip the pattern horizontally.

4 Character/Decorative Stitches
109


EDITING STITCH PATTERNS
Selecting a Single/Repeating Pattern
Press [icon: star pattern] to select whether the pattern is sewn repeatedly or once.
 [Display showing stitch patterns and button icons]
DELETE MEMORY
[Icon: repeating star pattern] [Icon: single star pattern]
Memo
If you press [icon: star pattern] while sewing, the key changes to [icon: single star pattern] and the machine will sew one copy of the pattern, then automatically stop.
Changing the Thread Density (Satin Stitch Patterns Only)
After selecting a stitch pattern, press [icon: density lines] until the desired stitching density is selected.
 [Display showing stitch patterns and button icons]
L S DELETE MEMORY
[Icon: thin density lines] [Icon: thick density lines]
CAUTION
- If the stitches bunch when thread density is changed to [icon: thick density lines], return the thread density to [icon: thin density lines]. If you continue sewing when the stitches are bunched, the needle may bend or break.
Memo
- Stitch patterns entered after the stitching density was changed are added at the selected density until it is changed again.
- You cannot change the stitching density of stitch patterns once they have been combined.
110


EDITING STITCH PATTERNS
Returning to the Beginning of the Pattern
When sewing character/decorative stitches, you can return to the beginning of the pattern after trial sewing or when the stitching is sewn incorrectly.
Memo This function is not available for quilting stitches and utility stitches.
1 Press the “Start/Stop” button to stop the machine, and then press [icon].

→ Sewing returns to the beginning of the selected pattern (“W”) from the point where sewing was stopped.
Memo If this key is pressed when sewing is stopped, patterns can be added at the end of a combined stitch pattern. (In this example, “!” is added.)

2 Press the “Start/Stop” button to continue sewing.
4 Character/Decorative Stitches
111


COMBINING STITCH PATTERNS
COMBINING STITCH PATTERNS
You can combine many varieties of stitch patterns, such as character stitches, cross stitches, satin stitches, or stitches you design with MY CUSTOM STITCH function (see chapter 7 for information about MY CUSTOM STITCH). You can also combine stitch patterns of different sizes, mirror image stitch patterns, and others.
Before Combining Patterns
Note
- When stitch patterns are combined, the machine is automatically set to sew the pattern once. To repeatedly sew the combined stitch patterns, combine the patterns, and then press [icon] so that it appears as [icon].
- You cannot change settings (such as the size and orientation) for stitch patterns once they have been combined. To resize or reorient the patterns, specify the settings for each pattern as it is added to the combination.
- Stitch patterns displayed on the LCD screen are for your reference. Sewing result and proportion may differ from the stitch pattern on the LCD screen. Please sew a trial on a piece of fabric before stitching on your project.
Combining Patterns from Different Categories
Example:
1 Press [icon].
2 Press [icon].
3 Press CLOSE.
→ The screen of pattern categories appears.
112


COMBINING STITCH PATTERNS
4 Press [icon: decorative stitch].

5 Press [icon: 8-07 feather stitch].

6 To repeatedly sew the pattern combination, press [icon: repeat] so that it appears as [icon: repeat active].

Memo
- Press DELETE to erase the last pattern entered. Patterns are erased one at a time.
- If the entire combined pattern cannot be displayed, press CHECK to view an image of the pattern. Press CLOSE to return to the previous screen.

→ The image of the pattern appears.

113


COMBINING STITCH PATTERNS
Combining Stitch Patterns of Different Sizes
Example:
1 Press [icon].
2 Press [icon].
→ The larger size pattern appears.
3 Press [icon] again, and then press [icon] so that it appears as [icon].
→ The second pattern is displayed in the smaller size.
4 To repeatedly sew the pattern combination, press [icon] so that it appears as [icon].

→ The combination appears as a repeating pattern.
114


COMBINING STITCH PATTERNS
Combining Stitch Patterns of Different Orientations
Example:
1 Press [icon].

2 Press [icon].
3 Press [icon] again, and then press [icon] so that it appears as [icon].

→ The second pattern is flipped horizontally.
4 To repeatedly sew the pattern combination, press [icon] so that it appears as [icon].

→ The combination appears as a repeating pattern.
4 Character/Decorative Stitches
115
COMBINING STITCH PATTERNS
Combining Stitch Patterns of Different Lengths
1 Press [icon].
2 Press [icon], and then press [icon] once so that it appears as [icon].
→ The pattern is displayed with a length of 4.
3 Press [icon] again, and then press [icon] three times so that it appears as [icon].

→ The second pattern is displayed with a length of 2.
4 To repeatedly sew the pattern combination, press [icon] so that it appears as [icon].

→ The combination appears as a repeating pattern.

Creating Step Patterns (7 mm Satin Stitch Patterns Only)
Stitch patterns that are shifted to create a step-shaped pattern are called step patterns.
Step patterns can be created by using [icon] and [icon] to shift 7 mm satin stitch patterns.
Press [icon] once to move the stitch pattern to the left by half the width of the stitch pattern.
Press [icon] once to move the stitch pattern to the right by half the width of the stitch pattern.

Example:

1 Press [icon].

2 Press [icon], and then press [icon].
→ The next pattern is moved to the right.
3 Press [icon] again, and then press [icon].
4 Press [icon] so that it appears as [icon].
→ The combination appears as a repeating pattern.
117

COMBINING STITCH PATTERNS
■ Examples of Pattern Combinations

118
USING THE MEMORY FUNCTION
Stitch Data Precautions
Observe the following precautions when using stitch data other than that created and saved in this machine.
■ Types of Stitch Data That Can Be Used
- Only .pmu stitch data files can be used with this machine. Using data other than that created using this machine may cause the machine to malfunction.
■ Computers and Operating Systems with the Following Specifications Can Be Used
- Compatible models: IBM PC with a USB port as standard equipment IBM PC-compatible computer equipped with a USB port as standard equipment
- Compatible operating systems: Microsoft Windows 98SE/Me/2000/XP (Windows 98SE requires a driver. Download the driver from our Web site (www.brother.com). In addition, only Windows 98 Second Edition can use the driver.)
■ Precautions on Using the Computer to Create and Save Data
- If the file name of stitch data cannot be identified, for example, because the name contains special characters or symbols, the file is not displayed. If this occurs, change the name of the file. It is recommended to use the upper and lower case letters, the numbers 0 through 9, the dash “-”, and the underline “_”. Do not use comma “,” period “.” in the file name.
- Do not create folders in “Removable Disk” on a computer. If stitch data is stored in a folder, that stitch data cannot be displayed by the machine.
■ Trademarks
- IBM is a registered trademark or a trademark of International Business Machines Corporation.
- Microsoft and Windows are registered trademarks or trademarks of Microsoft Corporation.
Each company whose software title is mentioned in this manual has a software license agreement specific to its proprietary programs. All other brands and product names mentioned in this manual are registered trademarks of their respective companies. However, the explanations for markings such as ® and ™ are not clearly described within the text.
Saving Stitch Patterns in the Machine’s Memory
You can save often-used stitch patterns in the machine’s memory. The machine's memory can hold up to a maximum of 24 stitch patterns, 70 entries per stitch pattern, or 224 KB.
Note Do not turn off the machine while the “Saving” screen is displayed, otherwise you may lose the stitch pattern that you are saving.
Memo
- It takes a few seconds to save a stitch pattern in the machine’s memory.
- See page 122 for information on retrieving a saved stitch pattern.
1 Press [MEMORY].

4 Character/Decorative Stitches
119
USING THE MEMORY FUNCTION
2 Press [icon of save button].
- Press
CLOSEto return to the previous screen without saving the stitch pattern.

\rightarrow The "Saving" screen appears. When the pattern is saved, the previous screen appears automatically.
If the Memory Is Full
If this screen appears while you are trying to save a pattern on the machine's memory, the memory is too full to hold the currently selected stitch pattern. To save the stitch pattern in the machine's memory, you have to delete a previously saved stitch pattern.
1 Press DELETE to continue.
- Press
CANCELto return to the previous screen without saving the stitch pattern.

2 Select a stitch pattern to be deleted.
- Press [icon of down arrow] to display the next page.
- Only the first entry of each stitch pattern is displayed in the memory. Press
CHECKto view the entire stitch pattern. - Press
CLOSEif you do not want to delete the stitch pattern.

① Saved stitch patterns
3 Press DELETE.

\rightarrow A confirmation message appears.
120
USING THE MEMORY FUNCTION
4 Press OK.
- If you decide not to delete the stitch pattern, press CANCEL.

\rightarrow The old stitch pattern is deleted, and the new stitch pattern is automatically saved.
Saving Stitch Patterns to the Computer
Using the included USB cable, connect the sewing machine to your computer so that stitch patterns can be retrieved from and saved to your computer.
Note Do not turn off the machine while the "Saving" screen is displayed, otherwise you may lose the stitch pattern that you are saving.
1 Plug the USB cable connectors into the corresponding USB ports on the computer and on the machine.
- The USB cable can be plugged into the USB ports on the computer and machine whether or not they are turned on.

① USB port ② USB cable connector
\rightarrow The "Removable Disk" icon appears in "My Computer" on the computer.
Note
- The connectors on the USB cable can only be inserted into a port in one direction. If it is difficult to insert the connector, do not insert it with force, and then check the orientation of the connector.
- For details on the position of the USB port on the computer, refer to the instruction manual for the corresponding equipment/computer.
2 Press MEMORY.

4 Character/Decorative Stitches
121


USING THE MEMORY FUNCTION
3 Press [icon].
\rightarrow Press CLOSE to return to the previous screen without saving the stitch pattern.

\rightarrow The stitch pattern is temporarily saved to “Removable Disk” under “My Computer”.
4 Select the stitch pattern’s .pmu file in “Removable Disk”, and copy the file to the computer.

Note
- Do not turn off the machine while the “Saving” screen is displayed, otherwise you may lose the data.
- Since the files are only temporarily saved on “Removable Disk”, turning off the machine will erase the files. Be sure to copy the necessary files onto the hard disk of the computer.
Retrieving Stitch Patterns from the Machine’s Memory
1 Press [icon].

\rightarrow The pocket selection screen appears.
2 Select a stitch pattern to be retrieved.
- Press [icon] to display the next page.
- Press CHECK to view the entire stitch pattern.
- Press CLOSE to return to the previous screen without retrieving the stitch pattern.

① Saved stitch patterns
122

USING THE MEMORY FUNCTION
3 Press RETRIEVE.
- Press
DELETEto delete the stitch pattern.

→ The selected stitch pattern is retrieved and the sewing screen appears.
Retrieving Stitch Patterns from the Computer
1 Plug the USB cable connectors into the corresponding USB ports on the computer and on the machine (see page 121).
2 On the computer, open “My Computer”, and then go to “Removable Disk”.

3 Move/copy the pattern data to “Removable Disk”.

Memo A maximum of 24 stitch patterns or 476 KB can be moved or copied to “Removable Disk”.
→ Stitch pattern data in “Removable Disk” is written to the machine.
Note
- While data is being written, do not disconnect the USB cable.
- Do not create folders within “Removable Disk”. Since folders are not displayed, stitch pattern data within folders cannot be retrieved.
4 Press [icon].

→ The stitch patterns in the computer are displayed in the selection screen.
4 Character/Decorative Stitches 123
USING THE MEMORY FUNCTION
5 Select a stitch pattern to be retrieved.
- Press
CHECKto view the entire stitch pattern. - Press
CLOSEto return to the previous screen without retrieving the stitch pattern.

① Saved stitch patterns
6 Press RETRIEVE.
- Press
DELETEto delete the stitch pattern.

→ The selected stitch pattern is retrieved and the sewing screen appears.
CAUTION
- When disconnecting the USB cable: Before disconnecting the USB cable, click the “Unplug or Eject Hardware” icon in the taskbar of Windows® Me/2000 or the “Safely Remove Hardware” icon in the taskbar of Windows® XP. Then, when the removable disk has been removed safely, disconnect the USB cable from the computer and the machine.
With Windows 98 SE, check that the Access lamp is not flashing before disconnecting the USB cable from the computer and the machine.
Note
- Be sure to perform the operation described above before disconnecting the USB cable from the computer and the machine, otherwise the computer may malfunction, the data may not be written correctly, or the data or data writing area on the machine may be damaged.
- The pattern retrieved from the computer is only temporarily written to the machine. It is erased from the machine when the machine is turned off. If you wish to keep the pattern, store it in the machine (see “Saving Stitch Patterns in the Machine’s Memory” on page 119).


